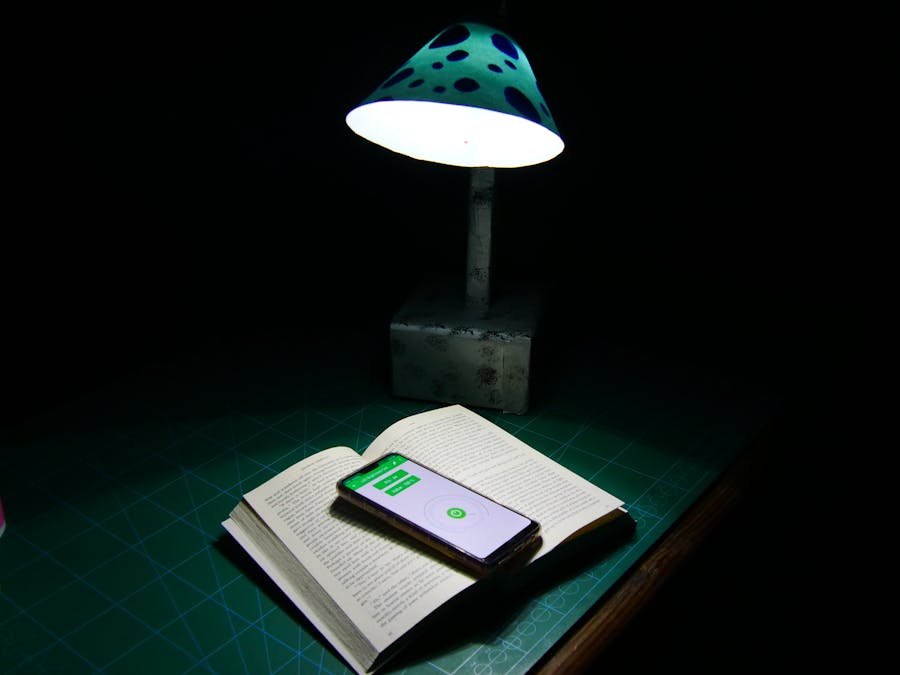
Imperfect lighting conditions can be bothersome especially when you’re working on an important project, or studying, or reading your favourite book. By affecting your vision and mood, they also affect your progress. But times are going to change my friend! The DIY Dabble controlled LED lamp is here at your service. With some power LEDs, chart paper, DIYing, and evive, you can make your own lamp whose brightness can be controlled using Dabble, a project-making mobile application developed by us. You can download it from here.
Get ready to say goodbye to lamps that don’t listen to you and say hi to the ones that do!
Step 1: Things You'll Need:Hardware:
- Bluetooth Module HC05
- Power LED
- Thick Cardboard
- Paint
- Hot Glue Gun
- Jumper Cables
Software and Applications:
- Arduino IDE
We need to make the base upon which we will be installing our lamp assembly and also this base will be used to keep evive.
We will be making the base using thick cardboard whose size will be same as evive.
Once you cut the base, fold it and make one of the side it's opening so that we can quickly put in or take the evive out.
Color the base.
The column is one of the essential parts of the lamp as, upon it, we will be mounting our assembly of a lampshade and LED.
Take a piece of cardboard and cut it as long as you want your lamp to be. Also, the hollow column will help you to pass the wires through it.
Fold the cardboard and glue the ends using Hot Glue.
Finally, color the column.
Normally, bulbs are used in the lamp shades which we buy from the market. But the lamp that we are making works on LEDs.
The LED that we are using is the Power LED.
To install the LEDs in lamp we will use the cardboard.
Take the cutout of the shape of the circle. And make holes of the size of the wires.
Glue LEDs on the top in passing the wires through the hole. Finally, color the circle.
We will be making the Lamp Shade with the help of a color chart paper. Take any color you want.
Take the cutout, fold the shape and glue the ends.
Finally, fit the cardboard with LEDs into the shade.
Step 6: Complete AssemblyMake a hole in the base and to pass the wire from. Fix the column onto the base using Glue Gun.
Make a small hollow cylinder to be fixed horizontally on the column onto which we will be placing our lamp shade.
Fix the lamp shape of the horizontal column and on the same on the column.
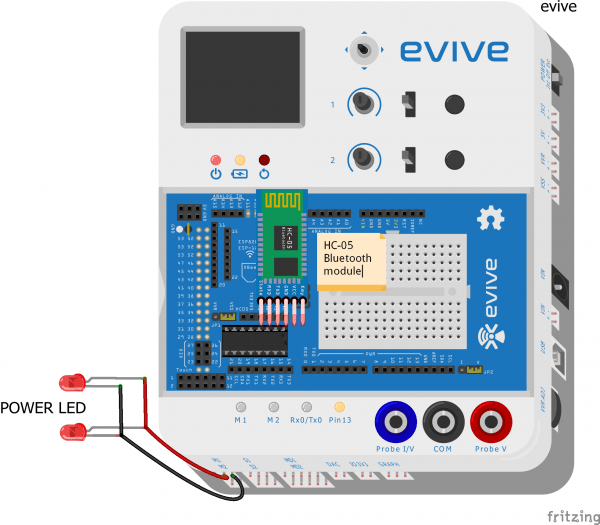
Make the connections as shown in the above figure.
The Power LEDs need 12V of supply so to provide that we will be connecting evive to the external source and the LEDs to the Motor Channel.
Also to make both the LEDs glow together, connect them in parallel.
Upload the following code to evive to control the brightness of your Lamp using your Smartphone.
Step 9: WorkingAs you know, we will be controlling the lamp with the help of the Smartphone. First, you need to install Dabble which will let you control it. Once you download it, open the app.
Secondly, connect the Bluetooth Module.
Once you have connected the Bluetooth, from the menu that appears on the screen, choose LED Brightness Control.
As we have connected the LEDs on the motor channel, choose pin number 44.
Now you can control the brightness both by the nob as well as by entering the percentage in the value box.
Step 10: ConclusionWith this, your DIY Dabble controlled LED lamp is all set to perfectly light up your life!


_wzec989qrF.jpg?auto=compress%2Cformat&w=48&h=48&fit=fill&bg=ffffff)


Comments
Please log in or sign up to comment.