Have your photos clicked and posted not by a friend or family but by an easy and fun to build assembly comprising of a few relays, an ultrasonic distance sensor, and your good ol’ friend evive - the coolest all-in-one prototyping platform you’ll ever come across! But how to make it do what you want it to? Simple! By writing code for the same in PictoBlox, the fun way to learn to code!
Download PictoBlox from HERE!
So, are you ready? Let’s begin right away!
Step 1: Components RequiredHardware
- Relays
- Ultrasonic Sensor
- Ultrasonic Sensor Holder
- Jumper Cables
Software
Step 2: Generating the TouchWe will be using the assembly of coin and relay to generate the touch.
As we know that the relays work as switches. We are going to need three relays.
Once you have all the three relays, connect the GND of all the relays together.
We need coins to attach them on our screen of the Smartphone, where we need to attach the coin to the screen.
Take the coin and attach the Jumper Cable using soldering as shown in the figure. You can also decorate it if you want.
Connect these coins to their respective relays as shown in the figure.
We are going to use the ultrasonic sensor for triggering the entire event.
Take the Ultrasonic Holder and the Ultrasonic sensor.
Fix the Ultrasonic Sensor to the Ultrasonic Holder using screws.
Step 4: Completing the AssemblyStick the coins onto the screen using Double-sided tape. And arrange the ultrasonic sensor where you need to detect the motion.
Step 5: WorkingThe coins that are fixed on the screen are used to generate the touch on your Smartphone. The logic behind the touch screen is that, once you touch the screen the charge from your body are transferred and then complete the circuits. Here we have used coins attached to the relays to complete the circuit.
The ultrasonic sensor is used to trigger the entire event. We have placed the coins where we need the touch to be generated.
1. For opening the camera 2. For Capturing the photo3. For Posting the photo on Instagram
Thus as soon as the signal is sent via ultrasonic, the process of capturing the photo and posting it on Instagram starts. The relay connected to the particular touch will be set High completing the circuit, thus generating the touch.
You can use this method to do more, than just photos on Instagram. You can play games applying similar logic.
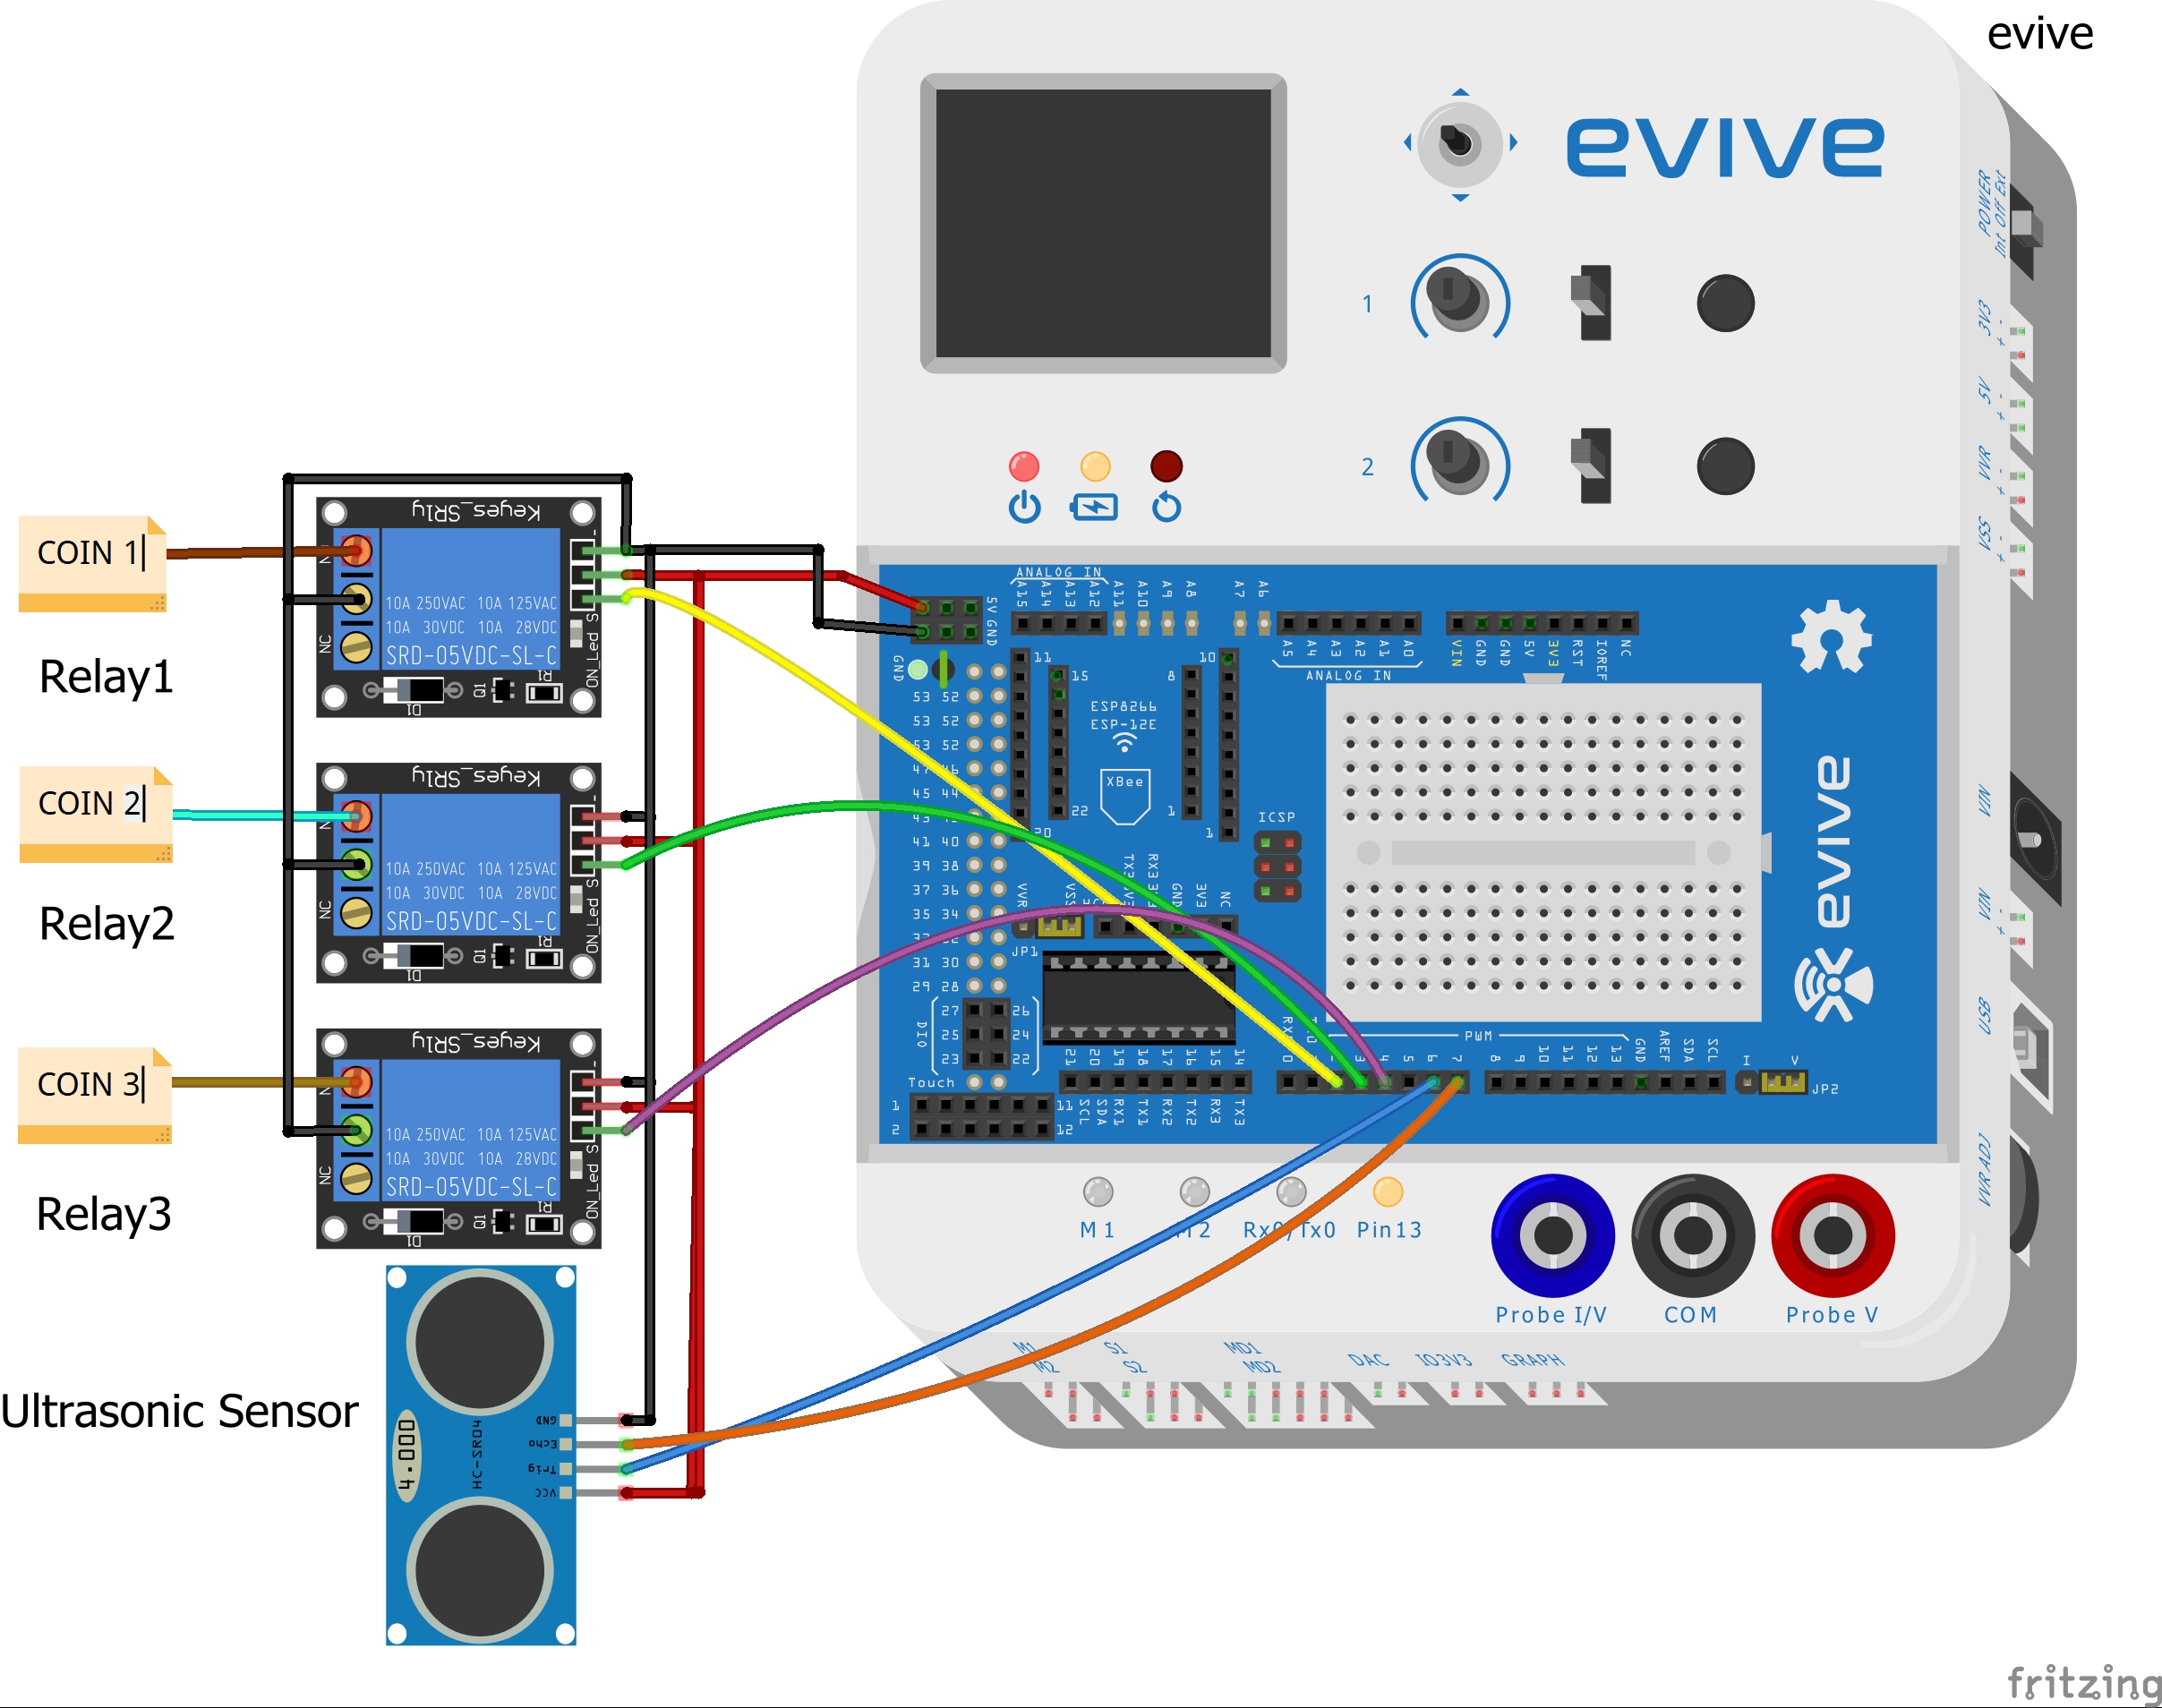
Step 6: Making the Connection With EviveMake the connection as given below:
- Firstly connect the jumper cables attached to the coin to the Normally Open pin of the relay.
- Make the GND pin of all the relays common and attach it to GND pin of evive.
- Connect the VCC pin of all the relays to +5V pin of evive.
- Connect the signal pin as:
- Relay 1 - Digital pin 2
- Relay 2 - Digital pin 3
- Relay 3 - Digital pin 4
Connecting the pins of the ultrasonic sensor:
- GND - GND
- VCC - +5V
- Trigger - Digital pin 6
- Echo - Digital Pin 7
Connect it as given in the below figure:
Write the script as shown below and upload it to evive:
With this, the assembly is all set to click photos for you and upload them to Instagram!
PS. Did you know that we’ve raised more than 150% of our fixed campaign goal? Isn’t it cool?! If you haven’t checked out our campaign yet then you better hurry because less than two weeks remain! Visit HERE to have a look and show some love! ;)


_wzec989qrF.jpg?auto=compress%2Cformat&w=48&h=48&fit=fill&bg=ffffff)


Comments
Please log in or sign up to comment.