


Hardware components | ||||||
 |
| × | 1 | |||
 |
| × | 1 | |||
 |
| × | 1 | |||
 |
| × | 1 | |||
Software apps and online services | ||||||
| ||||||
 |
| |||||
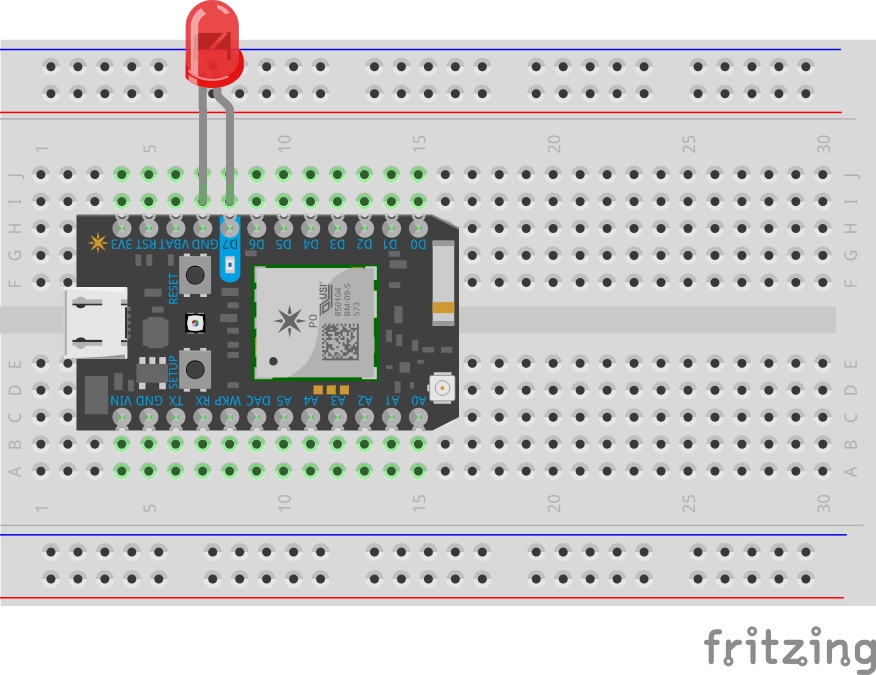
Connect Particle Photon with USB and place it on a breadboard. Take an LED and connect its cathode leg (smaller leg) to the ground and its anode leg (longer leg) to D7.
To connect Particle Photon with IFTT go here and press on "Connect Channel", and then in the popup window enter your Particle username and password.
Creating Recipe in IFTTT- Go to IFTTT and Sign Up/ Sign In on the website.
- Click on the "My Recipes" available on the header section of the website.
- Click on the “Create a Recipe”.
- Move your cursor over the “this” link and click on it.
Step 1: In the following step you need to select the social channel you wish to connect to Photon. For this project we have used Twitter, you can use anyone you want (Facebook, Mail). So, search for the Twitter and select it.
Step 2: In next step choose what trigger you wish to select so that the Photon Particle switches on the LED. Here we’ll select “New Mention of You” a trigger that fires every time you are @mentioned in a tweet.
Note: Remember, if you are connecting for the first time to any of social channel then you need to agree to terms and conditions.
Step 3: Click on the “Create Trigger” Button.
Now click on “That” link.
Step 4: In the “Choose Action Channel”, search for Particle and select it.
Step 5: Now click on “Publish an Event” in Choose an Action, Step 5 of 7.
Step 6: In this step “Complete Action Fields” for the section “Then Publish Event” Change it to simply “Button”, leave the “The event includes(Data)” as it is, and be sure to change the “Is this the Public or Private Event” to "Public" from the drop down. Click on “Create Action” then.
Step 7: In the “Create and Connect” Step simply click on “Create Recipe”.
So now, Creation of Recipe is all done and now we'll upload the code.
Uploading the CodeStep 1: Go to Particle IDE, and create a new project. To create a new project:
Step 2: Click on the code button (the <> icon) in the lower left.
Step 3: Click on "Create New App".
Step 4: Type in any name you want for your app, and hit enter.
Step 5: Now click in the code window on the right, select all the existing code the IDE added, delete it, and then paste in the new code.
After you've added all the code, press the Flash button (lightning bolt icon) in the upper left. Wait a few seconds, and you should see the light on your Photon flash magenta, and then the Photon will reboot. Now if it connects to the internet correctly (green flash, and then cyan breathing), and doesn't show any errors (eg. blinking a red SOS), you're all ready to go!
You are all set with the Project, and now ask someone to tweet to you, else tweet yourself with your username.


Comments
Please log in or sign up to comment.