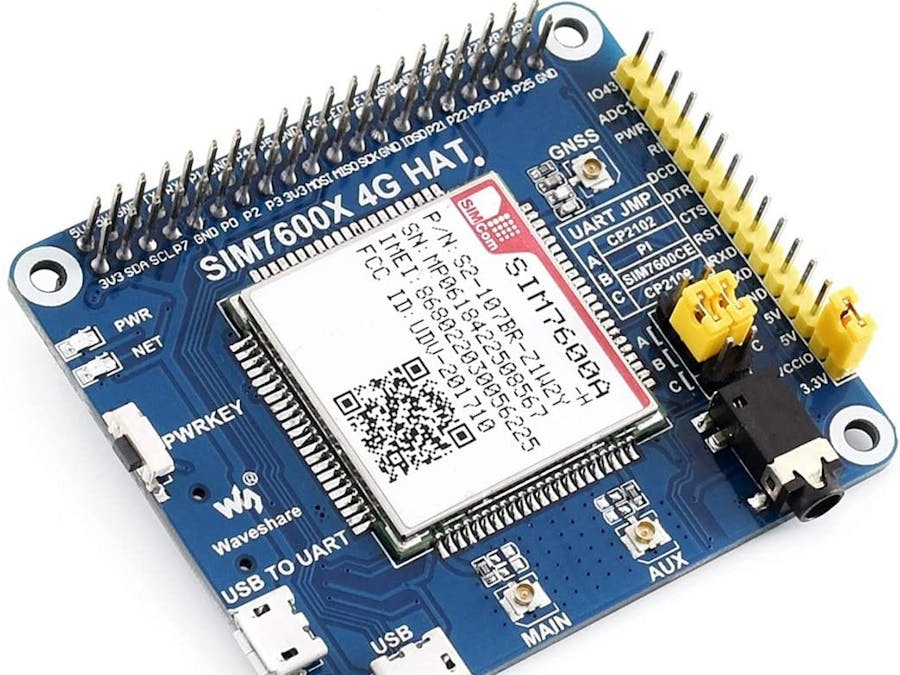
The SIM7600A 4G HAT is a 4G communication and GNSS positioning module, which supports LTE CAT4 up to 150Mbps for downlink data transfer. It is pretty low power consumption and can be attached to a Raspberry Pi to empower connectivity for IoT applications.
You can also connect this 4G module with a computer to browse the Internet. It has functionality for sending SMS, global positioning, and high-speed internet connections via 4G.
SIM7600-A Raspberry Pi 4G Hat SetupPrerequisites- A Telnyx Portal account and active Telnyx SIM card with data plan. Check out this Quickstart Guide to get set up.
- Raspberry Pi 3 Model B or Raspberry Pi 4 (this guide will use 4 but the steps are the same).
- Internet connection for initial setup and configuration.
Alright, let's get started!
PreparationFirst, we are going to start by updating the Raspberry Pi so let's run these commands:
sudo apt update -ysudo apt dist-upgrade -ysudo rpi-update- You may see a prompt like this. Press
Yand pressenter:
Once all of the steps are complete, reboot your Pi using sudo reboot command.
With the updates out of the way, let's start on installing prerequisite software and libraries: libqmi-utils and udhcpc are first up. Install them by running this command: sudo apt install libqmi-utils && udhcpc
libqmi-utils installs libraries that allow you to interact with Qualcomm-based modems. SIM7600 comes with a Qualcomm MDM9607 chipset. udhcpc is used for modem DHCP leasing. The cellular network gives a unique IP to the HAT and the Pi will have its own IP. This is used to solve IP addressing conflicts between the Pi and the HAT.
Now we will enable UART to communicate with the device. To do that, run this command and then follow the prompts as shown:
sudo raspi-config- Choose Interfacing Options (5):
- Choose P6 Serial:
- Press No to the prompt below then Reboot.
Next, we're going to configure the SIM7600A module. To turn on the module we will be using the qmicli commands which are used to control Qualcomm devices. This command will activate the device: sudo qmicli -d /dev/cdc-wdm0 --dms-set-operating-mode='online'
Now let's verify that the module is online. These are sample commands you can send to the device:
qmicli -d /dev/cdc-wdm0 --dms-get-operating-mode- Response: Online or Offline
qmicli -d /dev/cdc-wdm0 --nas-get-signal-strength- Response: Signal strength and signal quality values
qmicli -d /dev/cdc-wdm0 --nas-get-home-network- Response: Carrier name or carrier PLMN
You should now see a WWAN0 interface in net-stats (ifconfig). Unless specified by user, WWAN0 is the default interface this device uses.
We're now going to configure the module to use raw-ip protocol with the following commands:
sudo ip link set wwan0 downecho 'Y' | sudo tee /sys/class/net/wwan0/qmi/raw_ipsudo ip link set wwan0 up
And connecting to a mobile network:
sudo qmicli -p -d /dev/cdc-wdm0 --device-open-net='net-raw-ip|net-no-qosheader' --wds-start-network="apn='YOUR_APN',username='YOUR_USERNAME',password='YOUR_PASSWORD',ip-type=4" --client-no-release-cidPlease replace the username and password field with the username/password that you use for your Pi.
Finally, let's set the default route and IP using udhcpc: sudo udhcpc -i wwan0 And tell the udhcpc library to receive a DHCP lease from the network using WWAN0: ip a s wwan0
You are connected to the Internet! Open up your web browser and browse away!
Tiger Koo
 Christie Wragg


Comments
Please log in or sign up to comment.