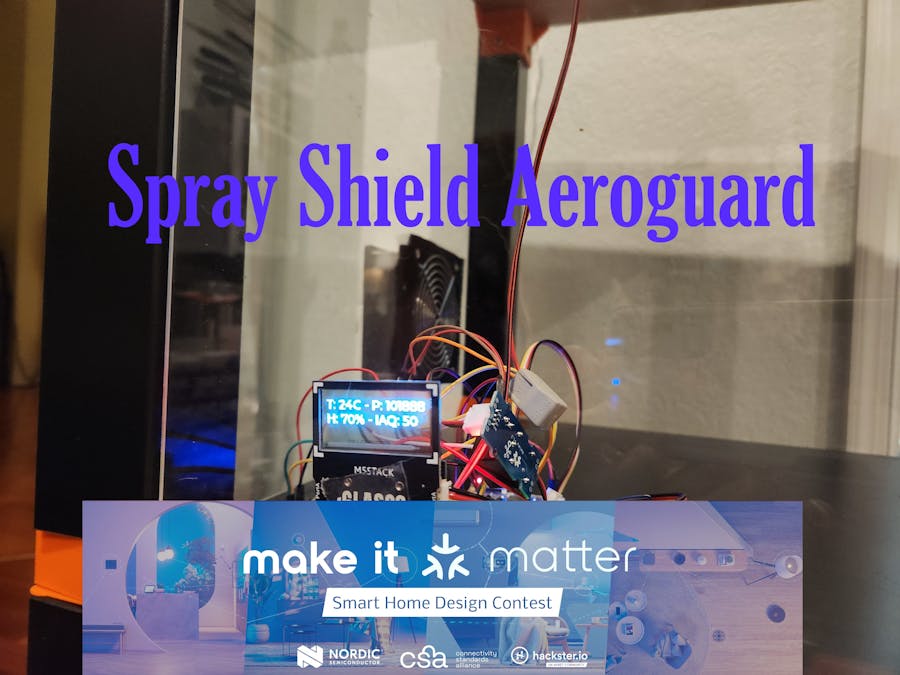
The Spray Shield Aeroguard is a device that aims to protect cohabitants from harmful VOCs released during spray activities. The device aims to act as the cleaner for the environment where the spray event occurs.
BackgroundThis project aims to act as my entry for the Nordic Semiconductor "Make it Matter!" contest. The theme of the contest is:
Explore opportunities where navigation, mobility, and communication can be made more efficient or provide assistance to the elderly, disabled, or children. By leveraging your skills and expertise in engineering, we can collectively innovate solutions that increase quality of life in our homes and enhance overall well-being.
Having used an enclosure and air filtration system previously for my 3D printer albeit not a smart one based on a VOC reading I knew I had the capability to make a cool device that could then utilize air filtration in some way. Given my family is comprised of makers (my wife is an artist) I knew a device like this would also come in handy and as such would prove to be a source of inspiration as I could utilize it for my own needs. This idea resonates well with me for the contest as I feel it utilizes Matter in a way to create a self contained device with tangible benefits for family.
IdeaThe device behind this project is effectively a self-locking VOC-detecting filtrating smart enclosure.
Usage scenario:
The device monitors air quality levels using an air quality monitor. The device itself is an enclosure to keep the fumes internal that relies on negative pressure from the fan to keep the fumes from otherwise leaking out. The fan is connected with a filter to filter the air.
For the matter integration of this project I opted to have one endpoint for the door lock. I originally intended to surface others but ran into some issues with the Zap tool and compatibility of the generated code. I've provided a lock endpoint to allow an end user to override the state of the auto lock to be able to remove the item if they needed to or otherwise make further changes. In addition with the lock endpoint I detect if fumes are present and from that use automation to trigger an indicator light.
One VOC levels have returned to normal the fan is disabled and the lock is disengaged. The presence of the fan being in the enabled state is an indicator of VOCs as Matter does not currently provide a device specific to concentration of particles to otherwise use to represent this.
Note: Matter 1.2 now includes an air quality monitor sensor so in the future this can be further improved to give real-time state information.
Utilization of Matter(endpoints):
- Root node
- Door lock endpoint (used for solenoid and as an indicator that the device is actively removing fumes)
Project components:
- nRF7002 DK firmware: This involves Matter provisioning and device setup, sensor setup, logic to take readings and update accordingly, and firmware logic for handling state
- Enclosure: acrylic panels, 3D printed connector pieces
- DFRobot Inclined Electromagnetic Lock
- Grove relay unit for triggering electromagnetic lock
- Level shifter
- Adafruit BME680
- M5Stack Glass display
- 12V Fan with PWM control
To build the Spray Shield Aeroguard the first step is to build a Prusa mk3s enclosure following the guide from Prusa. Given this is something many members of the community have done in building their units it makes it easy to find the associated cut acrylic for use. Amazon sells bundles of them if you search for "Prusa v1 lack enclosure acrylic" and buy one of the resulting sets.
After getting the acrylic pieces together to build the enclosure you will also need to get access to a 3D printer and print the associated connection elements as listed on the Prusa guide. You do not need any of the spool or printer specific related pieces just those associated with the enclosure itself. I found it took a few days to get all of the pieces printed out as there are a few and they are rather large so be prepared for a significant amount of printing effort.
In addition I printed out my lock components which I've used to attach the DFRobot solenoid lock to my enclosure. These can be affixed with 3MM screws and then use superglue to stick it to the top of the door. Long wires can be used such that the wiring can properly be positioned around the enclosure (in my case I've used shorter wires but this option allows for a neater setup).
Once those components are in place the only other element is to drill out holes for the fan. You will need a decent sized center hole for the fan air to pass through along with four holes matching the screws. With these in place you can sandwich together the filter with along with the fan as shown in my video to allow a tight fit that has a fan pull capability to draw air out and pass it through for filtration.
I've also setup an additional light to act as an indicator for my family to let them know whether or not the room is safe. I did this using automations to trigger the light to different colors based on the state of the lock.
One important thing to keep in mind is the BSEC library is used for this project. As such your local west install will need to have a few commands run against it to make this library available. They are detailed on the associated BME68X help article provided by NRF.
You'll need to grab the repository code but once you have it you can setup a build in visual studio by selecting the associated device tree.
With it built now it can be deployed to the NRF7002DK device easily from visual studio.
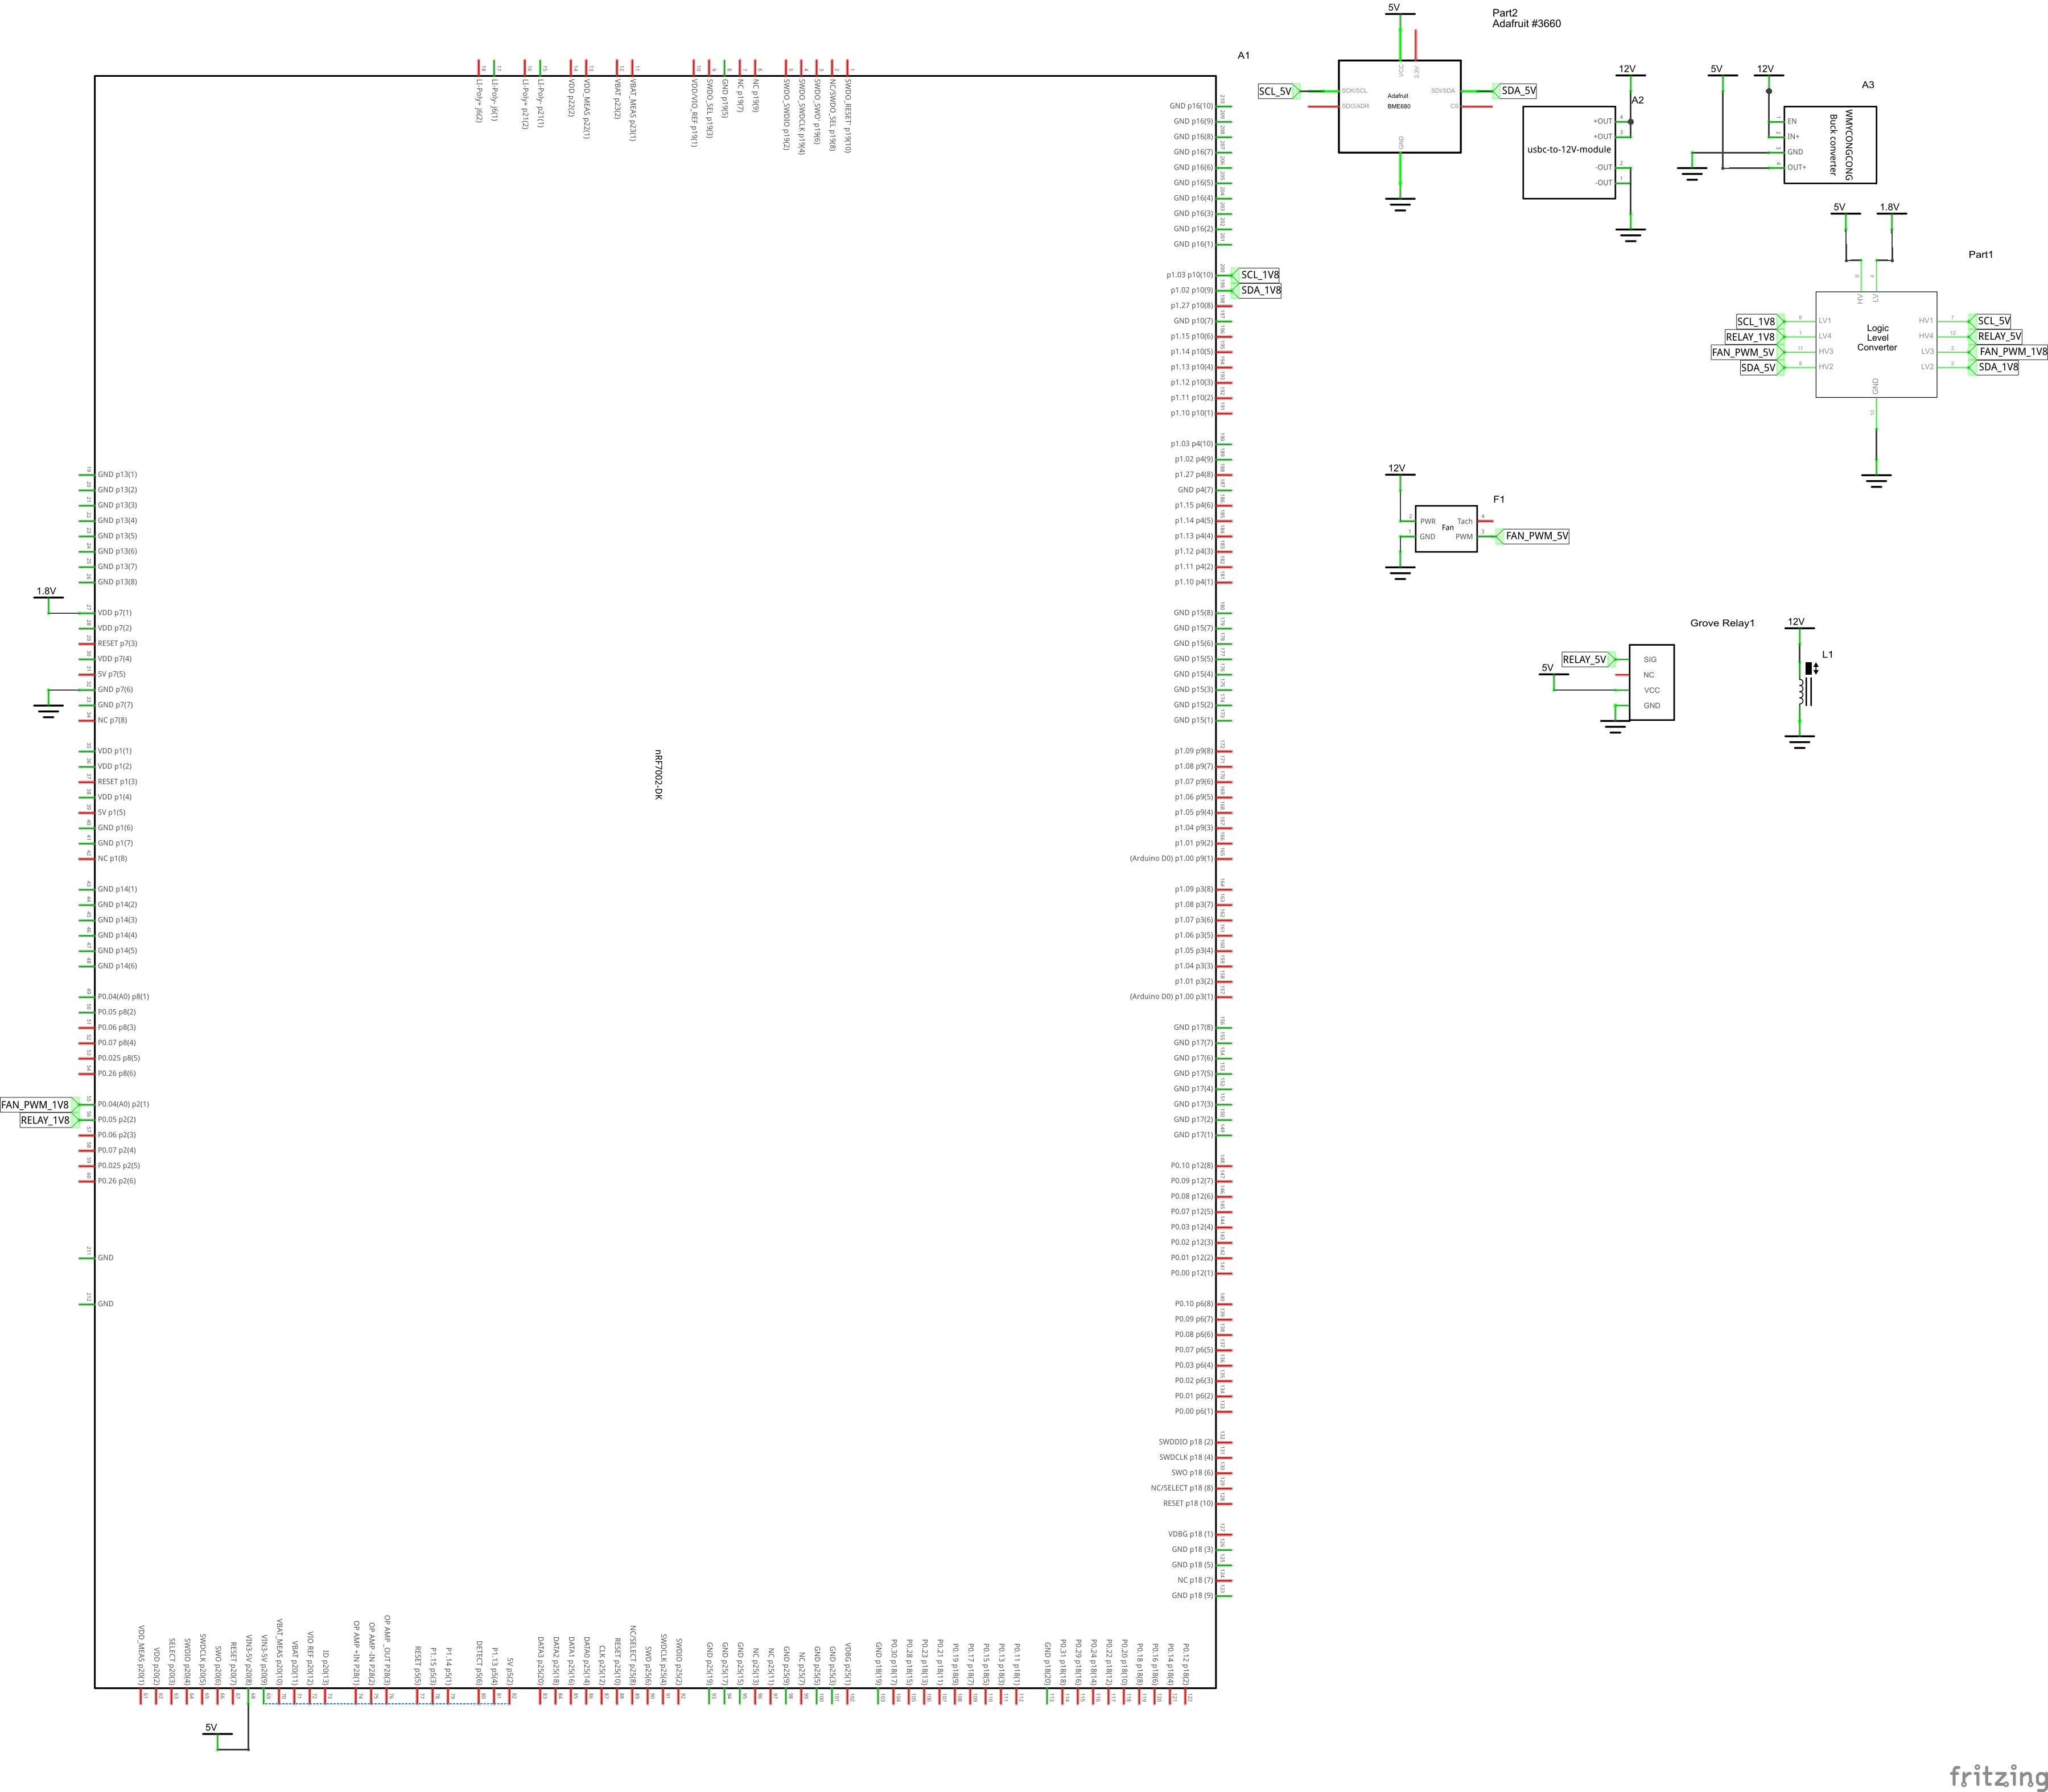
Hardware SetupAs you can see in the photos the setup for this project involved setting up several wires between a level shifter and my intended targets. First I needed to take my 12V input and bring it down to 5V for use with my board as the source of the power. I connected the NRF7002DK's VIN via this 5V and attached GND as well. At this time I also associated my I2C bus with 5V, GND, and attached two wires to the output side of the level shifter. On the associated input side I attached the P1.03 for SCL, P1.02 for SDA such that my board could handle the M5Stack Glass2 display and BME680 sensor data over I2C.
Next I attached my VDD to the level shifter and attached a wire from P0.04 and P0.05 for the fan and relay respectfully to the level shifter to finish up the wires I needed. I needed the level shifter for all of these signals as the board needs to run at 1V8 and I need much more voltage to fully enable my relay and handle the fan's PWM (it uses 5V there).
Using the DeviceSee the device in action by visiting my youtube channel to see the video of it via my playlist here: https://www.youtube.com/playlist?list=PLmOy82pCgLFlPhWEGA168y9AWgti5ws0I
As soon as the BME680 detects gases the lock and fan are activated which allow the device to self clean. The device can also be overrode from the Matter menu allowing it to be accessed even if the device is already in lockdown. I was able to use my phone in the associated video to associate my NRF7002DK with my Alexa account, set it up for triggering alert light colors on gas detection / lockdown, and showed the device in use.
In general it's a rather simple device with a lot of utility. Further enhancements to the Matter capabilities will allow this device to make its data more available in the home and further show the state of the device more easily via provided colors.
To perform the initial Matter setup please use the QR Code found here:
Hold down the button 2 on the NRF7002DK which will begin the provisioning process after three seconds. If you press the button for a short press it will lock and unlock the solenoid door lock.
Changes From Original ProposalInitially I had intended to include additional matter endpoints but I ran into some issues with the zap tool which ended up eating a lot of my time. I am using a windows machine so while I was able to eventually get the zap tool working I didn't find any useful guides related to the flow, the generated code created had issues reopening and regenerating existing examples, etc.
I'm regretfully only using the lock endpoint as it was the only one I could fully get working with the development kit in this timeframe (the example using it helped in this regards). I also plan to eventually include the air quality sensor once Matter 1.2 is ready for the NRF SDK.


_t9PF3orMPd.png?auto=compress%2Cformat&w=40&h=40&fit=fillmax&bg=fff&dpr=2)


Comments
Please log in or sign up to comment.