I could not find any smart garden lighting controller which integrate properly with Home Assistant. The very few smart controllers on the market were very expensive with a limited feature set. That was the motivation to build my own.
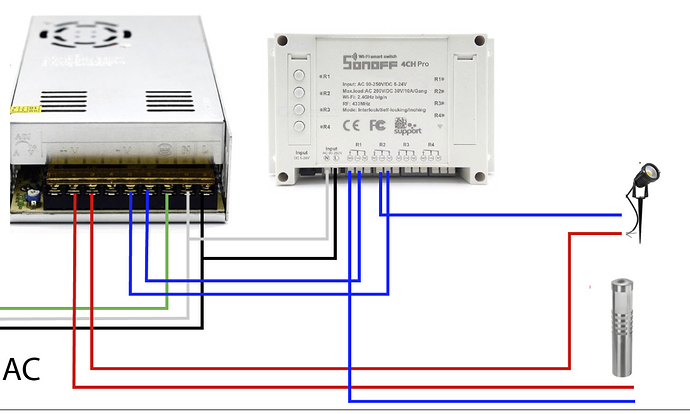
Step 1. Create my wiring diagram
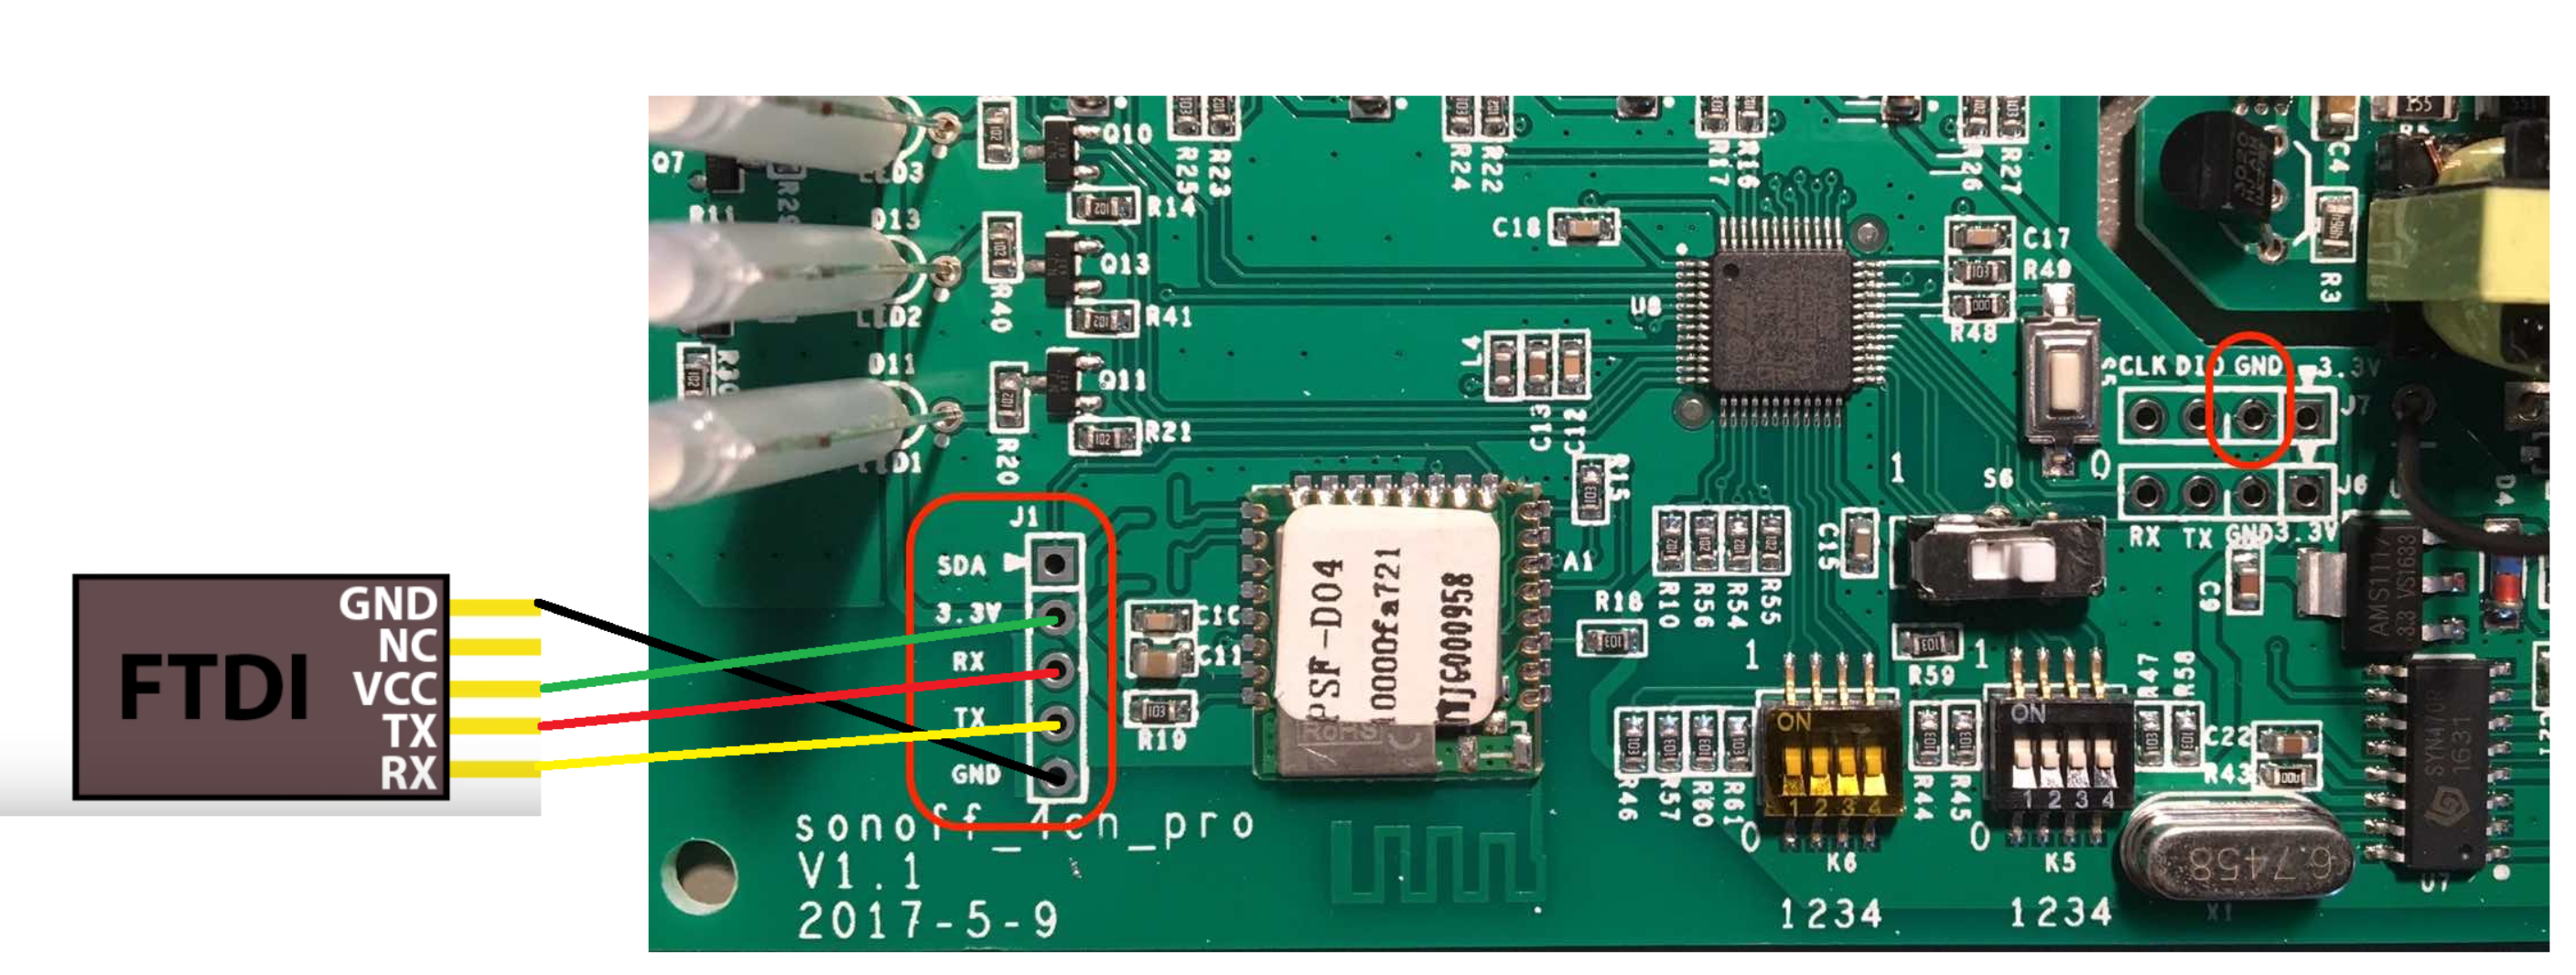
Step 2. Prepare Sonoff, installing Tasmota SoftwareMany good step-by-step tutorials available on YouTube. Since I was using the Sonoff 4CH Pro my steps were:
- Using atom editor with the platformio-ide extension
- Modify the wifi access in the Sonoff/user_config.h file
- Connect the Sonoff with the FT232RL FTDI Mini USB to TTL Serial Converter
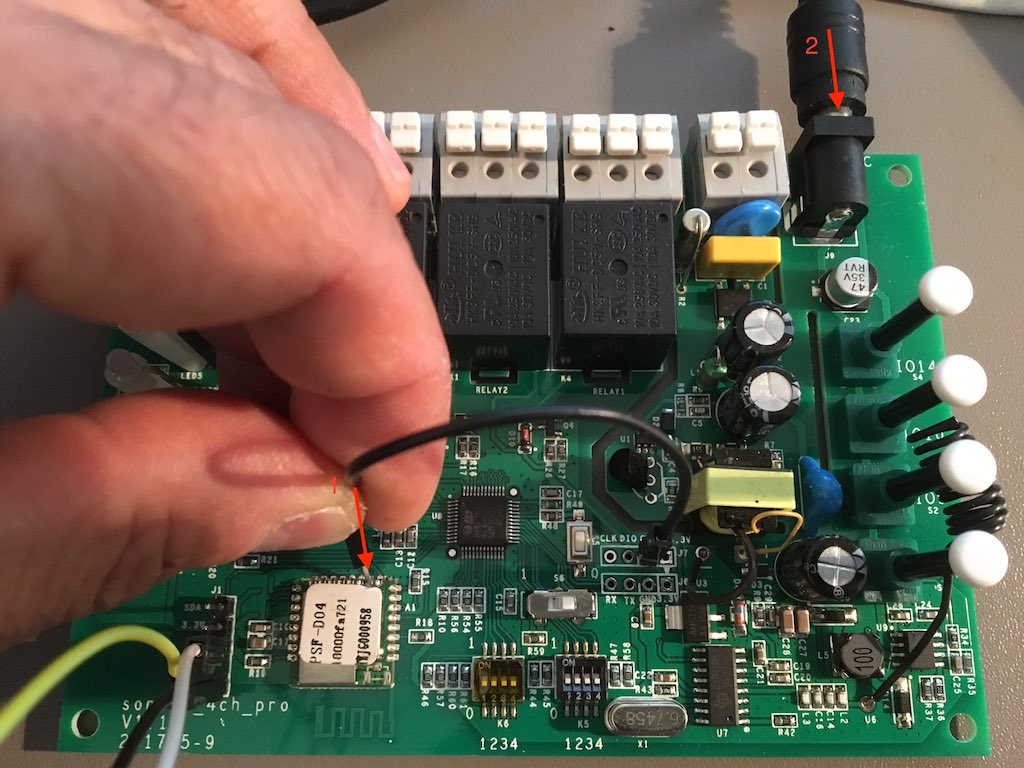
- Turn Sonoff into firmware flash mode: connect the GPIO0 pin to the GND with a jumper and then turn on the module. Three lights should be on, if the blue LED indicates a WiFi activity, it means that the module is not in flash mode. We must start again.
- Open the platformio.ini file (located in your downloaded Tasmota software root folder) in atom editor and click the "PlatformIO/Upload" button
- Once you get a "Succesful" message just restart your device. Please note, if you test the device only one of the switch will work. That's all right, you need to configure the device first.
- Open the IP address of the device in a web browser and set up your Sonoff type and MQTT connection. This will be straightforward.
Step 3. Do all the wiringDo all the wiring based on the diagram above and install all the parts into the weatherproof outdoor electrical box.
Step 4. Install the electrical box, lightsInstall the electrical box, the wires into the ground and the garden lights. I am not going to explain these steps since there are many videos on YouTube how to install outdoor lighting properly.
Step 5. Set up your Home Assistant and your automation


Comments