Trusted-Objects provides LoRa secured stack. This stack can be easily integrated to any LoRa project.
This project shows how to secure a LoRa setup.
In order to reproduce this project, you will need from us :
- SD card image
- Virtual machine
- Password
- Secured Element
Please contact us to get all these elements.
LoRa serverAny LoRa server can be use to realize this project. We will use the most advanced opensource LoRa server project https://docs.loraserver.io/overview/.
We package application server, network server, gateway bridge, and home-made gateway server in a virtual machine for easy installation.
Virtual machine user is "demo-lora", and password is "demo_lora". This is only for demonstration purposes, do not store any sensitive data with these logins.
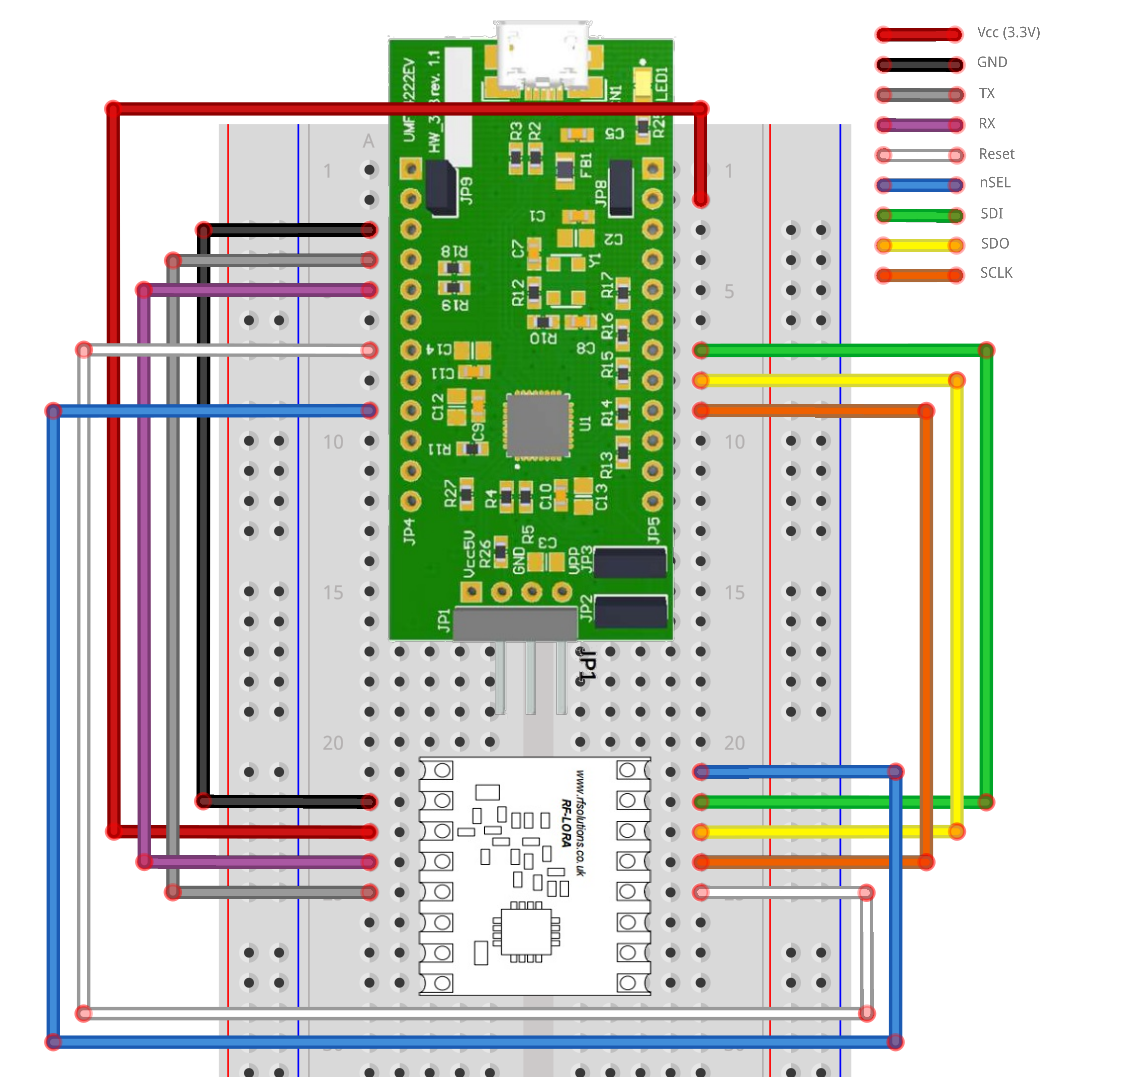
The gateway server needs an USB to SPI converter, as LoRa tranceiver is SPI.
The RF-LORA-868-SO transceiver must be connected to UMFT4222EV as on attached wiring schematic.
The UMFT4222EV must be connected to PC with USB, and connected to virtual machine (done by default).
On the virtual machine, servers are automatically started by init.d (script name is "demo-lora"), and logs of differents components can be observed in /tmp.
Start the virtual machine, and start "LoRa demo without Trusted Objects" on desktop.
Server is now ready.
LoRa clientWe use a Raspberry Pi (2 or 3) as client device.
Create an SD card with provided image (Raspbian based).
Unlock libTO with provided password. Extract, compile, and install libTO (see documentation).
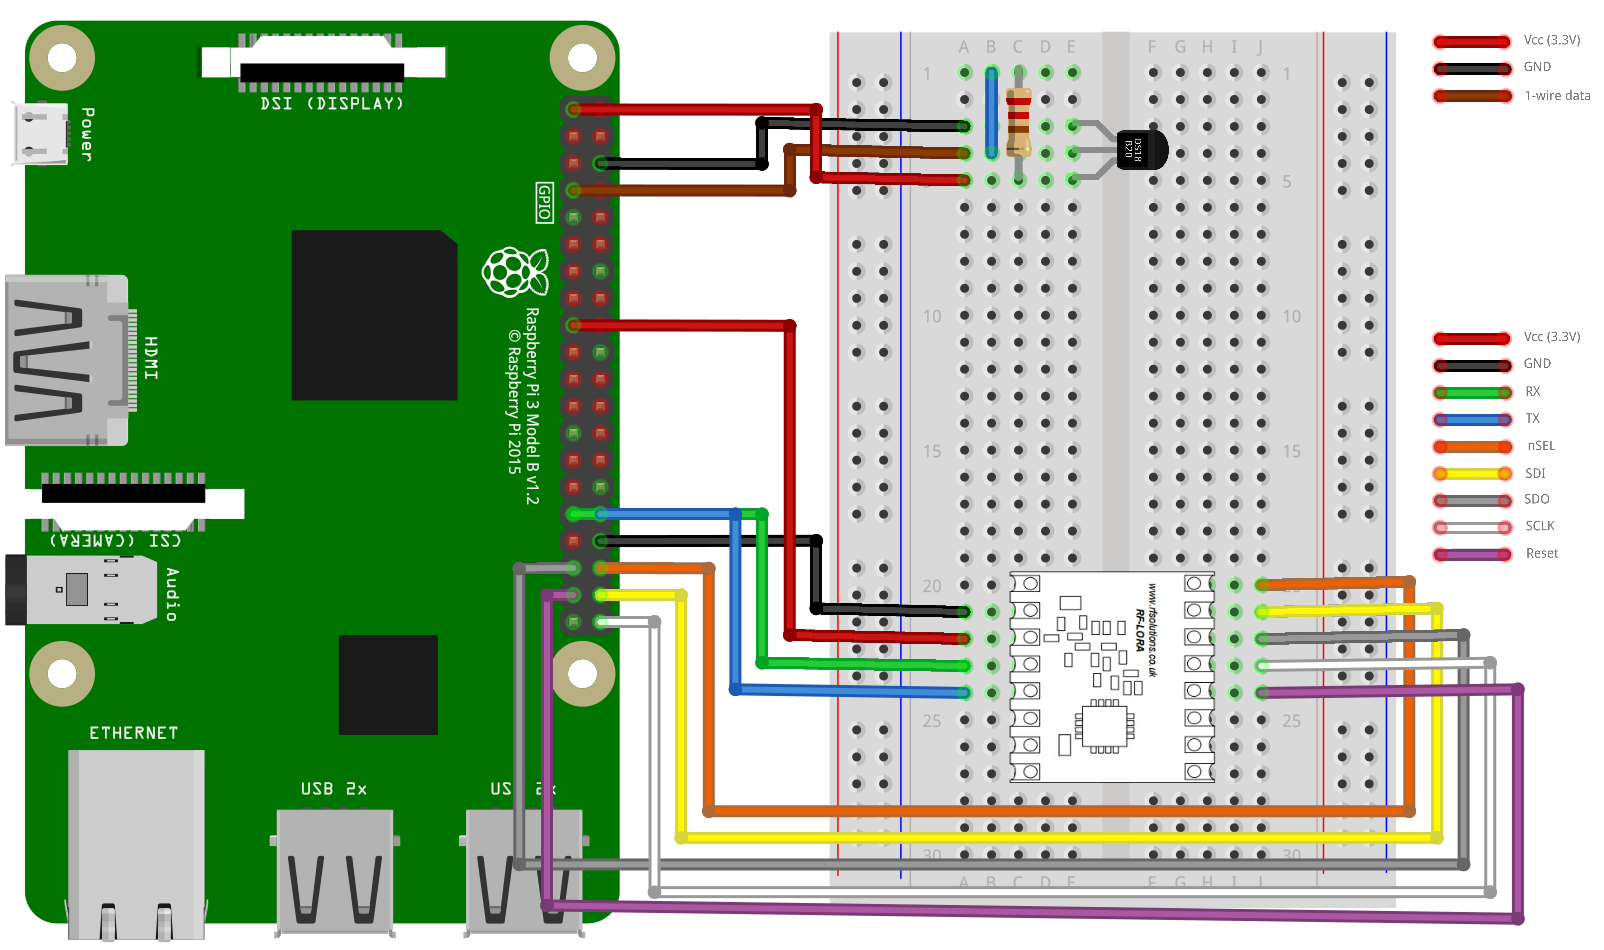
Connect Raspberry PI SPI to second RF-LORA-868-SO (software provided uses SPI1) as on attached wiring schematic.
Connect Raspberry PI to DS18B20 temperature sensor as on attached wiring schematic. More informations are available here.
Log in the Raspberry Pi with login "pi" and password "raspberry".
Go to LoRaMac-node repository at "/home/pi/lora-device".
Report your 1-wire sensor path in "get_temperature" function in file "src/apps/LoRaMac/classA/RPi/main.c".
Compile it with a simple "make", and start it with "lora-device" generated binary.
You should see LoRa Join Request and LoRa Join Accept, then the temperatures will show up on server.
Connect TO136USB stick to Rapsberry Pi.
In LoRaMac-node repository "/home/pi/lora-device", unlock "0001-Use-TO-to-build-parse-secured-payloads.patch" with provided password and apply it.
This patch removes LoRaMac-node code to build secured payloads, and uses TO136 instead. These APIs are LoRa standard and can easily be adapted to other LoRa clients.
Compile it again with "make clean; make".
TO136 AppKey, AppEUI and DevEUI are now used. Server configuration needs to be updated on page https://localhost:8080/#/applications/1 if your TO is personalized (new node must be created as EUI are fixed).
Start "LoRa demo with Trusted Objects" on desktop.
You should see LoRa Join Request and LoRa Join Accept and Trusted Objects communications, then the temperatures will still show up on server.
The node is now fully secured.


_1x_bGT19vVAby.png?auto=compress%2Cformat&w=40&h=40&fit=fillmax&bg=fff&dpr=2)


Comments
Please log in or sign up to comment.