Imagine being a value-added reseller of computer equipment. When a customer orders a computer server, you build and ship it out. But before you do, you slap multiple tilt indicators on it to make sure the delivery company didn't knock it on it's side, or get dropped. Those indicators let the customer know (at the point of delivery) to reject the delivery. But when that happens, your customer will need to wait longer for a rebuild and reship of the server. What we set out to do is to use Hologram's services and hardware to allow shippers to be proactive. Throughout transit, you will be able to track it and see it's tilt status, and know when/if it has been tilted past a given threshold, allowing you to ship out a replacement to your customer before they're told to reject the first delivery.
Hardware:- Hologram Nova Global 3G/2G cellular modem incl. Global IoT SIM Card
Full code is available on GitHub.
The GPS Module is serial interface and the motion sensor is I2C. You will need to first enable both on Raspbian OS.
- Run
sudo raspi-configin terminal
- Use the down arrow to select 9 Advanced Options
- Select A6 I2C
- Select yes when asked to enable I2C.
- Select A8 Serial
- Select yes when asked to enable Serial.
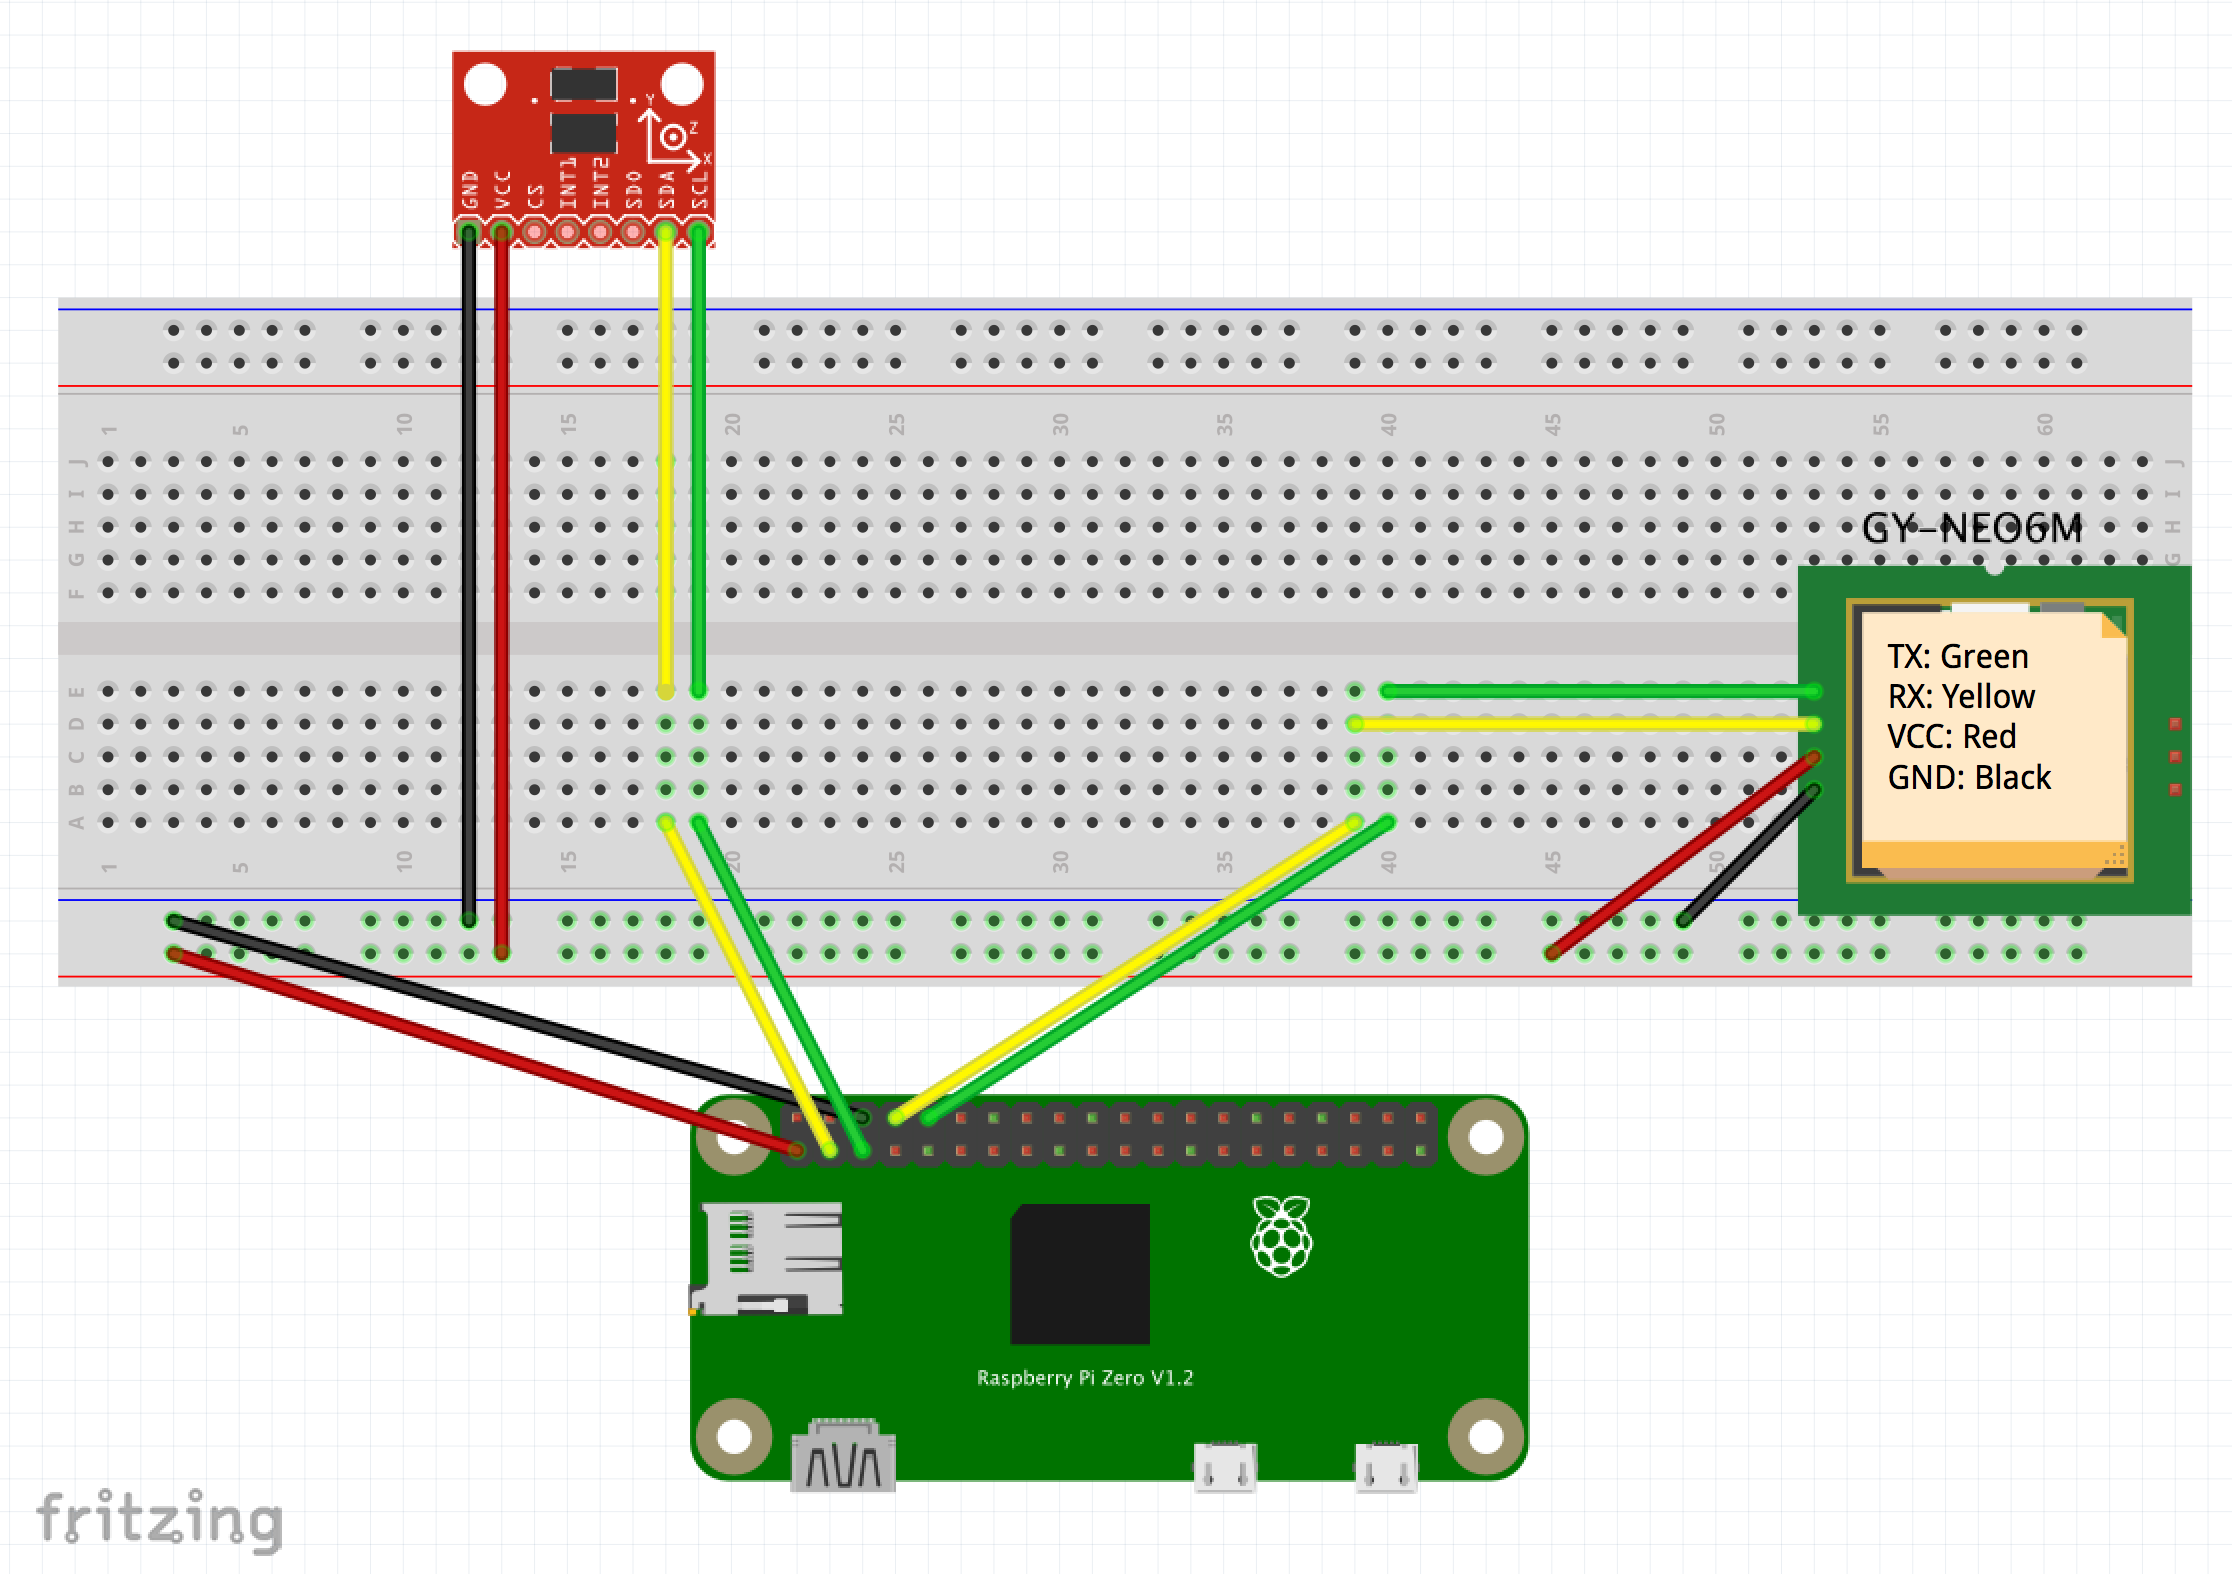
With the Raspberry Pi off, connect the GPS and Motion sensor.
Dependencies:
sudo apt-get install
- python-smbus
- python-gps
- gpsd
- gpsd-clients
- libgps-dev
pip install
- mpu6050-raspberrypi (and it's dependencies)
- flask
- flask-googlemaps
Elevated privileges are required to use Hologram's SDK. You also need to be a sudoer to open serial and run i2cget.
Run sudo senseStart.sh with sudo escalation. This will initialize gpsd with serial data from the GPS module and verify that the motion sensor is correctly addressed.
The GPS module is a stream on serial interface, since we don't want to have to deal with that, and we're using python, we can use the gps package to get our data! With the module we can easy get longitude and latitude like this:
from gps import *
gpsd = gps(mode=WATCH_ENABLE)
while True:
    gpsd.next() #gets the next gps datapoint
    print gpsd.utc #Time
    print gpsd.fix.latitude #Latitude
    print gpsd.fix.longitude #Longitude
For the Motion sensor, there is a great library called mpu6050-raspberrypi.
To access sensor data, all we need to do is:
from mpu6050 import mpu6050
motionsensor = mpu6050(0x68) #sensor address is 0x68
accelerometer_data = sensor.get_accel_data()
accelgyrotemp_data = sensor.get_all_data()
Since we want to continuously poll the sensors for data and still be able to do other things like sending our data, we'll run them in threads. For that we need python threading. See the source code for more details!
Now that we have our data, we want to be able to send it to Hologram Data Engine after we process the raw sensor data. Hologram's SDK makes this very easy. It also provides us with cellular triangulation for location if there is no GPS signal.
from Hologram.HologramCloud import HologramCloud
hologram = HologramCloud({}, network='cellular')
connectStatus = hologram.network.connect()
# To get location data from cellular
modemLocation = hologram.network.location
time = modemLocation.time
date = modemLocation.date
lat = modemLocation.latitude
long = modemLocation.longitude
alt = modemLocation.altitude
# To send a hologram data message to the data engine in the clouddd
response_code = hologram.sendMessage('Message to send', topics=['tag1', 'tag2'], timeout=5)
That's all you need to get started on the tracker side. For how I hacked mine together, see github.
2 Server Gateway:After the message gets sent to the Hologram Data Engine, we need it to send it Route it to our own server that'll process and log the data. Hologram Data Router does exactly what we need. The Data Router works on a topic, I've tagged my messages with 'Location' topic so Data Router can trigger when the Data Engine receives a message from the Nova.
We want to choose Custom Webhook URL (Your Own App)
Great, now when data is sent to the Hologram Cloud, it will get sent to our API where it will be processed and stored.
To process, store and display our data, we'll use Flask. Flask is great and easy to setup. But first let's create a database to store our tracker data. Since we're doing a proof of concept, we can make a simple database with sqlite3, and create the following two tables:
With that out of the way, we can then create a route to log the data sent from hologram data router. Hologram data router posts a form containing information and the payload, which is the message we sent.
@app.route('/device/log', methods=['POST'])
def log:
    content = request.form
    data = content['payload']
    # Process and store data into database
    # Also great place to check if tilt has passed threshold, and if so, send call notification APIs such as Twillo or send an email.
We also need to be able to specify the threshold and probably name and include a description of the asset. We can use flask to render a form and use jquery to POST to our onboading route to add a new tracker.
@app.route('/add')
def add():
    return render_template('addTracker.html')
@app.route('/onboard', methods=['POST', 'GET'])
def onboard():
    _devicekey = request.form['inputDevicekey']
    _name = request.form['inputName']
    _description = request.form['inputDescription']
    _notifyemail = request.form['inputEmail']
    _maxtilt = request.form['inputMaxtilt']
    #process data
With the data stored, we can then work on making a front end to display the data.
Like this: The tracker list displays the status of the package. If it's been tilted past the maximum angle threshold, it will turn red.
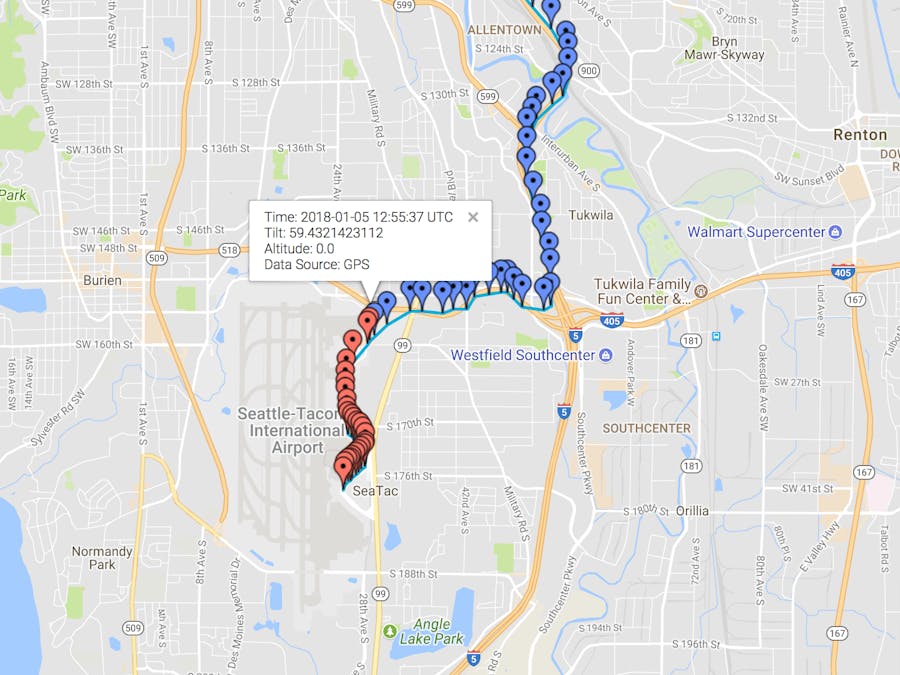
We also want to be able to visually see where the asset is, and when it was knocked over. For that, we'll use flask-googlemaps. You'll need to acquire a Google Maps API Key, and enter that in the googleMapsAPIKey variable on line 18. in gateway.py. We can then do fancy things like this:
And that's it! You've made yourself an asset tracker that falls back to cellular location triangulation when there is no GPS signal and continuously logs if the asset has been dropped or knocked over. Good luck!


_3u05Tpwasz.png?auto=compress%2Cformat&w=40&h=40&fit=fillmax&bg=fff&dpr=2)

Comments
Please log in or sign up to comment.