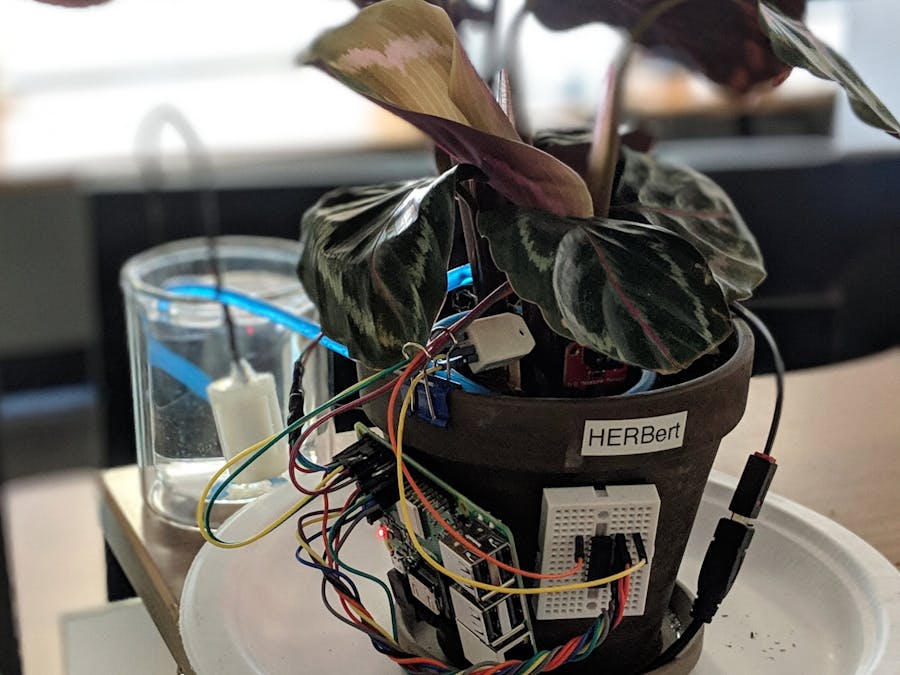
In our connected world there is no excuse for letting houseplants die. I have been guilty of this several times in the past but that all changed when I met my new desk plant Herb(ert). This plant inspired me to use the technology I have available to ensure its health.
My goal for this project was simple. I wanted to keep my plant alive and healthy with the smallest amount of physical interaction possible. I didn't want to feel the soil every few days and guess if it felt moist enough. I didn't want to measure an arbitrary amount of water and guess if it was enough to give to the plant. I wanted Herb(ert) to handle all of this logic himself and just leave me responsible for filling up a water tank when it gets low.
Full disclosure I work for niolabs, a software company that allows you to design this kind of edge logic using our platform and tools. This project was great for the nio Platform as it represented a small scale version of the automated irrigation we do in our autonomous vineyard.
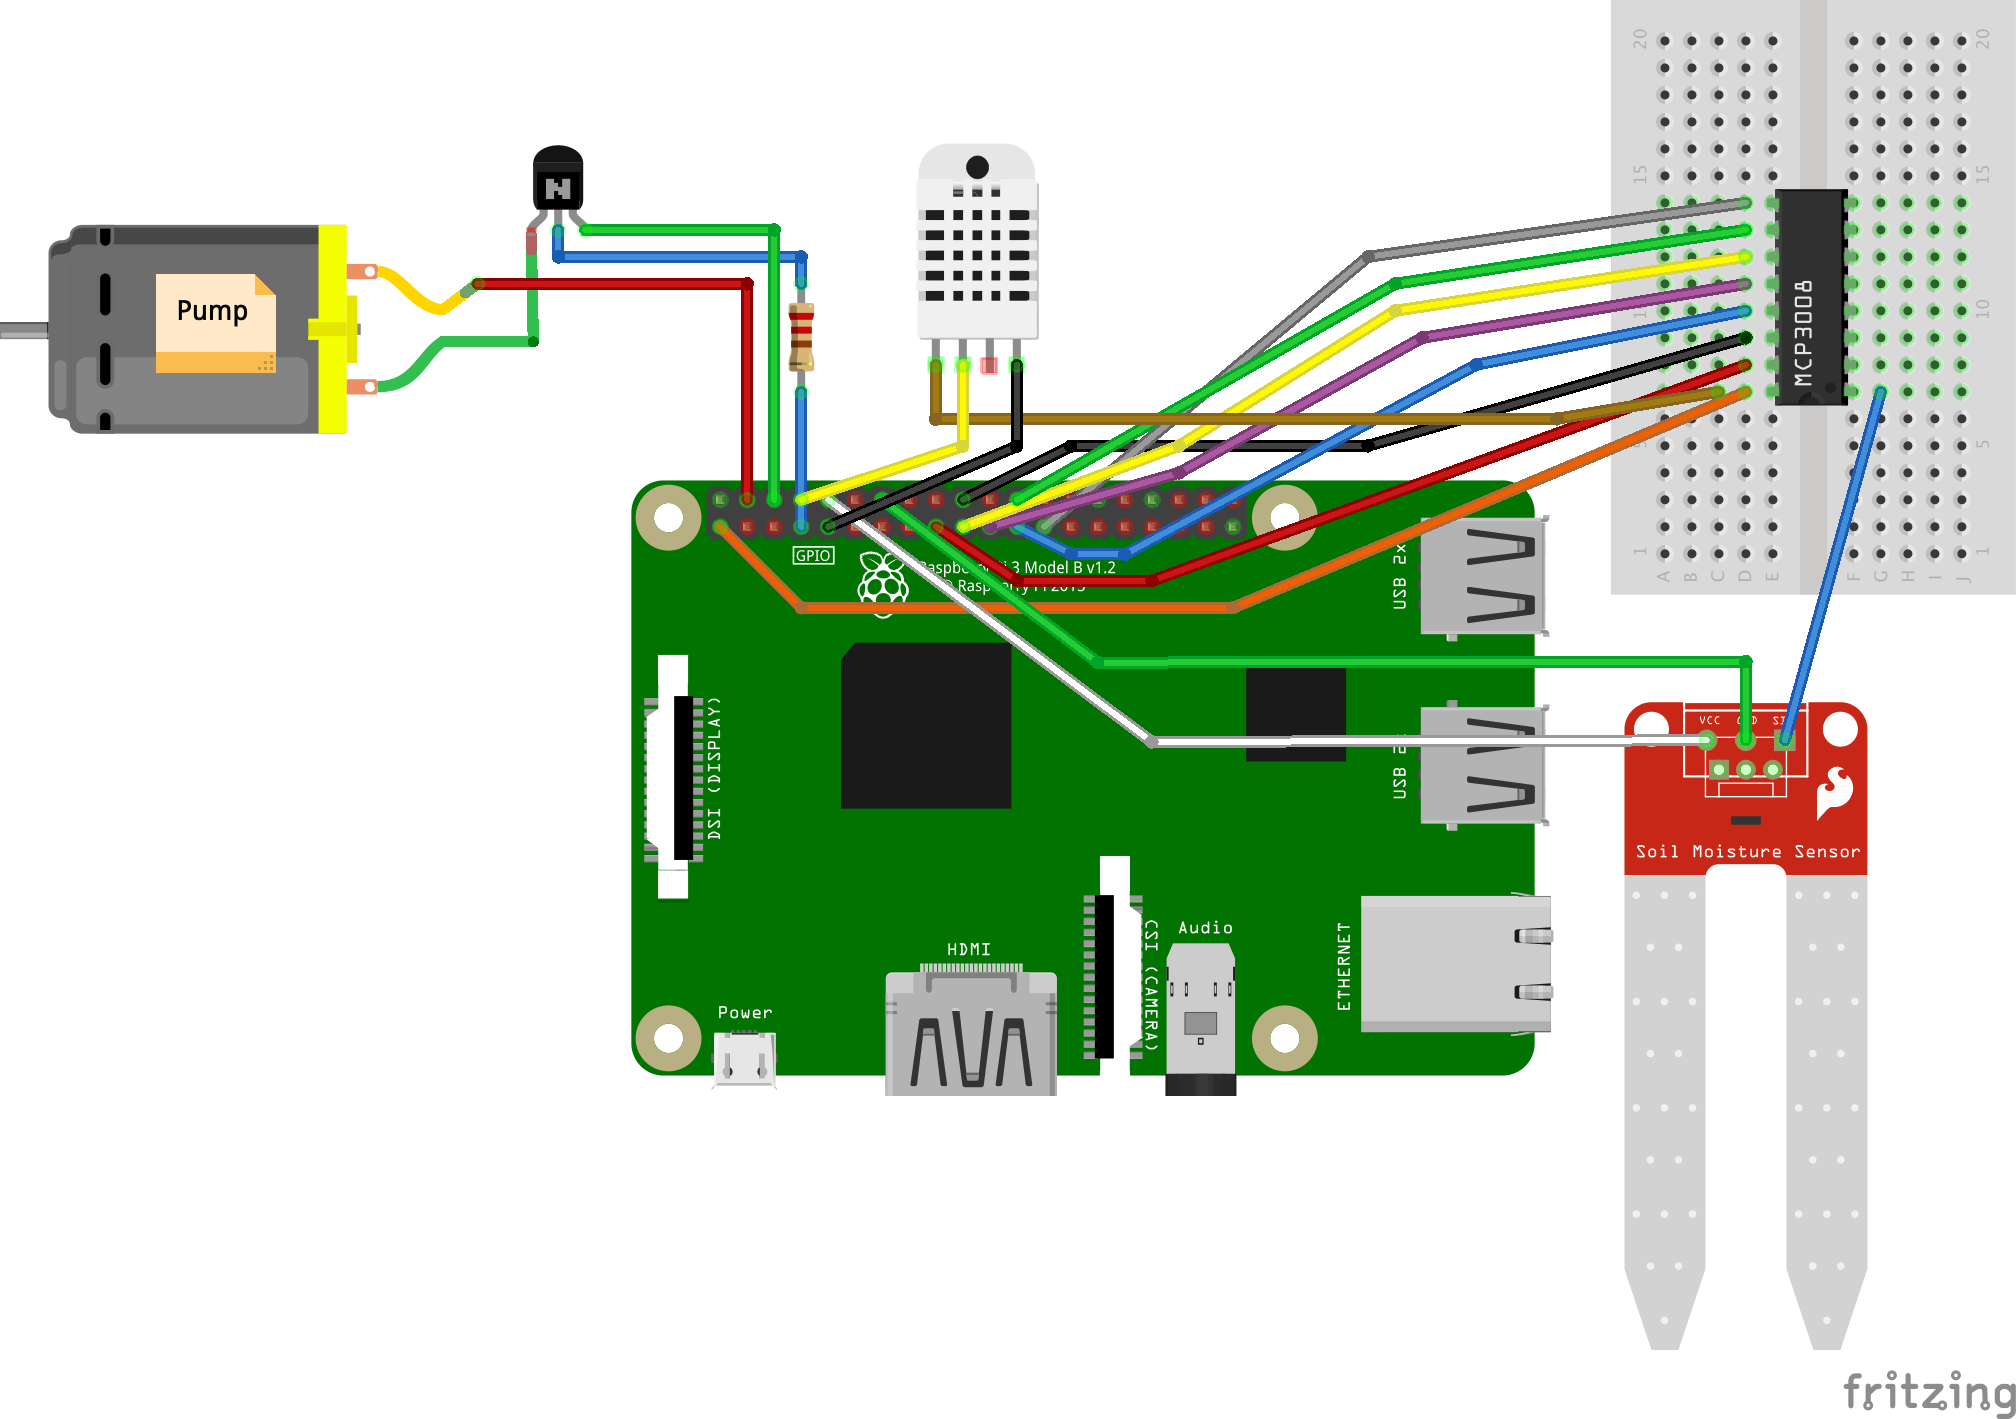
With the hardware that I am using, I will be able to read soil moisture values as well as visualize the environment that my plant is in with temperature and humidity values. Data stream processing will be applied on the Raspberry Pi to actuate the water pump. Additionally, I will be able to monitor the status of all of this using a custom created dashboard. This front end will subscribe to the data directly from the Pi and display real-time streams so I know my plant is healthy when I go home at night.
Setting Up nioWith my nio account, I can obtain a nio binary to install onto my Pi. This requires a few source packages from the apt package manager:
sudo apt install python3-dev libffi-dev libssl-dev
I will also need to install the pip package manager for python:
curl https://bootstrap.pypa.io/get-pip.py -o get-pip.py
python3 get-pip.py —-user
echo 'export PATH=/home/pi/.local/bin:$PATH' >> ~/.bashrc
source ~/.bashrc
This step isn't required but when dealing with python environments, it is best to use a virtual environment:
pip3 install virtualenv --user
virtualenv env
source env/bin/activate
With the MCP3008 analog to digital converter, we will also need to enable the SPI interface on the Raspberry Pi. This can be done through the raspi-config menu.
sudo raspi-config
After this setup, I just need to install the nio binary I downloaded and create a nio project using my example repo as a project template
pip install nio_lite*.whl
nio new MyPlant -t https://github.com/tlugger/herbert_edge.git --pubkeeper-hostname <your-pk-hostname> --pubkeeper-token <your-pk-token> --no-ssl
cd MyPlant
niod
With this nio is now running on my Raspberry Pi and is waiting for me to connect to it from the nio System Designer. Within this tool, I will be able to use modular blocks to generate, process, publish, and subscribe multiple streams of data which will automate each part of Herb(ert)'s irrigation.
Building ServicesUsing, the project template from my GitHub repository, all of the services should be good to go. After connecting to my Raspberry Pi, I can see all of the services running in this instance of nio on the designer canvas:
These 4 services represent the different pieces of functionality that nio is providing to this Raspberry Pi in a graphical way. The Main service is similar to the main function in a program. It will generate all of the signals passed between services here and send the appropriate data to the appropriate services. The last three services SoilRead, PumpControl, and TempHumidRead are similar to functions in a program. They will accept an input signal from the Main service and perform.
By looking into these services we can see the individual blocks that create the edge logic:
This is the whole service for controlling the water pump. Using 6 different types of nio blocks, this service can receive a signal from the main service, control the water pump through the Raspberry Pi GPIO pins, publish a status of whether or not the water pump is on, and log a timestamp each time the plant is watered.
Signals in a nio service flow top to bottom as apposed to how messages move left to right in a tool like Node-Red. Attributes of these signals are mostly arbitrary for this service as I use several Modifier blocks to create status and timestamp attributes. The publishers in this service will only be used by the dashboard.
Creating a DashboardThese services will now run on my Raspberry Pi and autonomously read sensor data and actuate my water pump as needed. But I thought it would be helpful to have a dashboard to view all of the data that nio is collecting for me. For this I used the nio UI Kit to create a dashboard that can subscribe to the data in my nio System.
This dashboard provides a changing svg representation of my plant, historical temperature and humidity values, soil moisture readings with an indicator of whether it is healthy or not, and finally display irrigation status and last watered values.
nio is running 24/7 to continuously monitor and automate the health of my plant. The dashboard is hosted publicly on my website cilantr.io. If you would like to create your own automated irrigation for a plant, vineyard, or anything feel free to reach out to me for help!


_3u05Tpwasz.png?auto=compress%2Cformat&w=40&h=40&fit=fillmax&bg=fff&dpr=2)
Comments
Please log in or sign up to comment.