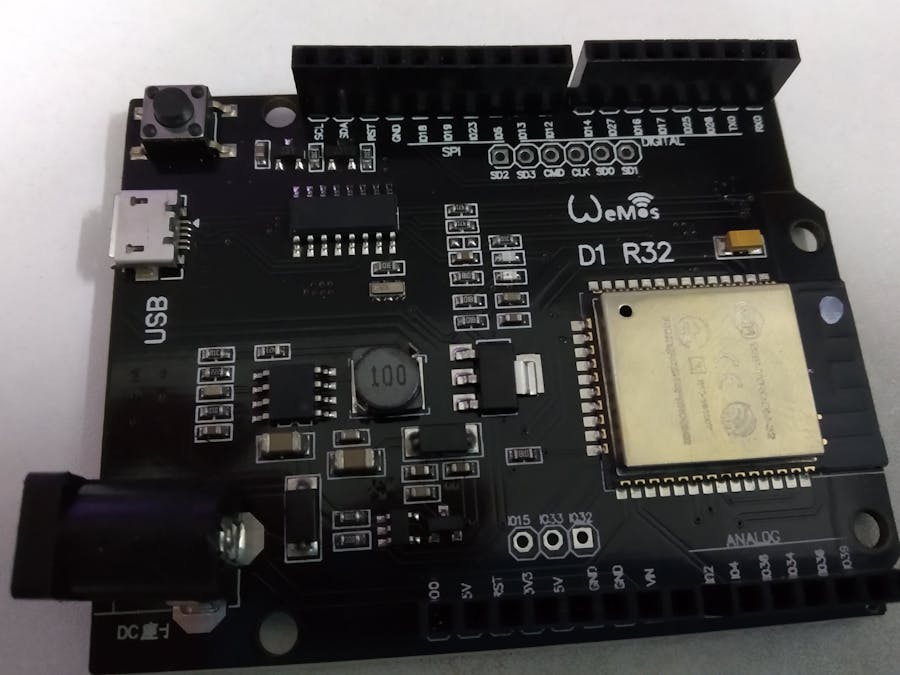
This is a short tutorial on how to have a simple ESP32 project running with Arduino and FreeRTOS in less time!
In order to start, we need these:
- Wemos R32 board
- Arduino
Directions:
1.) Before we plug into the Wemos R32 board, we need to install Arduino first. Get the Arduino from this link: https://www.arduino.cc/en/Guide/HomePage
2.) Afterwards, open the Arduino and obtain the ESP32 support first:
Select File -> Preferences, and then copy this link (https://dl.espressif.com/dl/package_esp32_index.json) into the Additional Boards Manager URLs:
3.) Go to Tools -> Board -> Boards Manager, then type in "ESP32". When you see this, press Install:
4.) Once it's all done, go to Tools -> Board -> Boards Manager, and then select "ESP32 Dev Module":
5.) Create a new project! Type this in:
void setup() {
 Serial.begin(112500);
 pinMode(2, OUTPUT);
 vTaskDelay(1000 / portTICK_PERIOD_MS);
 xTaskCreate(task1,"task1", 2048, NULL,1,NULL);
 xTaskCreate(task2,"task2", 2048, NULL,1,NULL);
}
void loop() {
 vTaskDelay(1000 / portTICK_PERIOD_MS);
}
void task1( void * parameter )
{
  while(1) {
   Serial.println("Hello World!");
   vTaskDelay(1000 / portTICK_PERIOD_MS);
  }
}
void task2( void * parameter)
{
  while(1) {
     digitalWrite(2, HIGH);
     vTaskDelay(500 / portTICK_PERIOD_MS);
     digitalWrite(2, LOW);
     vTaskDelay(500 / portTICK_PERIOD_MS);
  }
}
6.) Save the project.
7.) Before you upload, connect the R32 board to your PC. Find the COM port that is with the R32 board through Device Manager. The board is equipped with the CH340, so take note of the COM number:
In this example it's COM6, so it will be different on your PC.
Note: If you couldn't find this "USB-SERIAL CH340", the drivers are probably not installed. You can refer to the CH340 drivers installation guide there: https://sparks.gogo.co.nz/ch340.html
8.) Back to your Arduino, select your COM port that is connected to the board:
9.) Press "Upload".
When you see the "Connecting...", press the Reset button for about 4 seconds, and then release it:
You will see a lot of messages scrolling downwards. It is in the process of uploading the binary to the ESP32 module on the board.
Chip is ESP32D0WDQ6 (revision (unknown 0xa))
Features: WiFi, BT, Dual Core, VRef calibration in efuse
Uploading stub...
Running stub...
Stub running...
Configuring flash size...
Auto-detected Flash size: 4MB
Compressed 8192 bytes to 47...
Writing at 0x0000e000... (100 %)
Wrote 8192 bytes (47 compressed) at 0x0000e000 in 0.0 seconds (effective 3640.9 kbit/s)...
Hash of data verified.
Compressed 15072 bytes to 9733...
Writing at 0x00001000... (100 %)
Wrote 15072 bytes (9733 compressed) at 0x00001000 in 0.9 seconds (effective 139.2 kbit/s)...
Hash of data verified.
Compressed 180800 bytes to 91782...
Writing at 0x00010000... (16 %)
Writing at 0x00014000... (33 %)
Writing at 0x00018000... (50 %)
Writing at 0x0001c000... (66 %)
Writing at 0x00020000... (83 %)
Writing at 0x00024000... (100 %)
Wrote 180800 bytes (91782 compressed) at 0x00010000 in 8.1 seconds (effective 178.3 kbit/s)...
Hash of data verified.
Compressed 3072 bytes to 144...
Writing at 0x00008000... (100 %)
Wrote 3072 bytes (144 compressed) at 0x00008000 in 0.0 seconds (effective 910.2 kbit/s)...
Hash of data verified.
Leaving...
Hard resetting via RTS pin...
The upload is successful when it says : "Hash of data verified. Leaving..." at the end of the process.
10.) Open a terminal program and you will see "Hello World!" printed on it each second, and the LED on the board toggles at the rate of 500ms:
You are done here!
That's not all, if you want to learn how to use the FreeRTOS in this platform, refer to the external links and FreeRTOS' documentation for more info:
- What is FreeRTOS? https://techtutorialsx.com/2017/05/06/esp32-arduino-using-freertos-functions/
- Creating a task in FreeRTOS: https://techtutorialsx.com/2017/05/06/esp32-arduino-creating-a-task/
- FreeRTOS manual: https://docs.aws.amazon.com/freertos-kernel/latest/ref/welcome.html


Comments
Please log in or sign up to comment.