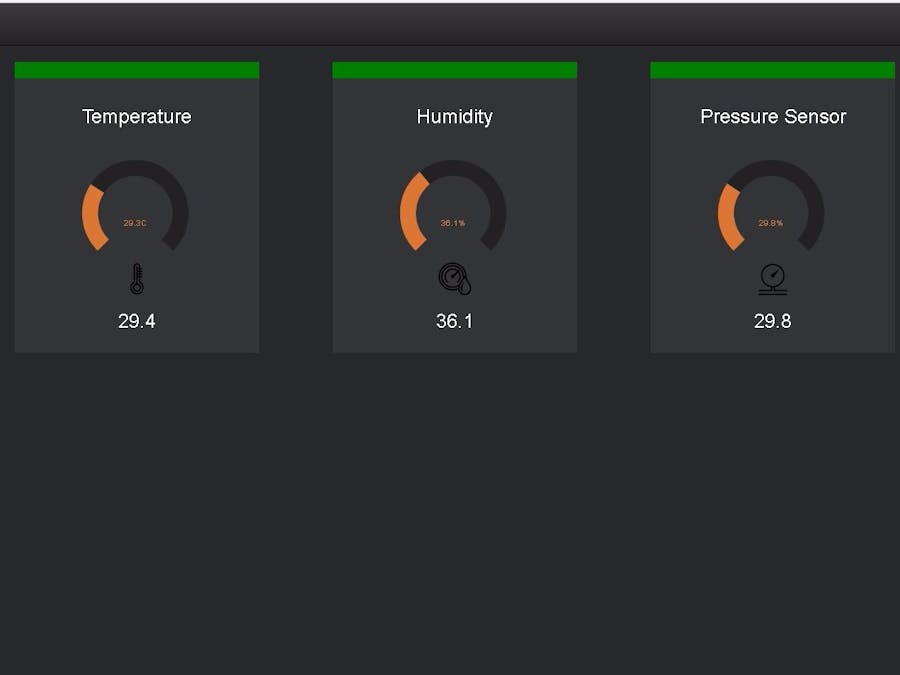
Looking for Internet of Things (IOT) SMART home? Feeling those commercial devices cost you more than you can afford? How about create your own IoT devices with cheap off the shelf embedded boards like Raspberry Pi Zero W ($10) and Arduino ESP8622( 10$).
OK, we have the 10$ hardware. How about software? Need to know where to start for the user interface to control the smart devices? How can I make my smart devices respond to the request from the user interface? How can I make all these requirements available through the internet and make an IoT device?
How about HTML web applications used to control the smart IOT devices that are designed using Raspberry Pi 3 and Raspberry Pi Zero W embedded boards?
Hope the below descriptions should help you to give a place to start your interest in IoT.
List of Needed Software Source Code:https://github.com/aterry35/SmartIOTControPanel
Youtube Video:System Architecture for the Below Example- USB webcam used for surveillance
- Client /User End: HTML5+Bootstrap+MQTT, Pahoo Client, JavaScript
- Device End: Python+Pahoo, MQTT, Python .
- IOT Broker: Mosquito IOT Broker + Linux Ubuntu 16.04
- IOT Broker Name: (MY Personal VPS IOT Broker),
NOTE: You can buy your VPS and configure the Mosquito MQTT broker or free broker like mosquito.org or hive.com, etc.
- Mqttport Number: 1883
- Web-socket Port Number: 9001
Configure the server in which you are going to run the IOT broker. This can either be a virtual private server, or any one of your home computer. Any third party IoT brokers like Mosquito, Hive, etc., or you can use my server. The details are in the beginning of the post.
Note: If you run the broker in the computer in your home, the device can be controlled only in the WiFi, and not outside of your WiFi.
Install Mosquito MQTT broker/Client in Ubuntu 16.04 server is as follows.
Sudo apt-get update
sudo apt-get upgrade
sudo apt-get install mosquito mosquito-client
Device side setup and configuration (Raspberry Pi Zero W for this example):
Note: The new version of the Raspbian comes with SSH disabled. After fish programming the SD card, boot the Raspberry Pi and go to desktop (by connecting to HDMI display) and enable the SSH.
https://www.raspberrypi.org/documentation/remote-access/ssh/
Setup WIFI for Raspberry PI from Command line.
https://www.raspberrypi.org/documentation/configuration/wireless/wireless-cli.md
Install Mosquito MQTT broker/Client:
Sudo apt-get update
Sudo apt-get upgrade
Sudo apt-get install mosquito mosquito-client
Install Pahoo mosquito client for python.
Sudo pip install paho-mqtt
Once the above device (Raspberry Pi Zero W) configuration is done, start writing the Python script for your devices. In this example, I had categorized the devices into two parts. For the sensors/lights we use GPIO’s to control our sensors and relays.
Sensors Temperature and Humidity (DHT22)Once the above wiring is done, use the library for Adafruit.com and do the following example for sensors in Python.
Codeimport paho.mqtt.client as mqtt
import RPi.GPIO as GPIO
import json, time
import thread
import threading
import Adafruit_DHT
# Example using a Raspberry Pi with DHT sensor # connected to
GPIO23. pin = 23
# The callback for when the client receives a CONNACK response from the server.
def on_connect(client, userdata, flags, rc):
print(“Connected with result code “+str(rc))
def readtemp():
threading.Timer(0.5, readtemp).start()
client = mqtt.Client(transport=”websockets”)
client.on_connect = on_connect client.connect(“iot.Broker Name”, 9001, 60) —> Note: you can use your IOT Broker in this place instead of the broker mentioned here.
time.sleep(0.5) sensor = Adafruit_DHT.DHT22
humidity, temperature = Adafruit_DHT.read_retry(sensor, pin)
Temp='{0:0.1f}’.format(temperature)
if humidity is not None and temperature is not None:
client.publish(“5282temp”,Temp,qos=0,retain=False)
else:
client.publish(“5282temp”,”none”,qos=0,retain=False)
client.disconnect()
readtemp()
The same code can be reused for Humidity reading and publishing. The piece of code to be changed as follows.
sensor = Adafruit_DHT.DHT22 humidity, temperature = Adafruit_DHT.read_retry(sensor, pin) hum='{0:0.1f}’.format(humidity) if humidity is not None and temperature is not None: client.publish(“5282humid”,hum,qos=0,retain=False) else: client.publish(“5282humid”,”none”,qos=0,retain=False)
For the Smart Light the python is as follows:
import paho.mqtt.client as mqtt
import RPi.GPIO as GPIO
import time
import thread
# ————– # # Board settings # # ————– #
GreenPin =29
GPIO.setwarnings(False) GPIO.setmode(GPIO.BOARD)
# use P1 header pin numbering convention
GPIO.cleanup()
# clean up resources
GPIO.setup(GreenPin, GPIO.OUT)
# led pin setup
# The callback for when the client receives a CONNACK response from the server.
def on_connect(client, userdata, flags, rc):
print(“Connected with result code “+str(rc))
# Subscribing in on_connect() means that if we lose the connection and # reconnect then subscriptions will be renewed.
GPIO.output(GreenPin,GPIO.HIGH)
client.subscribe(“light2582”)
def on_message(client, userdata, msg):
 payload = str(msg.payload) topic = str(msg.topic)
print(msg.topic + ” Payload is ” + payload)
if payload == ‘off’: GPIO.output(GreenPin,GPIO.HIGH)
elif payload == “on”: GPIO.output(GreenPin, GPIO.LOW)
else:
print(“WRONG MESSAGE”)
client = mqtt.Client(transport=”websockets”)
client.on_connect = on_connect
client.on_message = on_message
client.connect(“iot.broker.name”, 9001, 60)
client.loopstart()
Blocking call that processes network traffic, dispatches callbacks and handles reconnecting. The other loop*() functions are available that give a threaded interface and a manual interface client.loop_forever().
Once the respective python scripts are done, please verify by running the python script.
Python <Scriptname>To verify if your Python script is working fine, you need to run the IoT and subscribe in the computer or server in which your IoT broker is running.
Refer to the website for the documentation details.
Client Side User Interface:GUI Layouts


Comments
Please log in or sign up to comment.