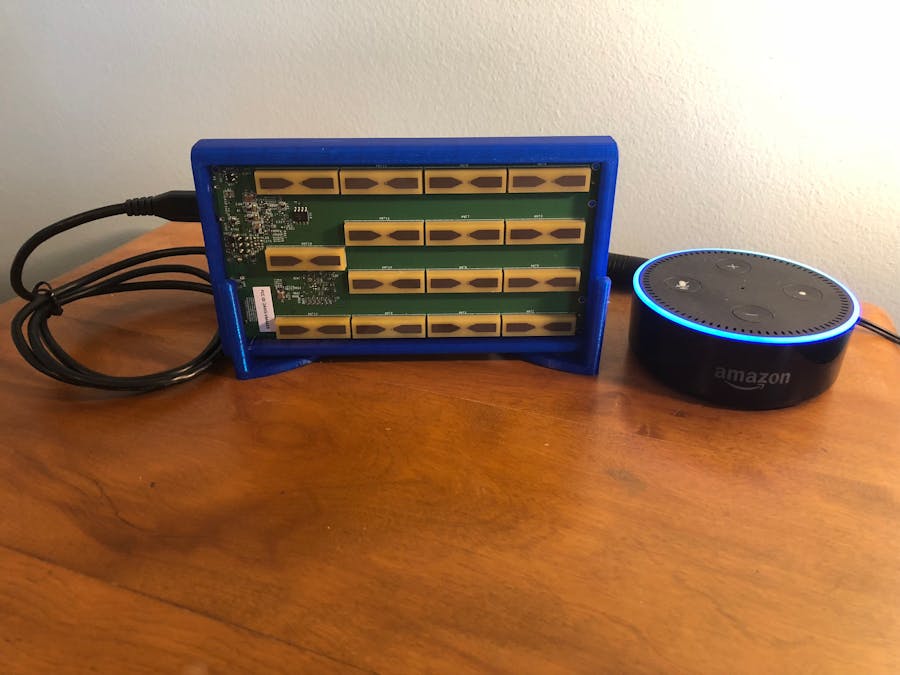
Battleship is the classic board game you play to kill time and dominate your friends through naval tactical superiority. But, if we're being honest, calling out "B4" and placing a red or white marker in your command center can be a bit boring especially if you're trying to find the pesky patrol boat. When I saw the impeccable combination of the Amazon Echo and Walabot, I thought there couldn't be a better way to creatively splash some fun back into the game with the innovation of two amazing technologies.
DescriptionThis project is intended to develop the connection between Walabot's sensing capabilities and Amazon Alexa’s interaction for home entertainment.
Any room can become a virtual naval war zone by simply saying, “Alexa play battleship.” Upon receiving the command, the software creates a turn-based battleship game where you are a ship Captain evading and firing rounds at an unseen enemy.
The Walabot is mounted on a stand facing the center of any room. When the Walabot is powered on, it captures the environment. To start a game, the room is split into compass rose sectors - North, South, East, and West. When the user steps into a compass sector with instructions from Alexa, the Walabot tracks their location. The player can take his turn by standing in, or moving around, his room to try and dodge an enemy attack. He can also say an enemy sector to attack.
With the crosshairs aligned on where you think the enemy is hiding, the gun fires! Your first mate, Alexa, will let you know if the scans say you hit the enemy. All the while, the enemy fires back! The player hears a whistling bombshell coming inbound - BOOM. The shell hits your ship, but your shot missed and hit the water. The next turn will begin repeating the pattern of choosing your sector by standing in it and saying a sector you want to attack. The game will continue until one player has been sunk.
A Walabot will work in tandem with an Echo Dot and Raspberry Pi in order to portray an epic naval battle where you can play against Alexa or against friends and family in other rooms of the house with the same hardware setup.
- Single Player: The Walabot will track your location in the battlefield sectors. Alexa will moderate the game, listening to your commands and giving instructions. And, Alexa will be the unseen enemy ship, choosing her ship’s hiding place and the sector she will attack. She doesn't cheat.*
- Multiplayer: The Walabot will track your location in the battlefield sectors of your room. Alexa will moderate the game, listening to your commands and giving instructions. The other player will act as the unseen enemy ship, choosing his ship’s hiding place and and the sector he will attack the same way as you but in a different room.
This live battleship game with the 3D imaging power of the Walabot and the Amazon Alexa skill will be of epic proportions. It is the perfect combination of fun and hardware integration.
The ProjectSetup the HardwareTo begin the project, the general hardware configuration will be created.
- Step 1: Obtain all of the hardware components listed above.
- Step 2: Download the .stl files of the baseStand.stl and walabotCase.stl. The base is used to create a stable holder for the Walabot and the Raspberry Pi 3 Model B. It is printed to match the outer dimensions of the Walabot black shell case (previously from the Walabot Pro only). The Walabot case part is useful to protect the models that do not come with a shell (currently useable with the "Developer" or "Creator"). It has similar outer dimensions when compared to the shell. Use a 3D printer to fabricate these parts with around 50% fill for structural stability.
- Step 3: Place the Raspberry Pi on the base with the attachment holes over the pylons and oriented as shown below. Press the pins into the pylons to secure the Raspberry Pi in place. These pins could be replaced by screws if you so choose. Note: adding glue to the pylon holes can be helpful for a more secure attachment.
- Step 4: Place the Walabot in the front holder with the antenna array facing away from Raspberry Pi. If you have the shell provided by Walabot the array side is denoted by the small "wifi-like" symbol on the front side closest to the USB ports. The case I provided has an open array to ensure the plastic does not hinder any sensor readings.
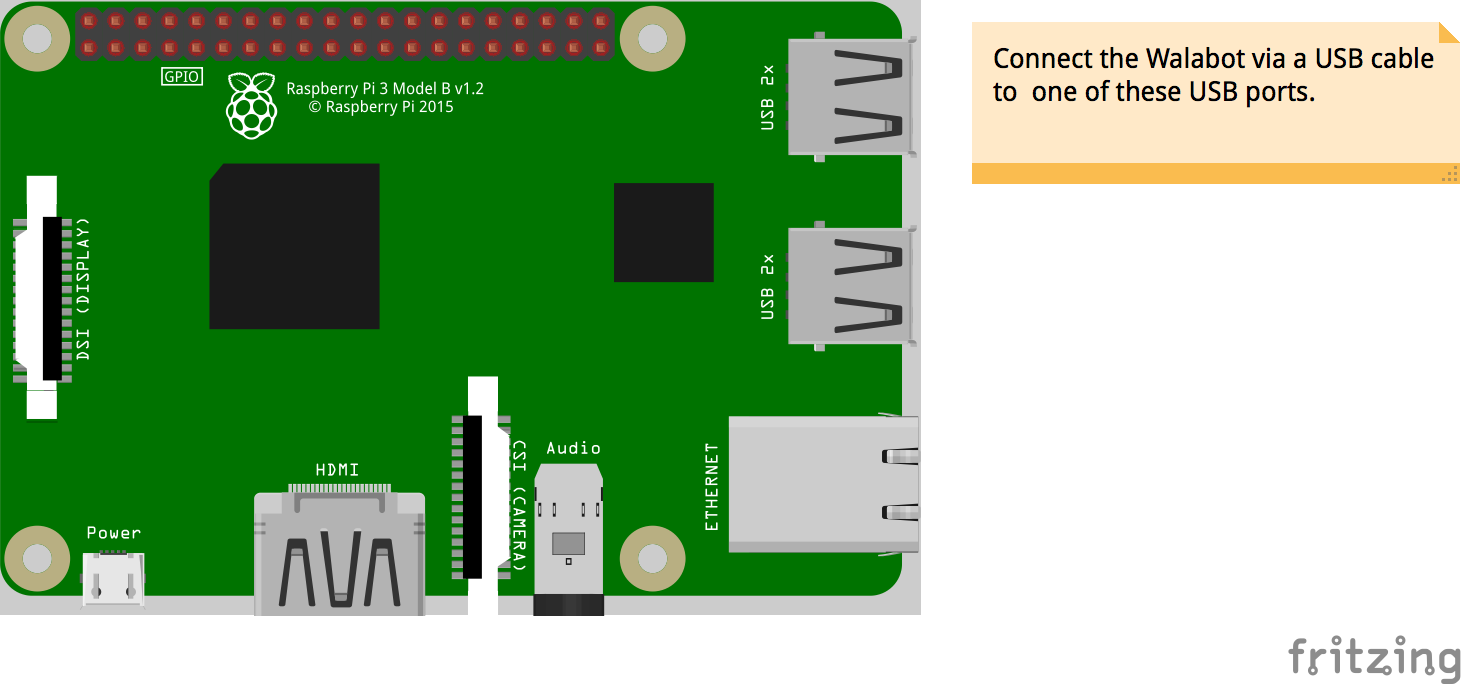
- Step 5: Attach the Raspberry Pi and Walabot through the USB to micro USB cable. Note: Use the offcenter micro USB adapter.
- Step 6: Power the Raspberry Pi with the Cana Kit 2.5A powersupply for Raspberry Pi. This power supply si sufficent to power both the Raspberry Pi and the Walabot simultaneously.
- Step 7: Place the Raspberry Pi and Walabot hardware in a room with the array facing toward open space.
- Step 8: Plug in the Amazon Echo and place it in a prominent spot in the room. It can be close to the other hardware or in an separate space in the room.
The Github repository contains all of the necessary resources for this project.
- Step 1: Open your computer terminal and type the following command. This will download all of the needed resource for the project.
git clone https://github.com/jonmendenhall/walabotBattleship.git
Google Firebase is used in this project as the database to which the Amazon Alexa Skill obtains the live data stream.
- Step 1: Click here and select "Go to Console."
- Step 2: Click "Add Project." It will prompt you to fill in your project name and country/region. Once the information is filled in, press "Create Project."
- Step 3: Click "Add Firebase to your web app." Copy the apiKey, authDomain, databaseURL, and storageBucket onto a text editor like MS Word or Pages. Note: This confiuragtion data will be used for connecting the Raspberry Pi to Firebase.
- Step 4: Click "Database" in the left-side navigation bar. Then press "Get Started."
- Step 5: Click the "Rules" tab. Copy the code below into the online editor, replacing what was already there. This is necessary to change the security settings, allowing the project to access the database.
{
    "rules": {
        ".read": "auth == null",
        ".write": "auth == null"
    }
}
- Step 6: Now open the file lambda/index.js from the downloaded Github repository, and modify line 15 to match your Firebase project name. (Example below)
firebase.host = "PROJECTNAMEHERE.firebaseio.com"
AWS S3 is a cloud storage platform that is used to hold the sound effects for the project.
- Step 1: Click here and sign into your AWS account or create an account.
- Step 2: Click "S3."
- Step 3: Click "Create bucket." Then fill in the name and region to match the picture below. Then click "Next" twice to change permissions.
- Step 4: Manage the public permissions to "Grant public read access to this bucket." Then click "Next" and "Create bucket."
- Step 5: Click "Upload" and select the files in the sounds folder of the downloaded Github repository. Click "Next."
- Step 6: Manage the public permissions to "Grant public read access to this object(s)." Then click "Next" twice and "Upload."
- Step 7: In the downloaded Github repository, modify line 16 of lambda/index.js to match the S3 bucket name you created. (Example below)
const s3bucket = "BUCKETNAMEHERE"
- Step 1: In your computer terminal, navigate to the downloaded Github repository then execute the setup-aws file. This will generate the zip file to be uploaded to your AWS Lambda Function.
The Alexa Skill allows the player to play battleship through an Amazon Echo device. AWS Lambda is used to store the Alexa Skill code.
- Step 1: Click here and sign into the Amazon developer console or create an account.
- Step 2: Click "Your Alexa Dashboard," and then select "Get Started" under Alexa Skills Kit.
- Step 3: Click "Add New Skill," and fill in the required skill information. Click "Save" then "Next."
- Step 4: Copy the contents of intentSchema.json from the downloaded Github repository into the Intent Schema field on the AWS developer console.
- Step 5: Add each of the slot types in the picture below, fill in the mode and the values on consecutive lines.
- Step 6: Copy the contents of sampleUtterances.txt into the Sample Utterances field on the AWS developer console. Click "Save" then "Next."
- Step 7: Go back to the AWS console and Click "Lambda."
- Step 8: Click "Create Function," and fill in the Name. Make sure the Runtime is "Node.js 6.10." For "Role." Select "Create a custom role," and fill in the information to match the picture below. Press "Allow."
- Step 9: Now change "Role" to "Choose an existing role." Select the role that you just created.
- Step 10: Click "Create Function."
- Step 11: Select "Alexa Skills Kit" from the list of triggers. Scroll down to select "Disable" Skill ID verification, and then click "Add" and "Save."
- Step 12: Click the Lambda function at the top of the tree in the Designer. Scroll down to "Function code."
- Step 13: Change the code entry type to "Upload a .ZIP file." Then upload the generated lambda.zip file and press "Save."
- Step 14: Copy the ARN string at the top of the page, and go back to your Alexa Skill in the developer console.
- Step 15: Select AWS Lambda ARN for service endpoint type. And then, paste the ARN into the field below. Click "Save" then "Next."
The Alexa Skill ID is as follows:
"amzn1.ask.skill.5e1aa5d2-744e-46d8-979d-d38def6fe124".
Each Raspberry Pi connects to a Walabot and scans your position in the room. During gameplay, it will upload your position to Firebase for a live battleship experience. Note: the following steps should be executed on each Raspberry Pi, not just one.
- Step 1: Download the code onto your Raspberry Pi from the Github repository. Navigate into the downloaded folder and run setup-pi. This will install the necessary libraries for the python code on the Raspberry Pi.
git clone https://github.com/JMendenhall1028/walabotBattleship.git
cd walabotBattleship
./setup-pi
- Step 2: For each Raspberry Pi, open battleship.py and change line 5 to match which player it is assigned to. Note: make sure the Raspberry Pi's do not have the same player number.
player = 1 # this will upload data for player1
or...
player = 2 # this will upload data for player2
- Step 3: Run the command below, and make sure your Raspberry Pi is set to Console Autologin under Boot Options, then Desktop / CLI.
sudo raspi-config
- Step 4: Run the command below to edit the startup configuration file.
sudo nano /etc/profile
- Step 5: Add the following line to the end of this file, then press CTRL+X, then Y, then ENTER to save the file.
python3 walabotBattleship/battleship.py
Both Raspberry Pi's are now setup, and will now run the battleship python program when they are rebooted.
Demonstration


_copy_P5AWOdT4dX.png?auto=compress%2Cformat&w=48&h=48&fit=fill&bg=ffffff)


Comments
Please log in or sign up to comment.