


What is different about this system ?A very simple electronic circuit provide the DCC signal and power for the track, however the App does the real work ! pdate The computer on your phone is utilised to the full by constructing the codes required to form each packet of instructions, thus simplifying Uthe job of the Arduino controller !
Update 14 Feb 2023 - PCBs available once more here.
Added L6203 h-bridge option and increased o/p from 2 to 2.5 amps
Update 17 Jan 2022: New App 'Locomotive DCC 2' with roster for 50 locos with short or long address. CV read/write 1-1024. Program on the main (PoM) where consists or double headers may be set up. Also, modified circuit diagram replace a 10k with a 470 ohm resistor.
Examples of the App screen shots:
No need to purchase any propriety systems, this is a stand alone unit operated by a free App called 'LocoMotive'Works with NMRA compliant decoders. This system compiles the operating DCC packets within the App which are sent to the Arduino interface to combine with the DCC clock signals. Purchase this PCB here.Get free App LocoMotive on Google Play Store.Features include:
- Control of 1 to 50 locos in roster with short or long address.
- Ideal for small to medium size layouts
- 2.5 Amps load drives up to 16 of OO/HO locomotives using H-bridge specified
- Short circuit protected
- Automatic over current cut-out, adjustable in Arduino code
- Lights and direction
- Functions 1 to 32
- Edit function names, visibility and momentary action
- Turnout / points / accessories operates up to 256 pairs of outputs
- Edit turnout names
- Custom naming of your locos and set max speed for each
- Program on the Main (PoM) where consists or double headers are set up
- CV read/write 1-1024
- Add your own accessory addresses
- Choose a DC power source to suit scale used (Z/N/OO/HO/O/G) 14v to 20v
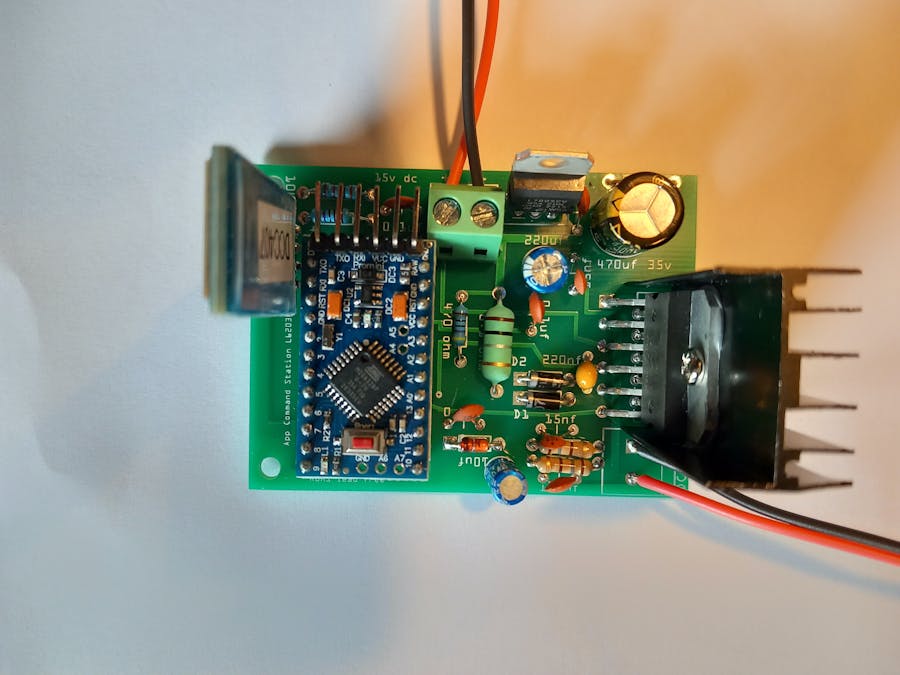
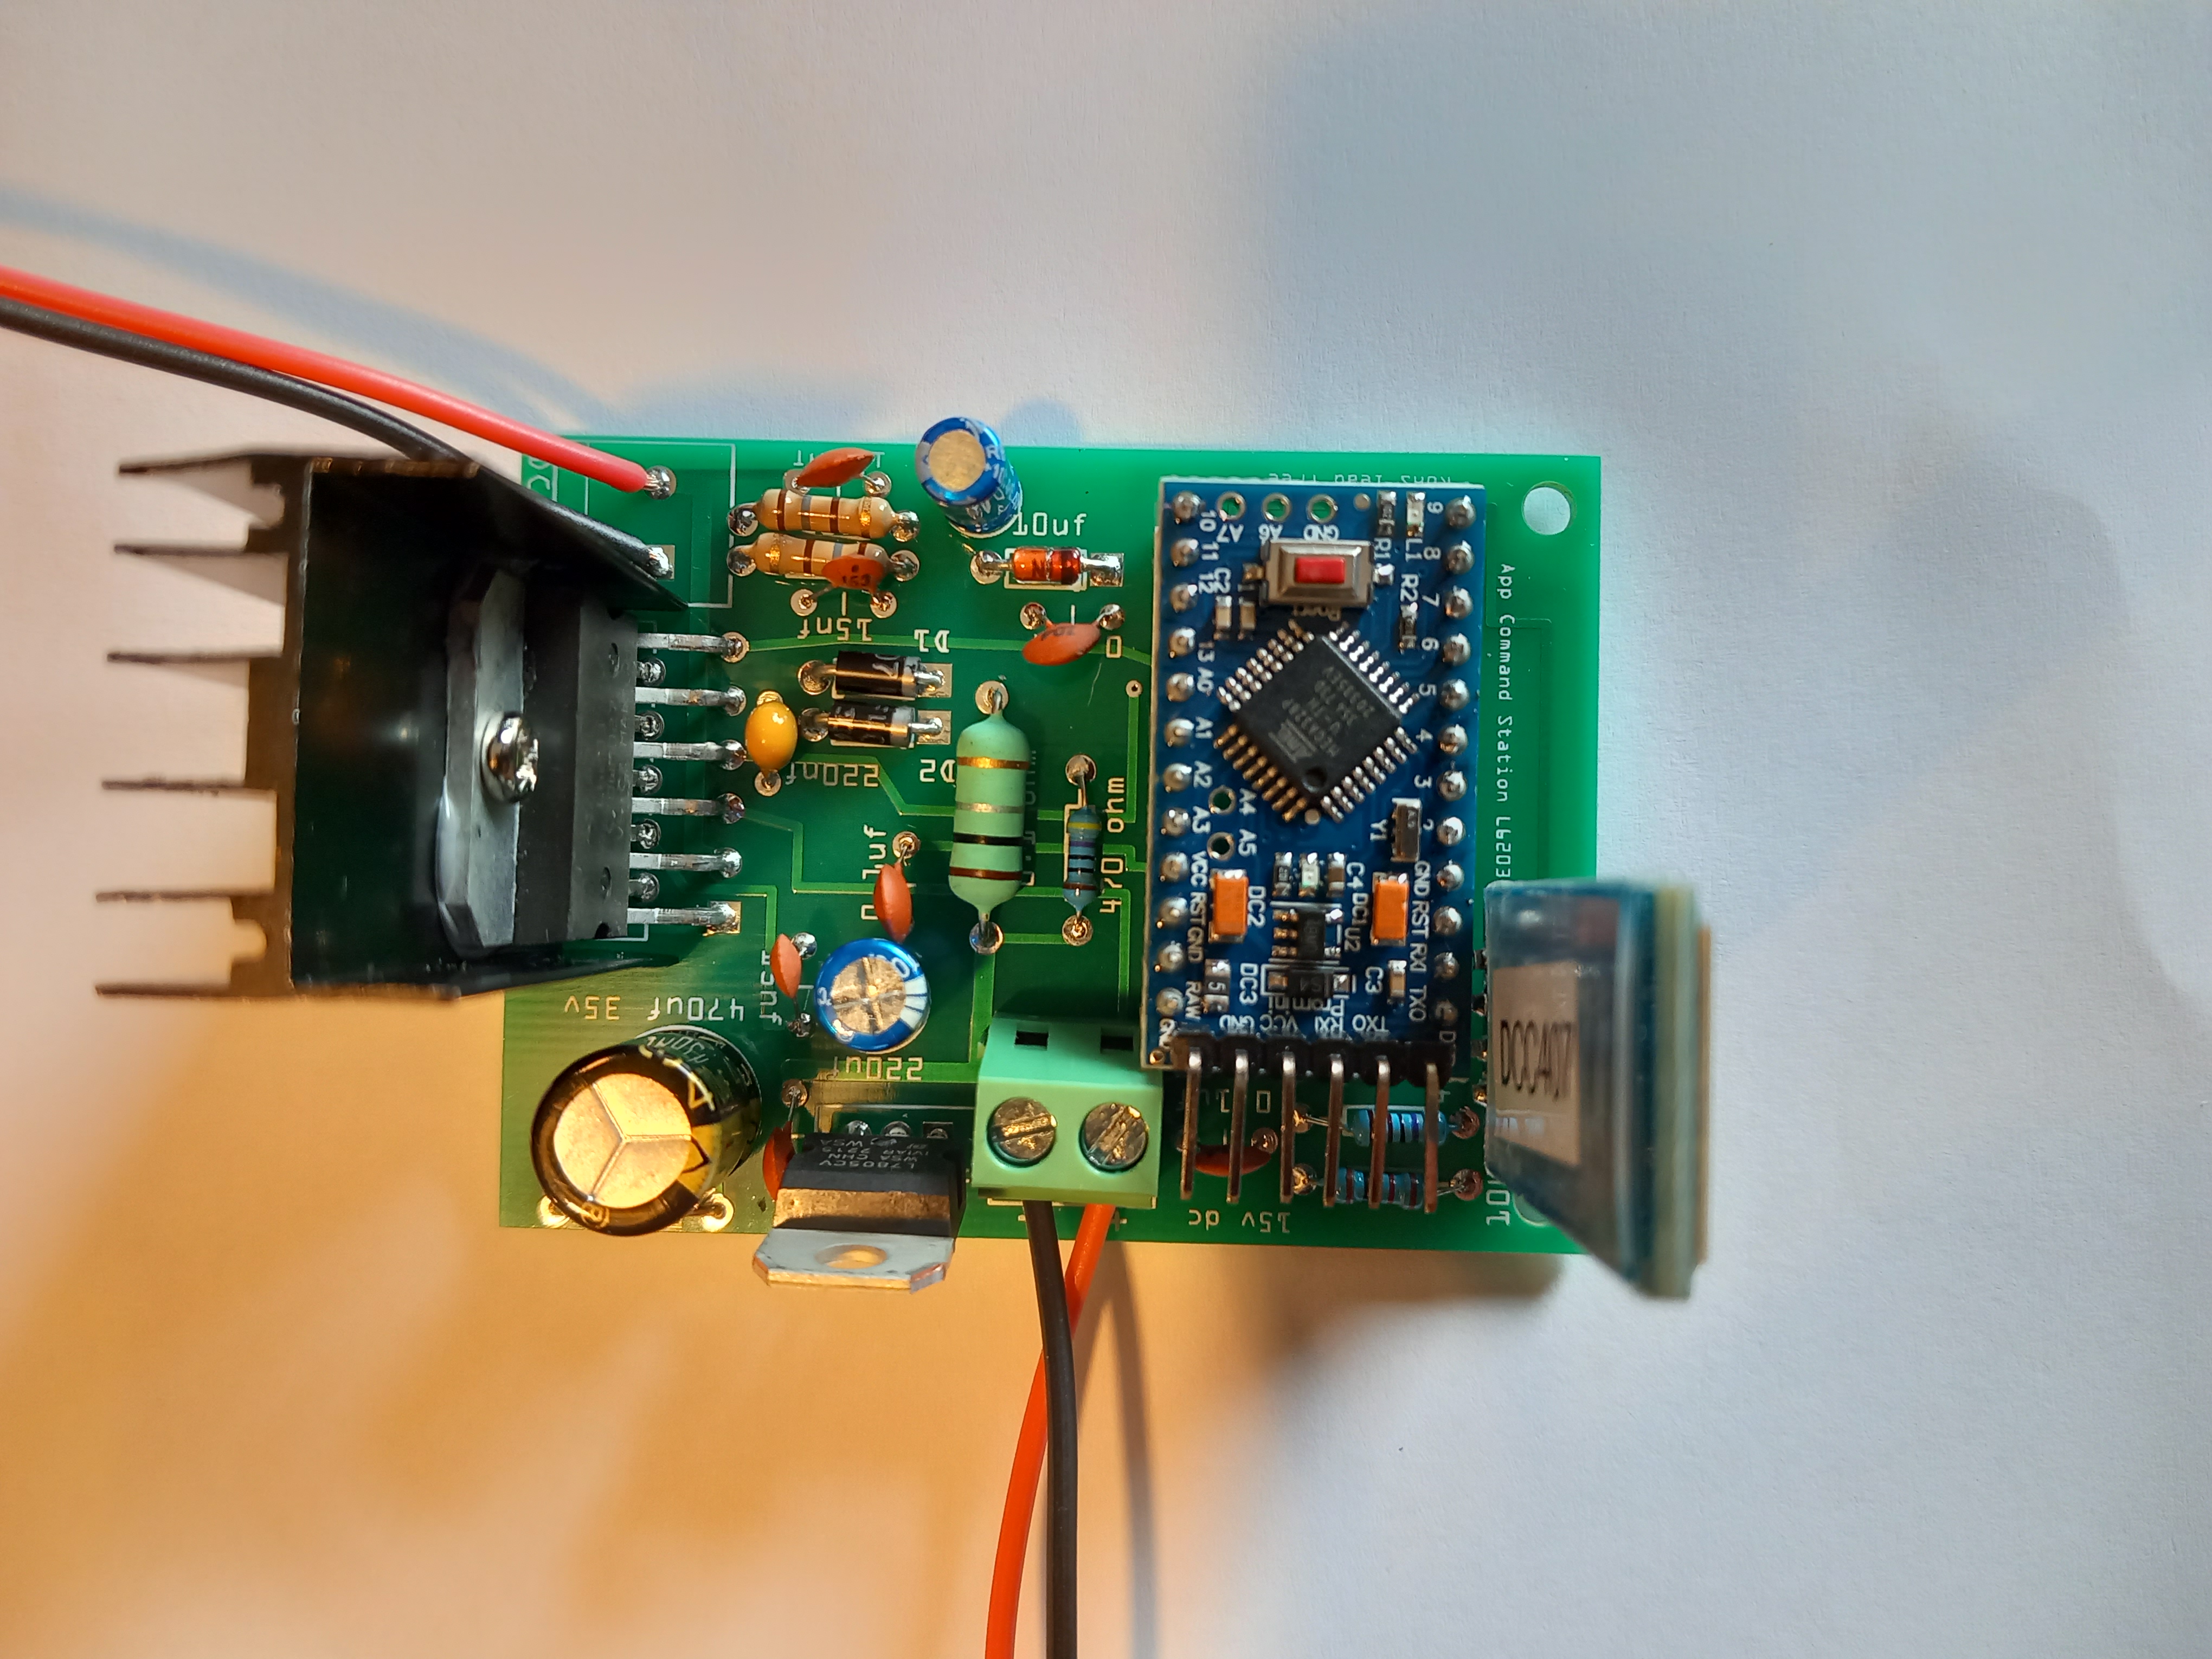
Further to previous work on DCC wireless systems, I have developed a Bluetooth Command Station linked to a receiver Arduino based circuit with a HC-06 BT module and a LMD18200 (or L6203) H-bridge Motor driver delivering 2.5 Amps.
The overall cost of parts is around £30.
Step 1: Arduino SketchThe full sketch is attached. This portion is the loop and data receiver code. The Android App sends a complete packet to the receiver and is decoded here into an array of data. Depending on whether 3 or 4 bytes are received the code will generate the correct DCC packet format for the train track.
void loop() {if(bluetooth.available() > 0); {inString = bluetooth.readStringUntil('\n');}if (inString.substring(0, 1)== "D") {string();}delay(20);}
The string() void then splits out the data from the text string received and places each instruction into itsappropriate position in the DCC packet.
For example:
A received text string of 'DD, 3, 63, 12, 48, ' translates into a 4 byte Speed packet of 8 bits each :
DD = message IDByte: [1] [2] [3] [4]Decimal: [3] [63] [12] [48] Binary: [0000 0011] [0001 1111] [0000 1100] [0001 1000] Action: [Loco 3] [speed steps] [ loco speed] [ XOR data check]
A received text string of 'DD, 1, 129, 128, ' translates into a 3 byte Function packet of 8 bits each :Decimal: [1] [129] [128] Binary: [0000 0001] [1000 0001] [1000 0000] Action: [Loco 1] [ F1 on] [XOR data check]
For more information on the NMRA packet standard refer to:https://www.nmra.org/sites/default/files/s-9.2.1_2...
The LMD requires the DCC signal on the DIR pin and the PWM pin held HIGH.
Step 2: Fritzing Circuit DiagramThe Arduino Pro Mini receives the Bluetooth data via the HC-06 module. The Arduino generates the NMRA standard clock cycles of data in packet format. The received data interrupts the sequence when new data is received and the DCC packet is updated to send instructions to the train tracks.
List of parts required for LMD18200t version :
PCB available here.
1 off Arduino Pro Mini Atmega328P 5V/16M
1 off LMD18200T H-bridge
1 off HC-06 Bluetooth module
1 off 0.1 ohm 2W Metal Film Resistor 0.1R 2 Watt (11.5 mm x 4.5 mm)
8 off Capacitor 0.1uf
2 off 10kΩ resistor
2 off 180 ohm resistors
1 off 470Ω resistor
1 off Capacitor 10uf 25v
1 off Capacitor 220uf 16v
1 off Phoenix Contact MKDS 1/ 2-3, 5 2 Way Screw PCB Terminal Block 13.5A 200V 3.5mm
1 off 4.7kΩ resistor
1 off L7805 CV Positive Voltage Regulator IC
1 off 4 pin Female Header Edge Pins Strip 0.1" 2.54mm
2 off 12 pin Female Header Edge Pins Strip 0.1" 2.54mm
1 off Zener Diode 3.6V; 0.5W 1N4732A
Wire
Power `supply: For OO/HO layouts use a 14v DC power supply (e.g. laptop charger unit from eBay). For example this delivers up to 2.5 Amps. Check the size of panel mounted socket required to fit the DC jack plug on the power supply chosen for this project. https://www.ebay.co.uk/itm/Samsung-AC-DC-Adapter-...
To extend the range of the HC-06 Bt module, solder a wire onto the end of the antenna on the module. I used a solid copper wire (from mains earth wire) 31.2 mm in length (1/4 of wave length for 2.4 GHz). See photo above.Please note - the HC-06 connections are Rx (on PCB) to Rx (on module) and Tx to Tx. Please note, the antenna wire should be covered in sleeving to avoid accidental shorting with other components.
The code limits the max current to 2.5 Amps when reached, the LMD18200 h-bridge is shut down by applying a HIGH signal from D13 on the Arduino to the 'Brake' input on the h-bridge.
The use of a 0.1 ohm current sense resistor gives an analog input range of 0 to 200 mv on Arduino sensor pin A0 for up to 2.5 Amps load. For approx 5mv per analog step input (1023 total steps or divisions) gives 0 to 40 divisions or 2 Amps / 40 = 50mA per division. The measured current precision is 50 mA however we are protecting the h-bridge when 2.5 Amps is reached. The LMD18200 also has in-built over temperature protection as a back up.
if(C >2500){ // 2.5 amps
Serial.println("Over Current"); digitalWrite(13, HIGH); }
The value of the current drawn is sent to the Android App via Bluetooth every second.void send_c(){t = millis() - lastmillis; if (t >= interval){ bluetooth.write(sensorValue); bluetooth.write('c'); lastmillis = millis(); } }
Step 3: Android AppDownload the free App from Google Play Store - 'LocoMotive'
Download the full App (£5.99) from Google Play Store - 'LocoMotive DCC'
Download the full App (long address/PoM/CV 1-1024) )£8.49) from Google Play Store - 'Locomotive DCC 2'
Instructions are attached for the full version App.
Comments
Please log in or sign up to comment.