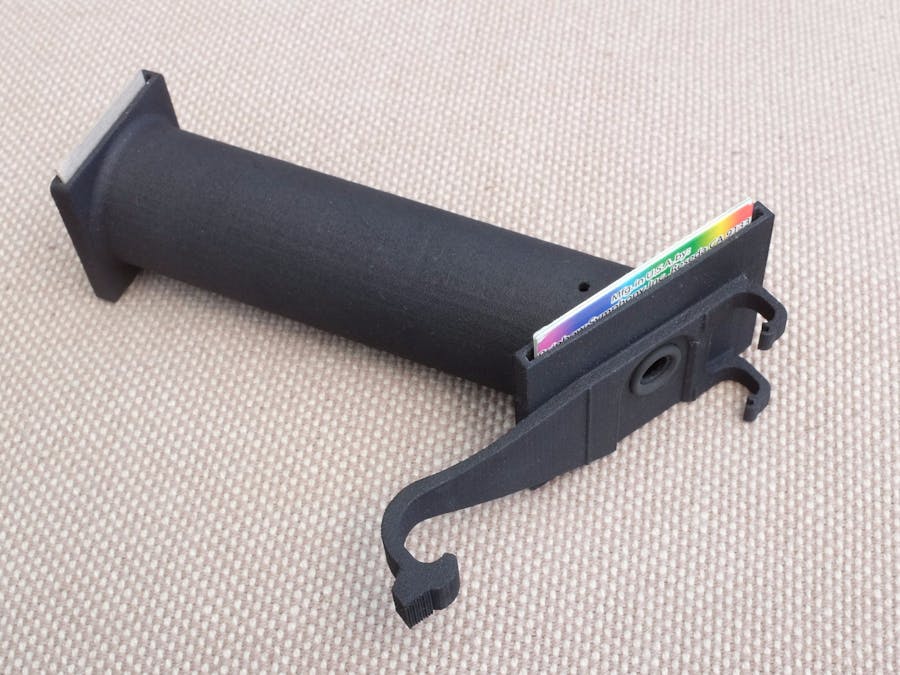
The purpose of this project is to show the design principles of the simplest optical spectroscope. It should not serve as a 3D design tutorial, our goal is to step through development process.
The original construction was designed with Solid Works. For the publishing as open-source DIY project, the design was imported in Onshape cloud 3D tool and can be seen and loaded from anyone.
Link to a project: DIY spectroscope in OnShape CAD tool
The main part, the heart of spectroscope is the refracting element. It can be a prism or a diffraction grating. Its role is to split the incoming light beam into a spectrum; the rays range from blue to green to red.
Diffraction Grating on Wikipedia
For our spectroscope, concerning the dimension and weight, the grating is used. The angle of first diffracted light beam maximum is about 30 grad. The angle between blue and red rays in that portion of rays is about 30 grad. Knowing the opening size of the camera, we have the conditions for the dimension of placing grating.
If we want to utilize the first diffraction maximum, and place the diffraction grating parallel to opening camera lenses, we must bend the incoming light about 30 grad. That‘s why our tube is not perpendicular to phone case.
if we use the lens with the focal length F and place the slit diaphragm in the distance equals to F, we will get the parallel lights rays in the grating directions.
The last element: input hole, in pro-jargon: slit diaphragm. If we enable the whole incoming light, we will get the big blur area of the light on the camera. The size of the opening, is a trade-off between amount of light (bigger hole) or resolution (small pinhole).
In the more sophisticated version of the spectroscope, the optical objective should be used, which has bigger aperture (lightning) and smaller angular resolution (greater focal length).
The similar situation is in photography. The simplest form of photo camera, is the pin-hole camera. But to get photos with good quality we must use photo objectives
Design DetailsStep 1: Create your own CAD WorkspaceOpen Project: DIY_spectroscope in Onshape from Onshape Menu, call "Copy workspace" and create your own sandbox to freely modify and experiment.
If you are have experiences with another 3D constructing tool, as Blender, FreeCAD, a.s.o., you can export the design from Onshape and edit with your preferred tool.
Step 2: The Holder for Diffraction GratingThe diffraction grating from Rainbow-Symphony (link) was chosen. It has the dimension of typical photo-slide. Considering the distance from the camera, we design the grating holder.
The lens should be close to the grating and its optical axis should be bent to the camera optical axis. For the lens placing, a small rand is prepared through 2 holes in the wall. You can place a small amount of glue to hold the lens.
Step 4: Input Hole in Focal DistanceFor the experimenting with various holes, we have created an insertion box. We can insert plates with diverse holes and check the results.
The last but not least is the holder of Android device. It has some functions to fulfillment.
- Must be easy to lock and unlock
- Hold stable
- Position should be always the same.
All these tasks are not possible to realize with a simple construction. In our case the repeatability of mount position is not the best. But if you attach the spectroscope to the Android phone and make some observations and scans without unlocking the scope, you can minimize that drawback.
As first reference Device, the LG Nexus 5 was chosen. To define dimensions of the holder, we have used two methods:
- classic: measure the phone with the caliper
- modern: we have found 3D model of Nexus 5 in www.grabcad.com
Export file in proper format (STL, or STEP, etc.) from CAD and order item by 3D-printing service. I'll suggest black unpolished plastic as material. Such a material is the best to minimize the disturbing reflections.
Step 7: Play with your SpectroscopeIn Google-Play, I've published the application Aspectra-mini. You can install the app and play with your self made spectroscope. Here are some screen shots of various light sources. Screen shots are taken with my Nexus 5. The Android application can be used on various phones and tablets.
The future development should consider following aspects:
- Holders for various devices
- Enhancement of spectroscope
- Utilizing better optics (optical objectives)
- “Through-light” spectroscope
I‘ll to thank my friend Dietrich for his help and contribution in realization of that project.


Comments
Please log in or sign up to comment.