


Hardware components | ||||||
_ztBMuBhMHo.jpg?auto=compress%2Cformat&w=48&h=48&fit=fill&bg=ffffff) |
| × | 1 | |||
 |
| × | 1 | |||
 |
| × | 1 | |||
 |
| × | 1 | |||
 |
| × | 1 | |||
 |
| × | 1 | |||
 |
| × | 3 | |||
A lot of us have Arduino starter kits that generally come with a single potentiometer and lots of buttons. You could, and you probably have, control the RGB LED with three different buttons. Alternatively, you could control it with three potentiometers just fine... but what can we do with a single one?
HOW IT WORKSHardware wise, it's pretty simple. We have two inputs being the potentiometer and the button. Button cycles through the modes (red -> green -> blue) and potentiometer sets the intensity of whatever colour we pick. Things get a little more interesting from here though.
We could just write the potentiometer value to the current mode. That was the first solution, but the issue with that lies in your original value set being overridden once you cycle through the modes. For example, let's say I'm mixing colours and I initially set red to 50/255, green to 100/255 and blue to 255/255. I'm set, I have my colour.
Now, what if we want more red? Say 70. If I press the button to go to blue->red, my red gets written to... 255. I have to dial it down all the way back down to 70. Now, I click the button and we go from red to green. Green is 70 now. We have to go back down to 50. Button press once more to blue... which is now 50 instead of the 255 we originally set. And so forth.
Thus, I set my course to save values of each colour to the LED, and to only start adjusting the LED when the current potentiometer value is equal to the old value of the current mode. It's simple in theory but took a lot more trial and error than expected. Just to showcase how it works simply, here's a video.
I set red to a high intensity. Then cycle through to green and blue on zero. The pot is on zero when I switch modes to red again and... it doesn't change to zero! I have to go back all the way up to the original intensity before the pot 'gains control' of red again.
Let's have a look at a fragment of the code here.
bool redState;
int redVal
int PWM;
if (currentMode == "red"){
 greenState=false;

if(redState == false && PWM == redVal){
   redState = true;
  }

if(redState==true){
   redVal = PWM;
   analogWrite(rPin, redVal);
  }
}
The mode is currently on red, set by the button. Upon entering the loop, the red state is false by default, and the redVal is 0 by default. Only when the PWM(value of the pot converted to a 0-255 scale) is equal to the currrent redval(0) and the redState is false, does the PWM value get assigned to the brightness of the red.
You probably have noticed the greenState assignment in this loop, and it's a bit of a janky solution to my problem but a solution nonetheless. You exit the loop with the redState true and you want to enter it with it false. I couldn't have initially assigned red to false at the start of the loop, because then it'd be false every time the code loops around(as long as currentMode = red). The solution? The preceding colour's 'if' block contains the false assignment to the next colour. Hence, redState=false; is indeed in the main blue 'if' block. Another solution was a while loop but to redefine all the variables in the while loop was a bit clunky.
Now combine three of these blocks for each colour and we get a colour mixer that can hold the values.
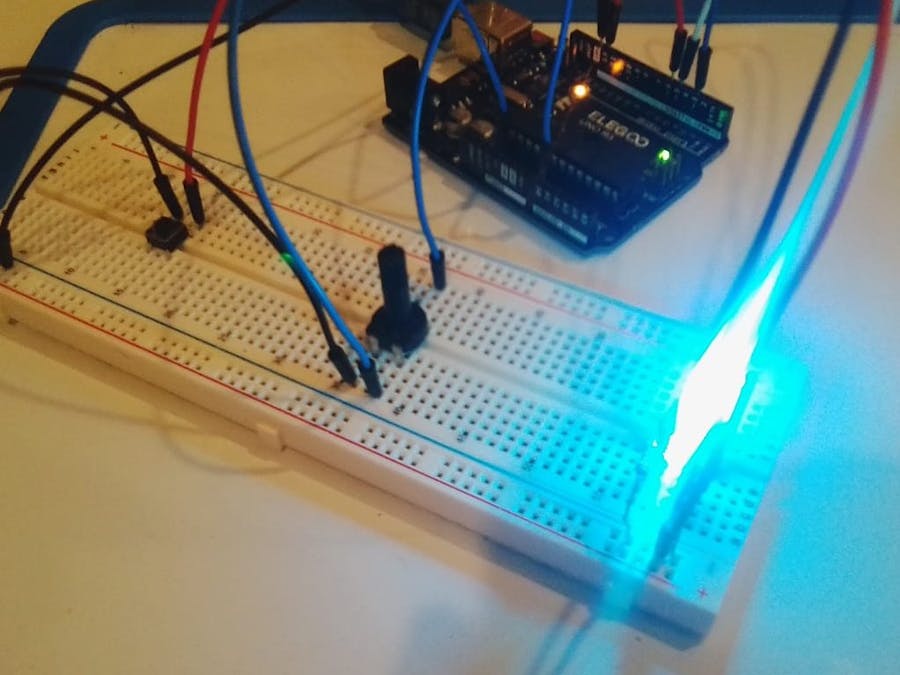
Here I make my favourite colour (in the dark for extra effect). Notice how I was able to skip past the green without triggering it? Well maybe not, but all that's left is to is build the circuit and try it yourself!
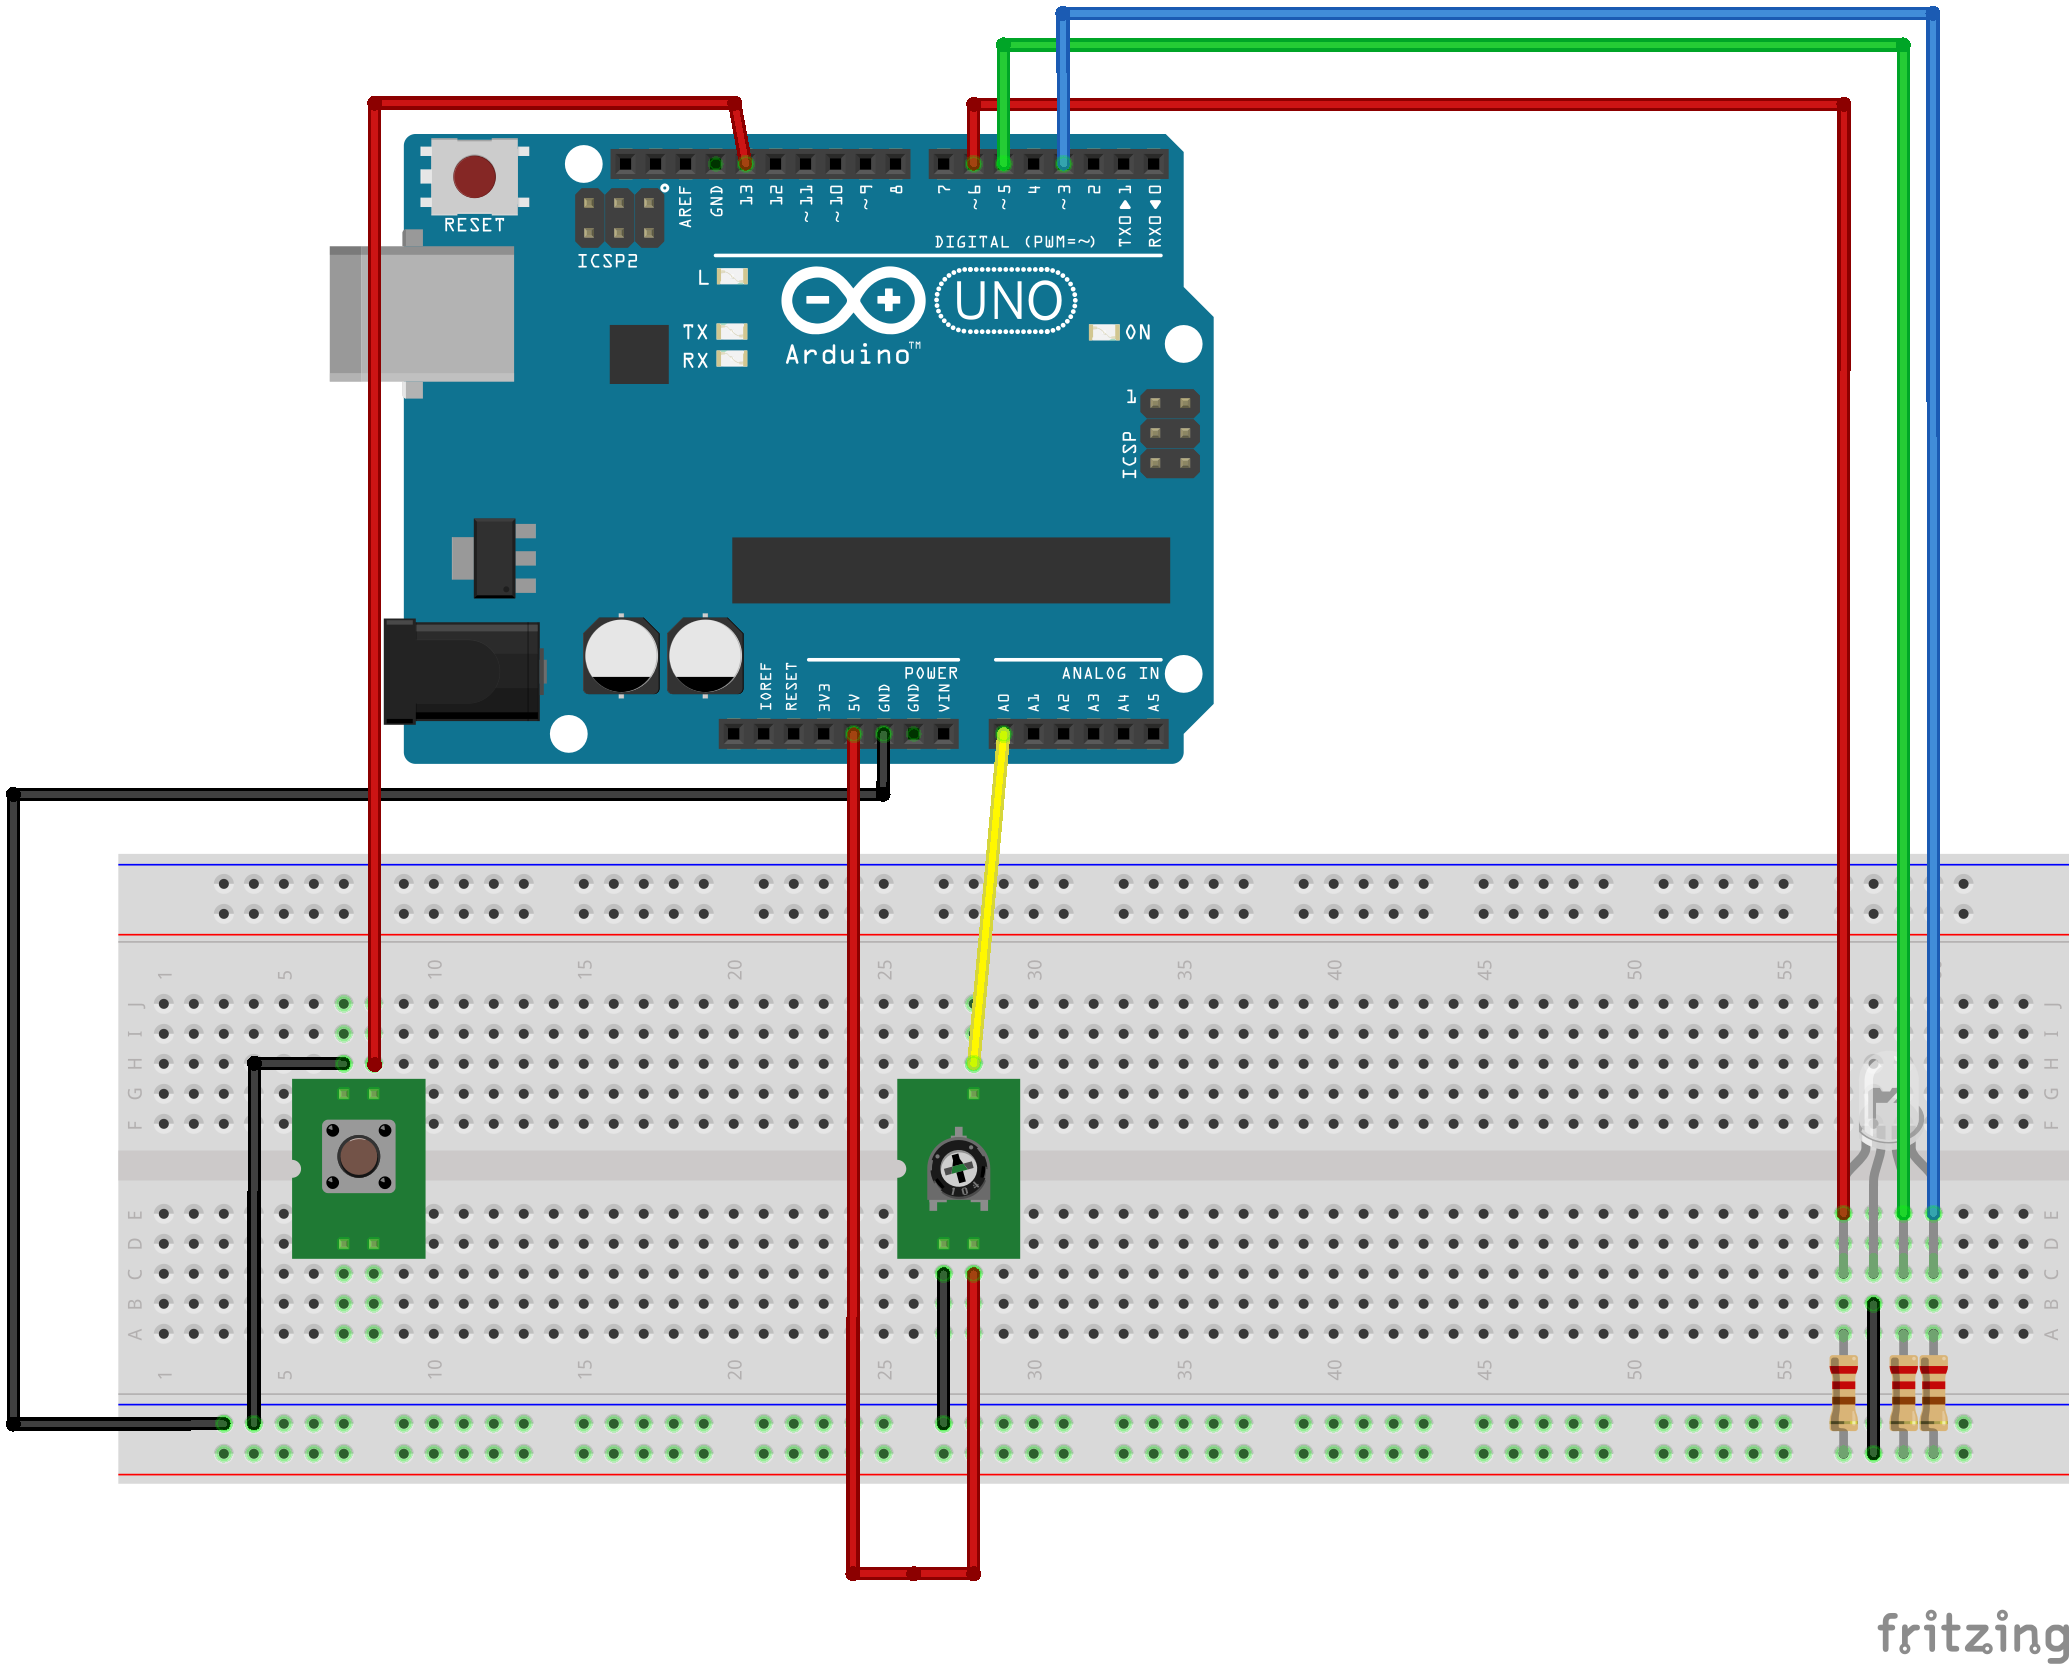
THE FUN PARTThe included schematic should hopefully be enough for you to piece this one together. Just a word of caution is that when you're adjusting the pot or pressing the button, you can easily shift the wires and get janky readings so try to wire it where you don't have to do too much finger acrobatics, unlike me. My potentiometer also could never get to zero, so I've included a piece of code that makes it zero once it reads below a certain value. You could always delete/adjust that to your liking.
When you switch modes to a new colour, remember you have to match the pot to the current value of the light. When a colour is off, you have to get the pot all the way back to its minimum value before it latches onto controlling the LED.
I am a beginner at programming so feel free to comment on how I can improve the project, or if the code could be cleaned up anywhere. Have fun mixing colours!


Comments
Please log in or sign up to comment.