- I hope you all are safe at home. At this time the whole world is facing the biggest crisis ever. The COVID-19, this pandemic makes us realize that how we could change our lives with different technology. By keeping this in mind, here "Voice Bell" can be used as a substitute of our normal door bell. With the help of google assistant we can use the bell just by saying "Okay Google, ring the bell".
- As the WHO suggest that do not touch anything, so we can use this technique for those who are providing us basic materials via home delivery such as vegetables, milk, groceries, etc.
- By using this "Voice Bell" anyone need not to touch the bell every time and need not to sanitize it.
STEP-1:CircuitConnections
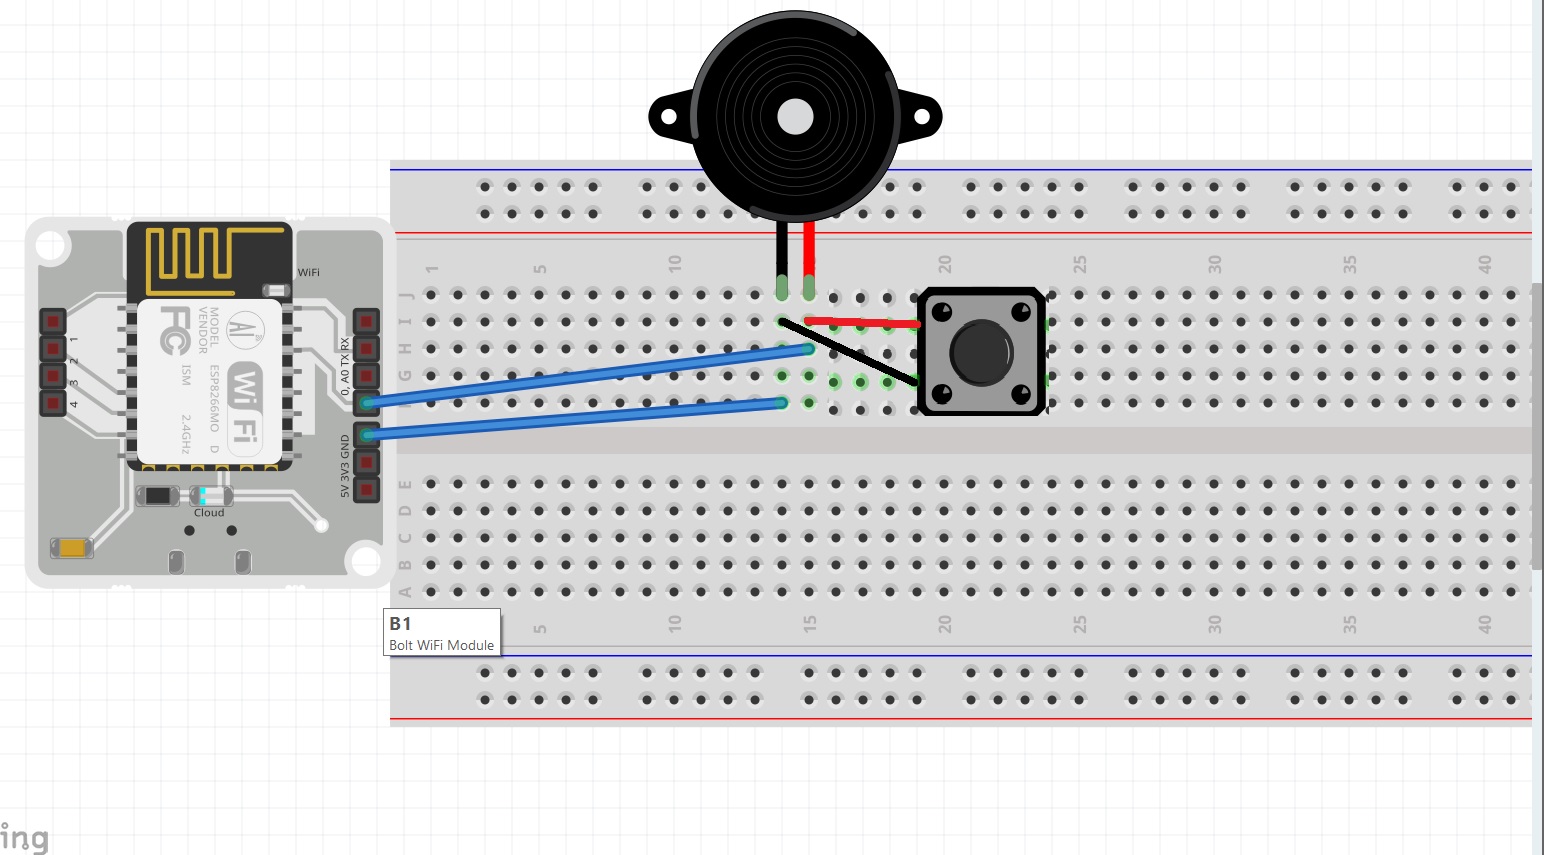
1) Connect the positive pin(longer leg) of the buzzer to the 0th GPIO pin (mine is red wire).
2) Connect the negative pin(shorter leg)of the buzzer to the GND pin. (mine is black wire)
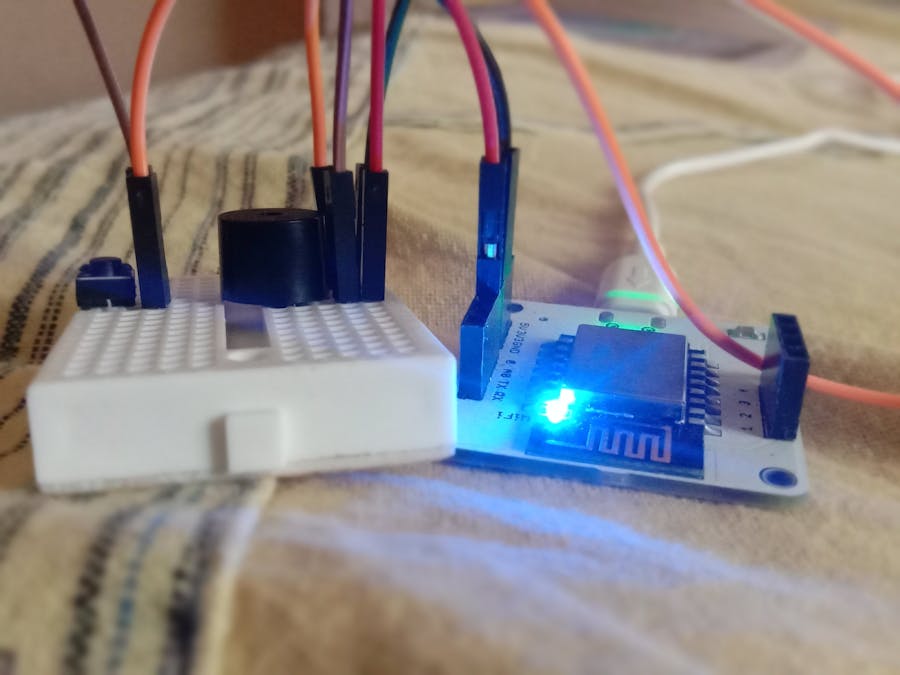
PICTURES FOR CIRCUIT CONNECTION WITHOUT SWITCH BUTTON:I have used the switch to switch off the buzzer untill user says the switch off the buzzer phrase to google assistant. It is optional. Use the jumping wires to the connection from the ends of the buzzer to the ends of the switches
1) Connect one end of switches to the 0th GPIO pin
2)Connect another end of the switch to the GND pinPICTURES WITH CONNECTION OF SWITCH BUTTON:
Complete connections for the project
STEP2: KNOW YOUR API KEY AND DEVICE IDFORWEBHOOKSURL
Login to cloud.boltiot.com and note the ID of your Bolt WiFi Module.
Now click on the API tab, click on Enable to see API key and copy it for further use
STEP 3:GPIO COMMANDS
we will need to use Digital Write as the buzzer is a digital output device.
goto https://docs.boltiot.com/docs/write-digital-output-1
Docs Tab -> API Documentation -> GPIO Commands API -> Write Digital Output
The command will be like this-: https://cloud.boltiot.com/remote/API_KEY/digitalWrite?pin=PIN_NUMBER&state=HIGH/LOW&deviceName=DEVICE_ID
API_KEY: You can get it from the API tab on the cloud dashboard.
PIN_NUMBER: pin number can be 0-4. the number should be 0 according to my schematic if you place it in 1, pin number should be 1.
HIGH/LOW: This value makes buzzer on/off. HIGH will turn it on, LOW will turn it off.
DEVICE_ID: The id of your device. You can get it from the cloud dashboard.
STEP 4:CREATING IFTTT TRIGGER
Open
Click on This
Choose Google Assistant -> Say Specific Phrase
what do you want to say is for accepting voice command. In this case, if you say Alert/alarm on in google assistant it will reply with ALERTING and trigger the circuit.
Here I have use a simple phrase "Ring the bell". After filling the fields click on create trigger.
After creating a trigger you will be redirected to Back page and you will see something like this
Click on then that and select the service as web hook
now we have to specify what should assistant do when triggered
- URL is https://cloud.boltiot.com/remote/API_KEY/digitalWrite?pin=0&state=HIGH&deviceName= DEVICE_ID
- Make sure that you have replaced API_KEY and Device ID with your's
Method: GETcontent Type : application/json
After completion of fields click on create action. After that click on finish and that's it. You have created a connection with assistant.
Repeat the steps from step 4 for triggering the buzzer to off. Their will be slight changes in the webhooks URL. The URL will be
https://cloud.boltiot.com/remote/API_KEY/digitalWrite?pin=0&state=LOW&deviceName= DEVICE_ID
Method: GETcontent Type : application/json
Now when you say "Okay google, Ring the bell", the buzzer will start and to stop the continue sound of buzzer press the switch and now say "Okay google, switch off the bell"


Comments
Please log in or sign up to comment.