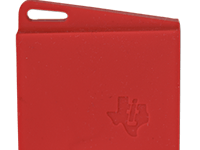
The SensorTag has various features that make it a phenomenal device to use for various applications, including Internet of Things (IOT) devices as well as a wirelessly connected RTOS (Real Time Operating System). This tutorial is made to illustrate how easy it is to go from an idea to fully working system using the sensortag.
Additional software you'll need:To program the SensorTag, you will need to buy/download the following material:
Code Composer Studio Version: 6.1.1.00022 Link: http://processors.wiki.ti.com/index.php/Download_CCS
BLE-Stack V2.1.1 software Link:
http://www.ti.com/tool/ble-stack
Installing code composer Studio:The first task we will have to do is install Code Composer Studio onto your computer. For those who already have that installed, skip this step. To install, download the setup files from the link above and run the setup.exe. The installation is self-explanatory, but the following images show what you need to make sure to install.
Once code composer has been installed, we can now add the BLE stack software libraries so that we can start programming the SensorTag! To do this, download the BLE stack software from TI and run the setup.exe. The setup is straight forward, just ensure it installs to your TI folder.
We now have all the necessary components to create our first sensor tag embedded project!
Adding the projects:To create our project, we will first add the default template for the SensorTag and SensorTag stack and program them.
- Open Code Composer Studio
- To import our example projects, first we will go into the Resource Explorer under view in CCS.
- Under this view we will select BLE Stack for Simplelink wireless MCUs, then CC2640f128, projects, and we can now see the SensorTagApp and SensorTagStack projects.
- Add these projects to your workspace by selecting the project and importing to workspace.
Now we that we have reached a state where we are about to program the SensorTag, I want to take a step back and examine the software that we are about to program. The SensorTag contains three vital components that make it operate correctly. The BIM (Boot Image Manager), the SensorTagStack, and the SensorTagApp. The BIM allows the SensorTag to control how and what image to boot, and allows for a hard reset of the SensorTag to a default image. The Stack is used completely for communication of BLE. The stack handles everything we don’t want to worry about with our GATT protocol and communications. Last but not least is the SensorTagApp, which is the heart and soul of our system. The SensorTagApp runs TI-RTOS and allows us to create tasks and interface with the stack to send and receive data. By modifying just the app project, we can accomplish nearly everything you’d want to do with the sensortag.
Lets program!We are now ready to program. Connect your Sensortag with the debug board, and connect it to your computer with a USB cable. Your computer should have all the necessary drivers, and recognize the device you plugged in. Next, click on the SensorTagStack project and click debug.
Once the program is running, we can now select the SensorTagApp project and debug it as well. If all is correct, you should have programmed the SensorTag, and now have the ability to debug the device. You can click play to start the SensorTag. The SensorTag has now been programmed with your environment suite, and you have all the tools necessary to start adding amazing features to your projects. Even though the project is running the same code as it was when you first got your SensorTag, I hope you now have a better understanding and can use your system to edit the SensorTagApp code and create your next IOT invention!


Comments
Please log in or sign up to comment.