Initially, I wanted to monitor the environment in another room by means of a Zigbee device collecting temperature and humidity data from a Thunderboard. I needed a screen to display the sensor data, but I didn’t want to use a developer board, so I decided to design a beautiful enclosure and create an exquisite product.
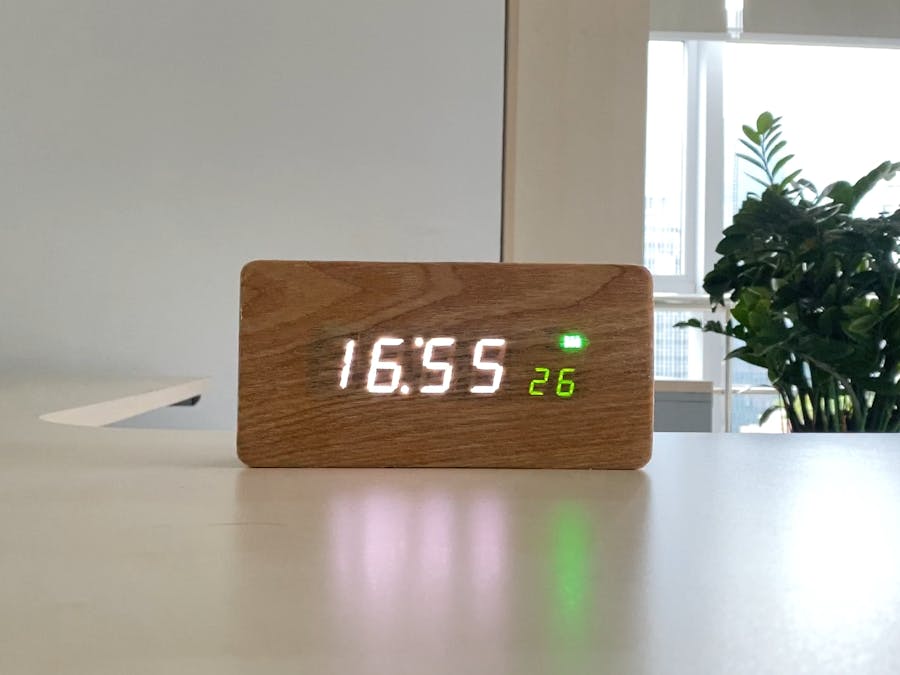
After considering a variety of enclosures, I decided to design a fine, clock-like wooden device for a nightstand or desk that would function as a smart alarm clock and display sensor data. The design would look like the figure below.
The device would show the time of day but also be able to display temperature or humidity as needed. I also wanted to add some fun and practical features. The device needed to be connected to the Cloud, which meant I needed to add a Wi-Fi module. I wanted the clock to have weather forecast reception capability, broadcast and alarm feature, so a speaker is needed.
The home sensor hub component structure graphic below is based on these required features, and I decided to call this Connected Home Sensor Hub the “iBox”.
EnclosureAlthough plastic and 3D printing techniques can be used to easily create precise and inexpensive enclosures, they can’t produce the fine aesthetics I was after, so I decided to go with real wood and started designing a dimension graphic and 3D module graphic.
The green part of the dimension graphic is the size of the PCB. The hole in the front panel of the wooden cube is reserved for a 7-Segment LED Digital Tube, as shown below.
Next, paste a similarly textured, thin wooden skin to cover the 7-Segment LED Digital Tube. This gives the device the appearance of a solid wooden cube.
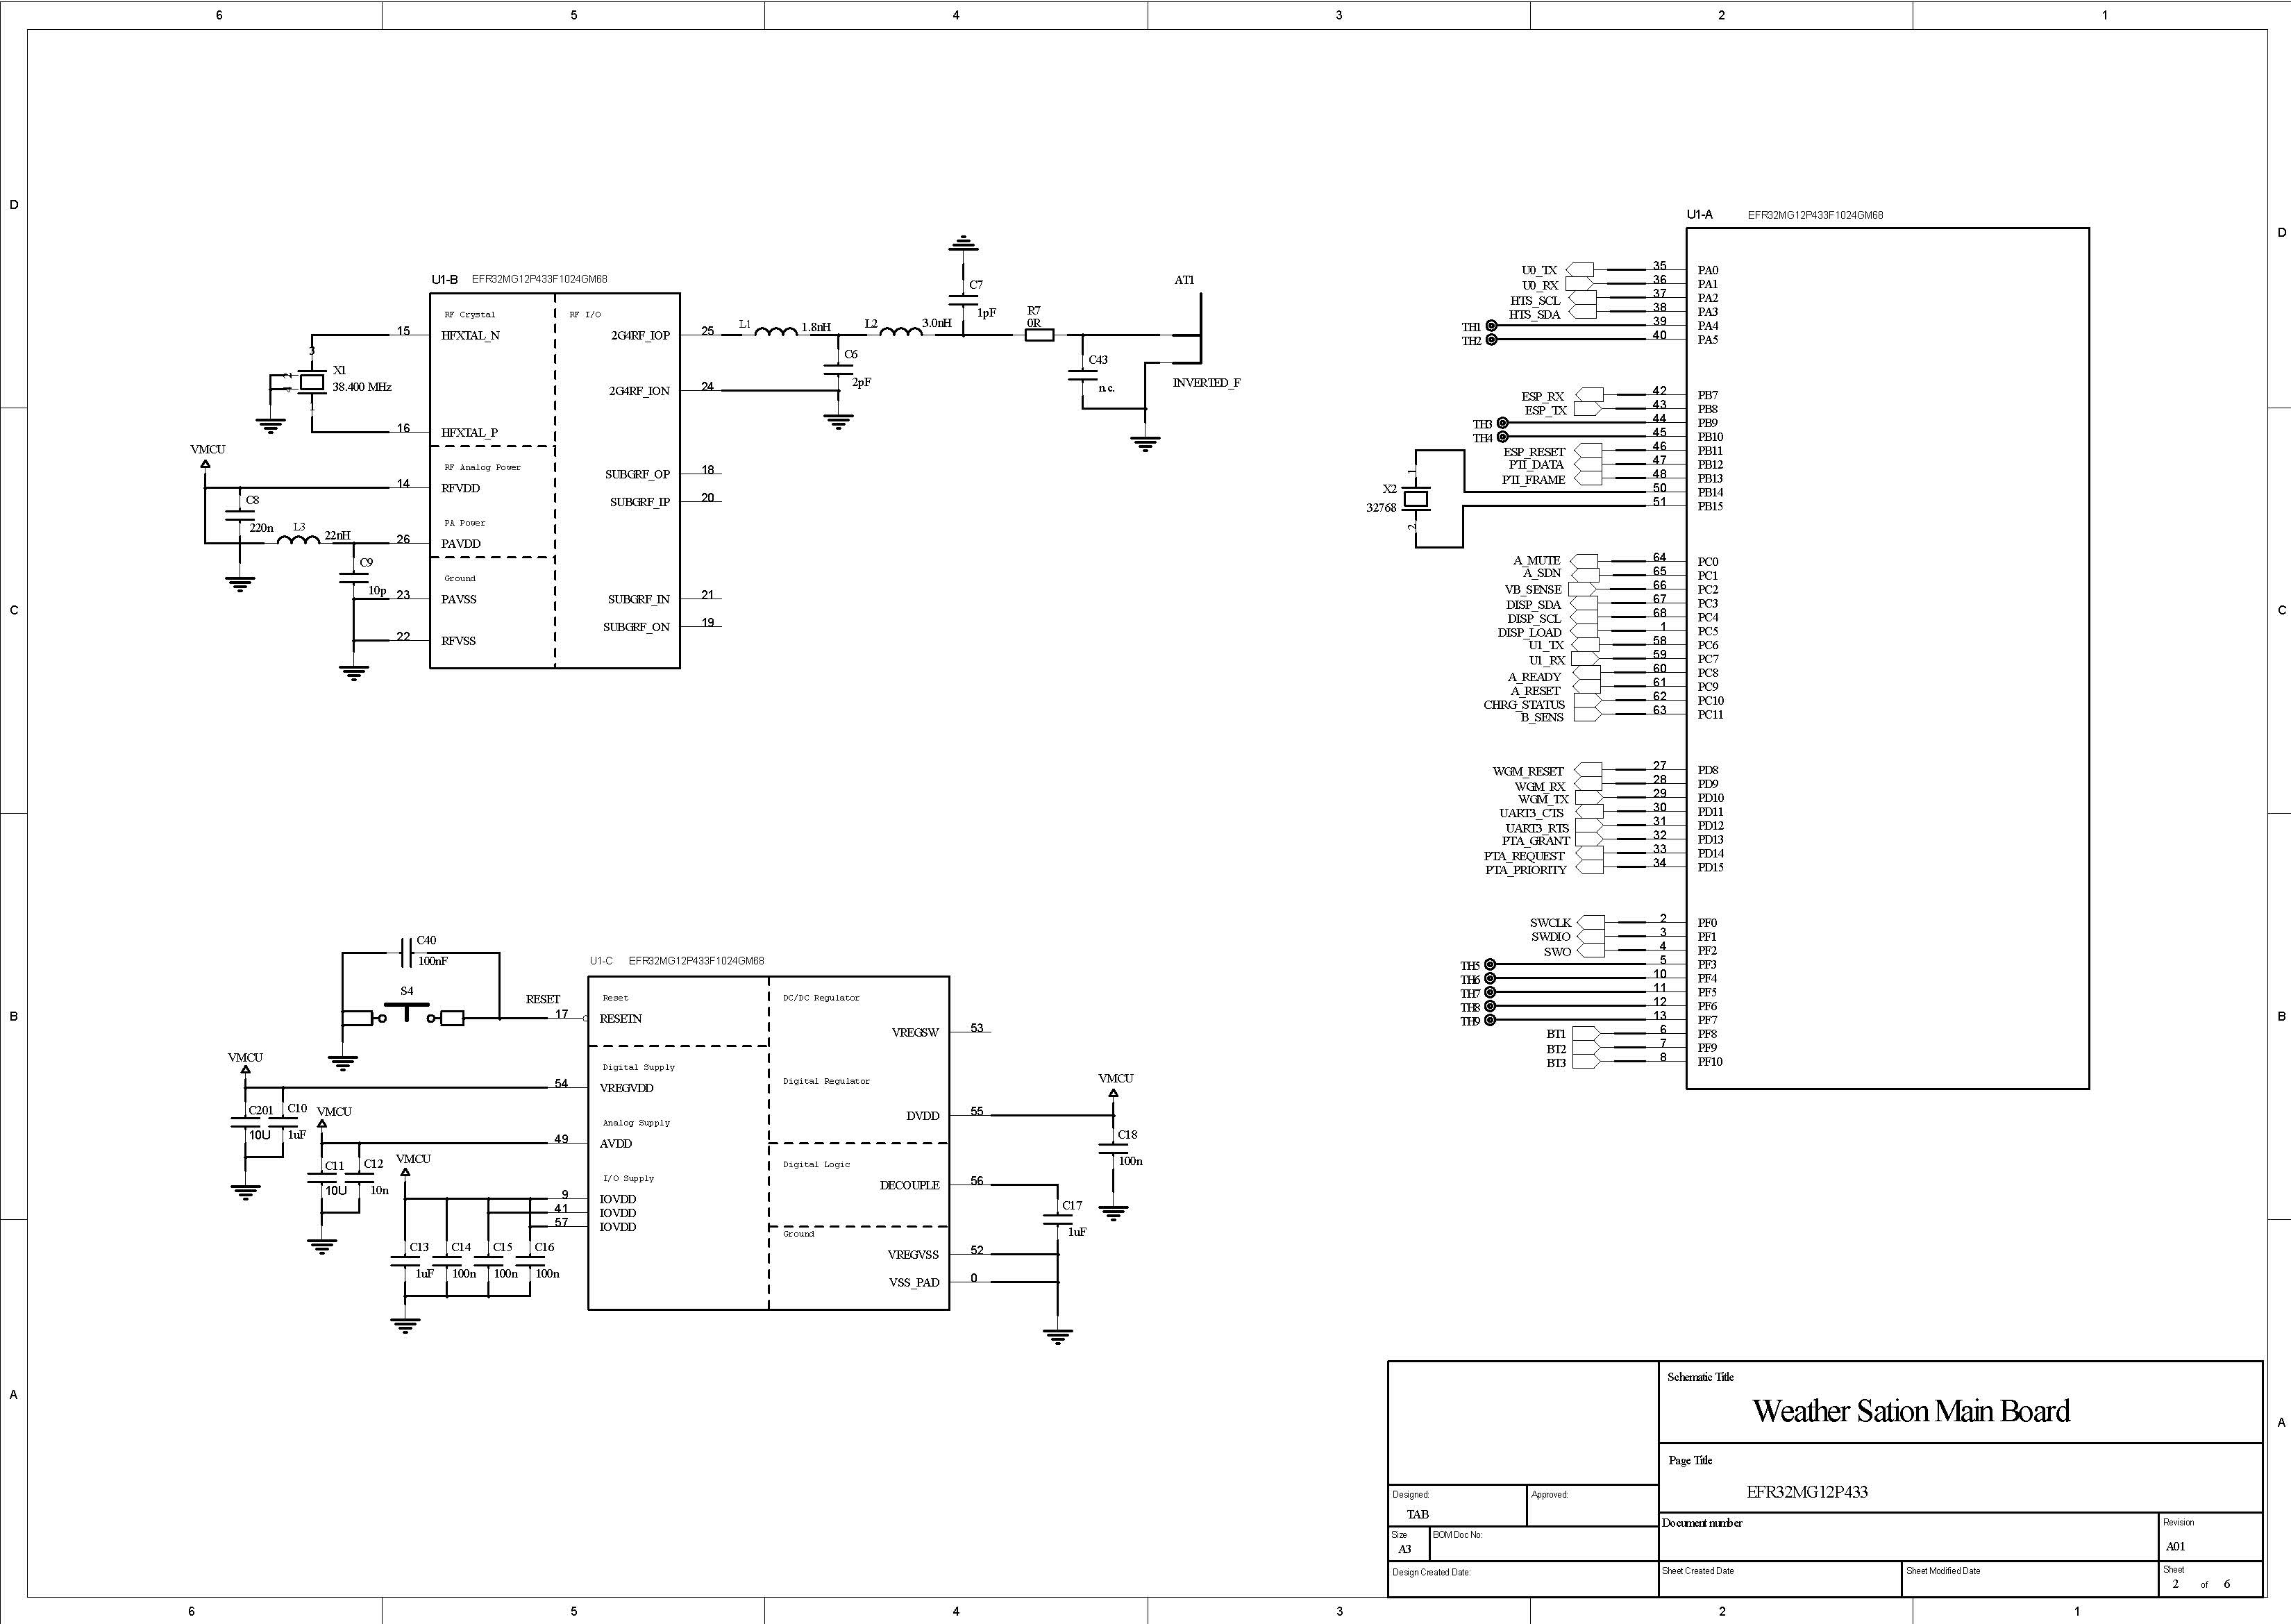
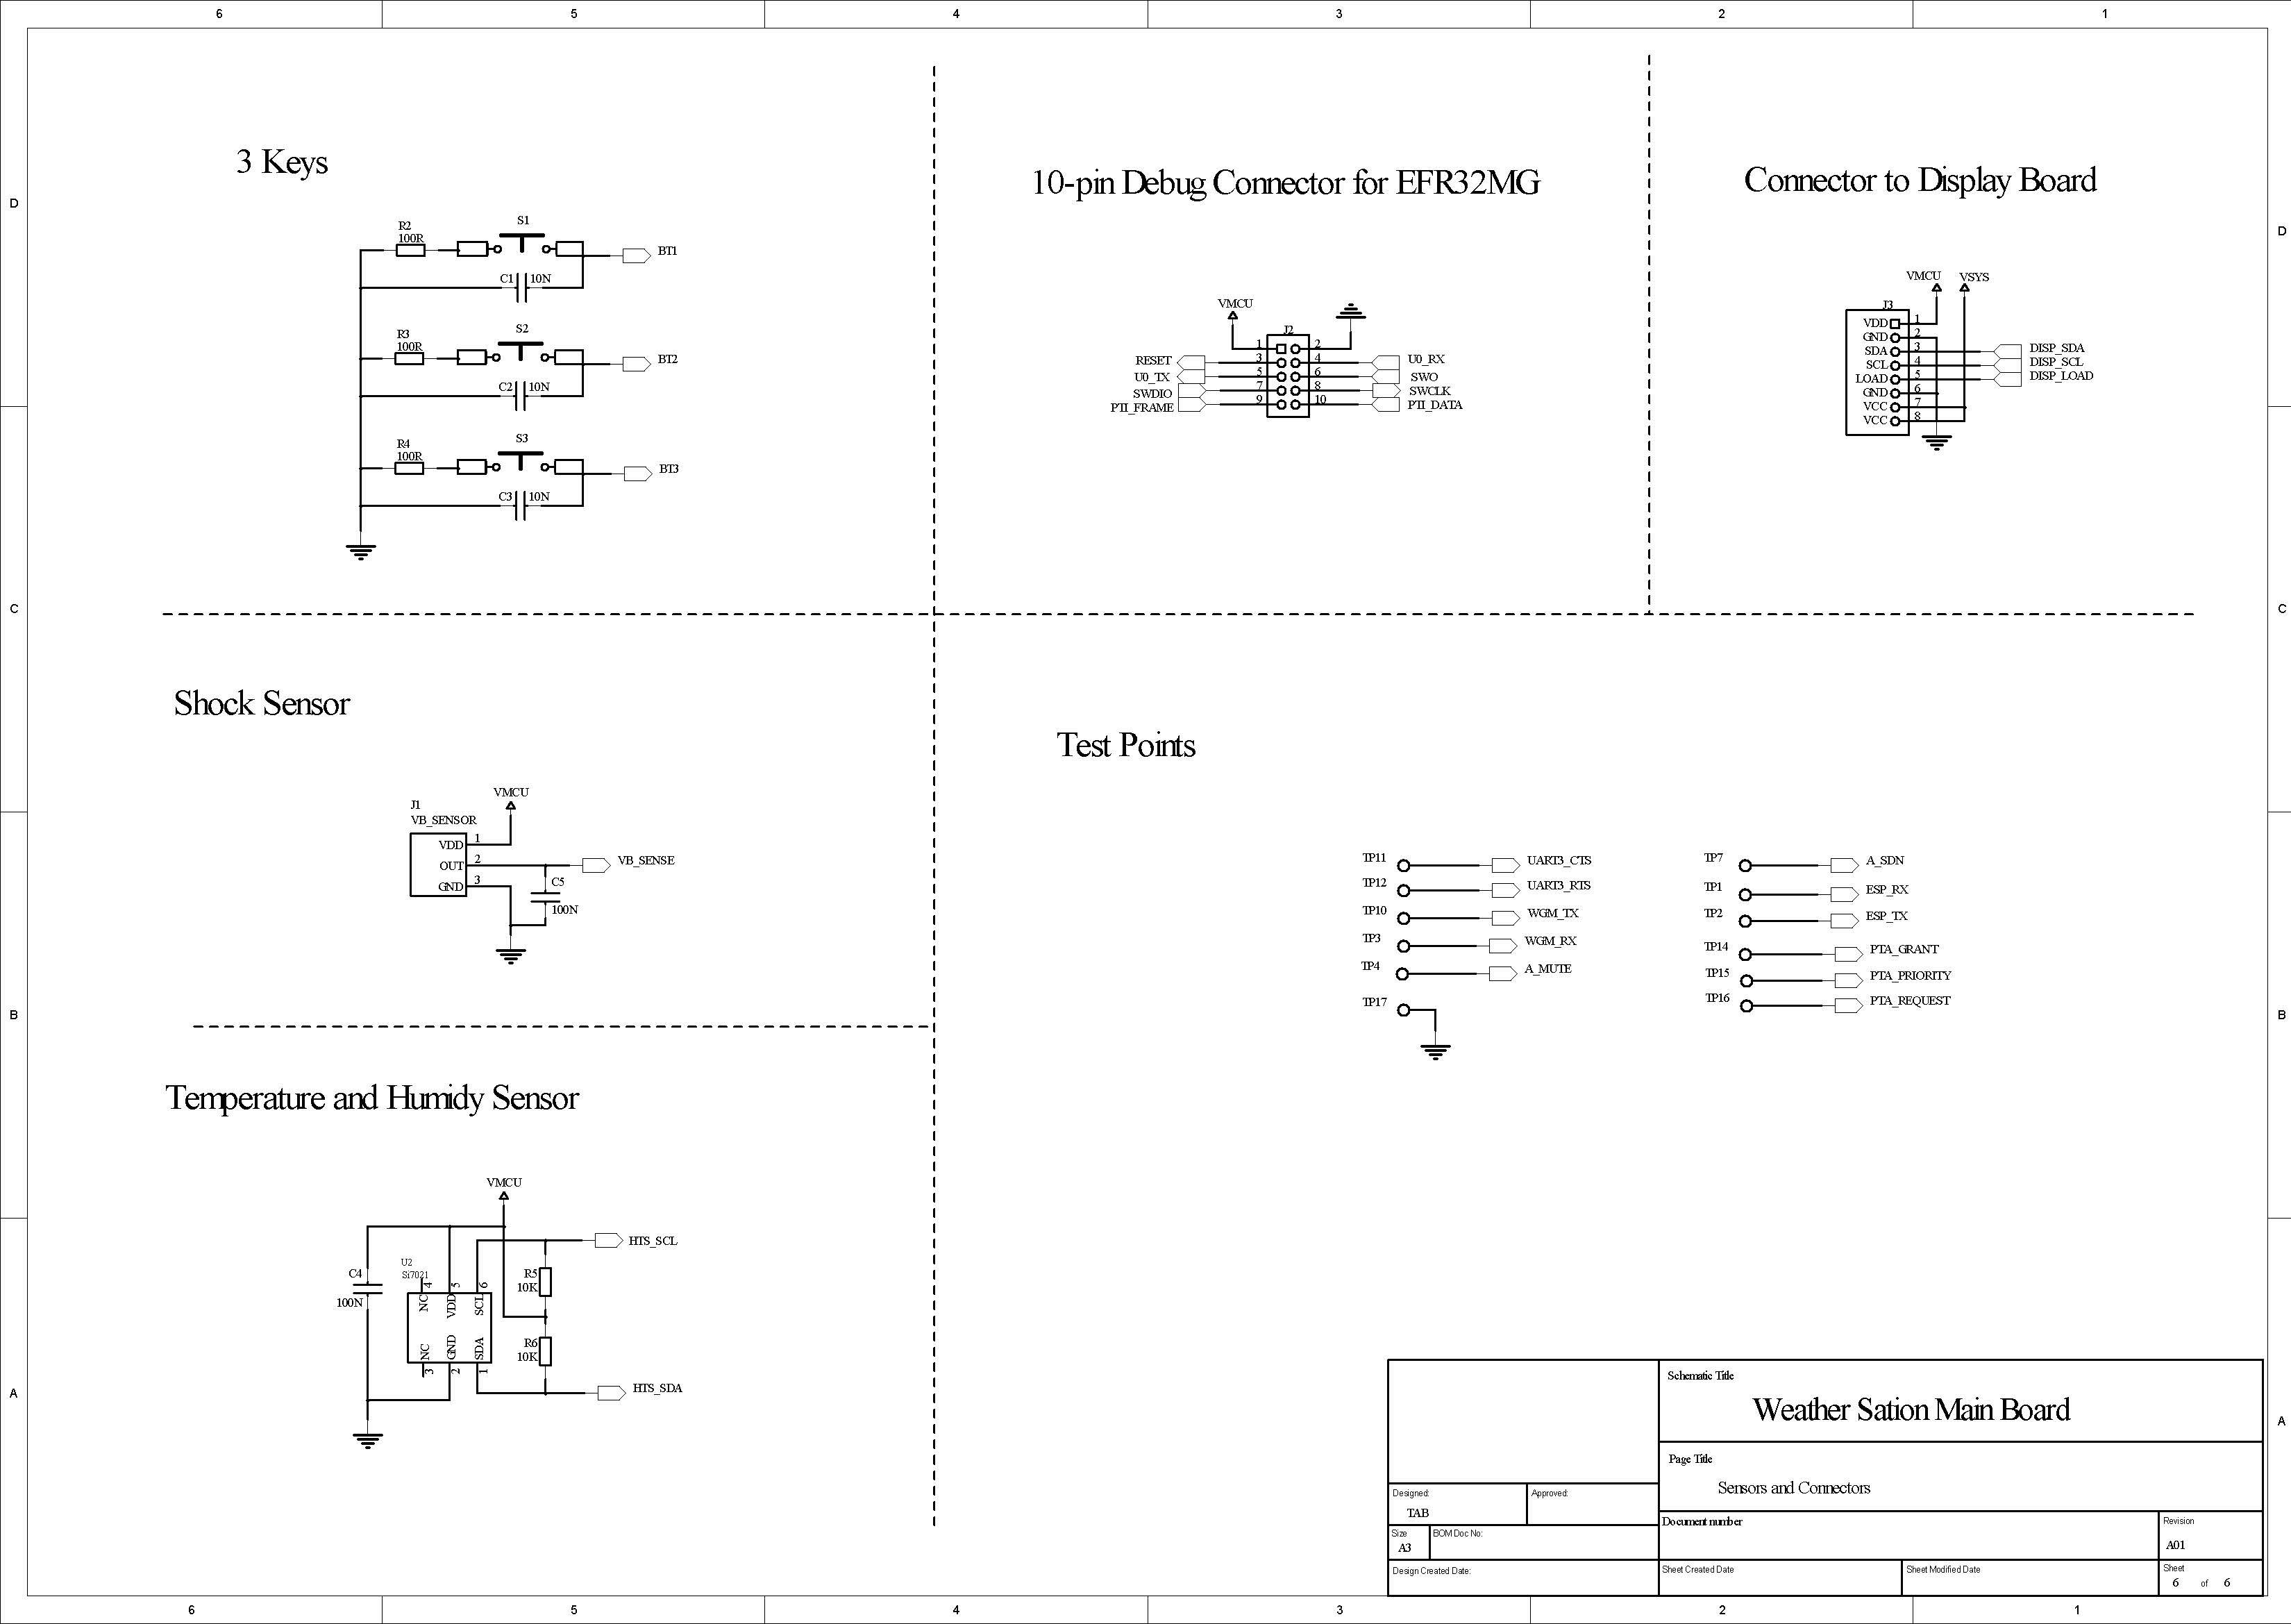
I decided to use the EFR32MG12P433F1024GM68 as the processor of the iBox. It is a 2.4 GHz wireless SoC that supports the ZigBee protocol. It has 1024 kB flash and 256 kB RAM, enough to run multiple tasks and support stored OTA firmware.
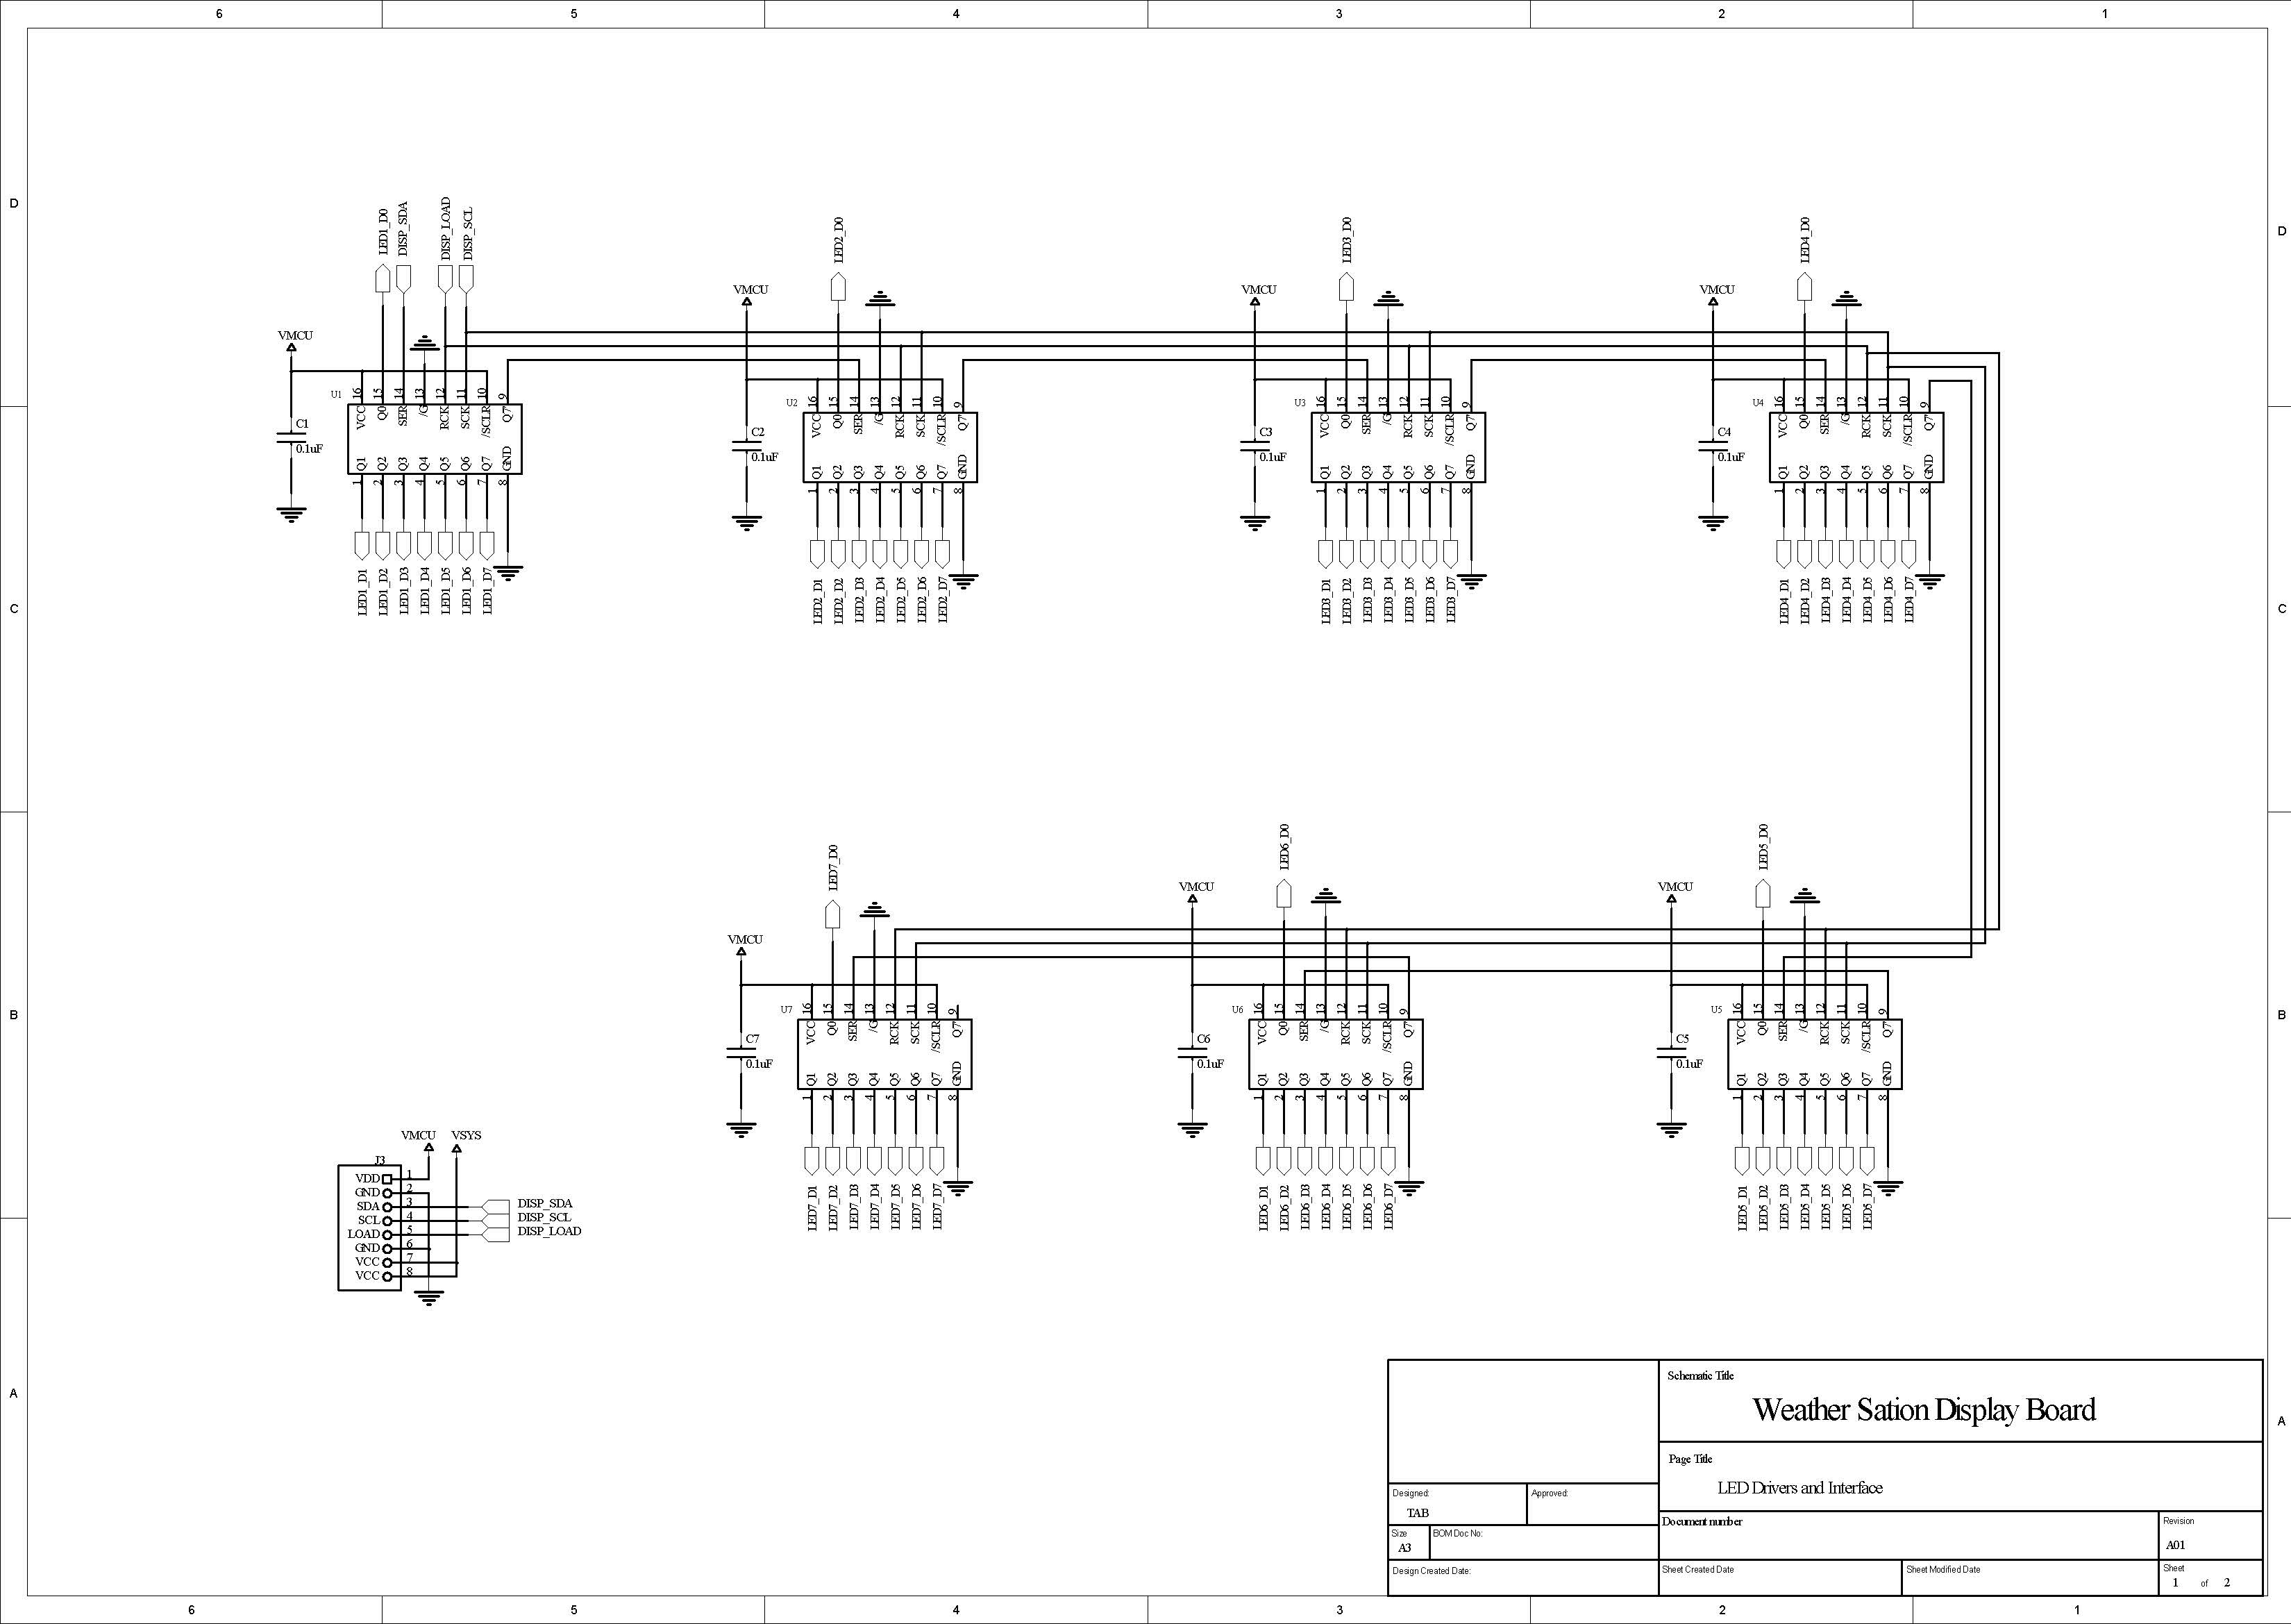
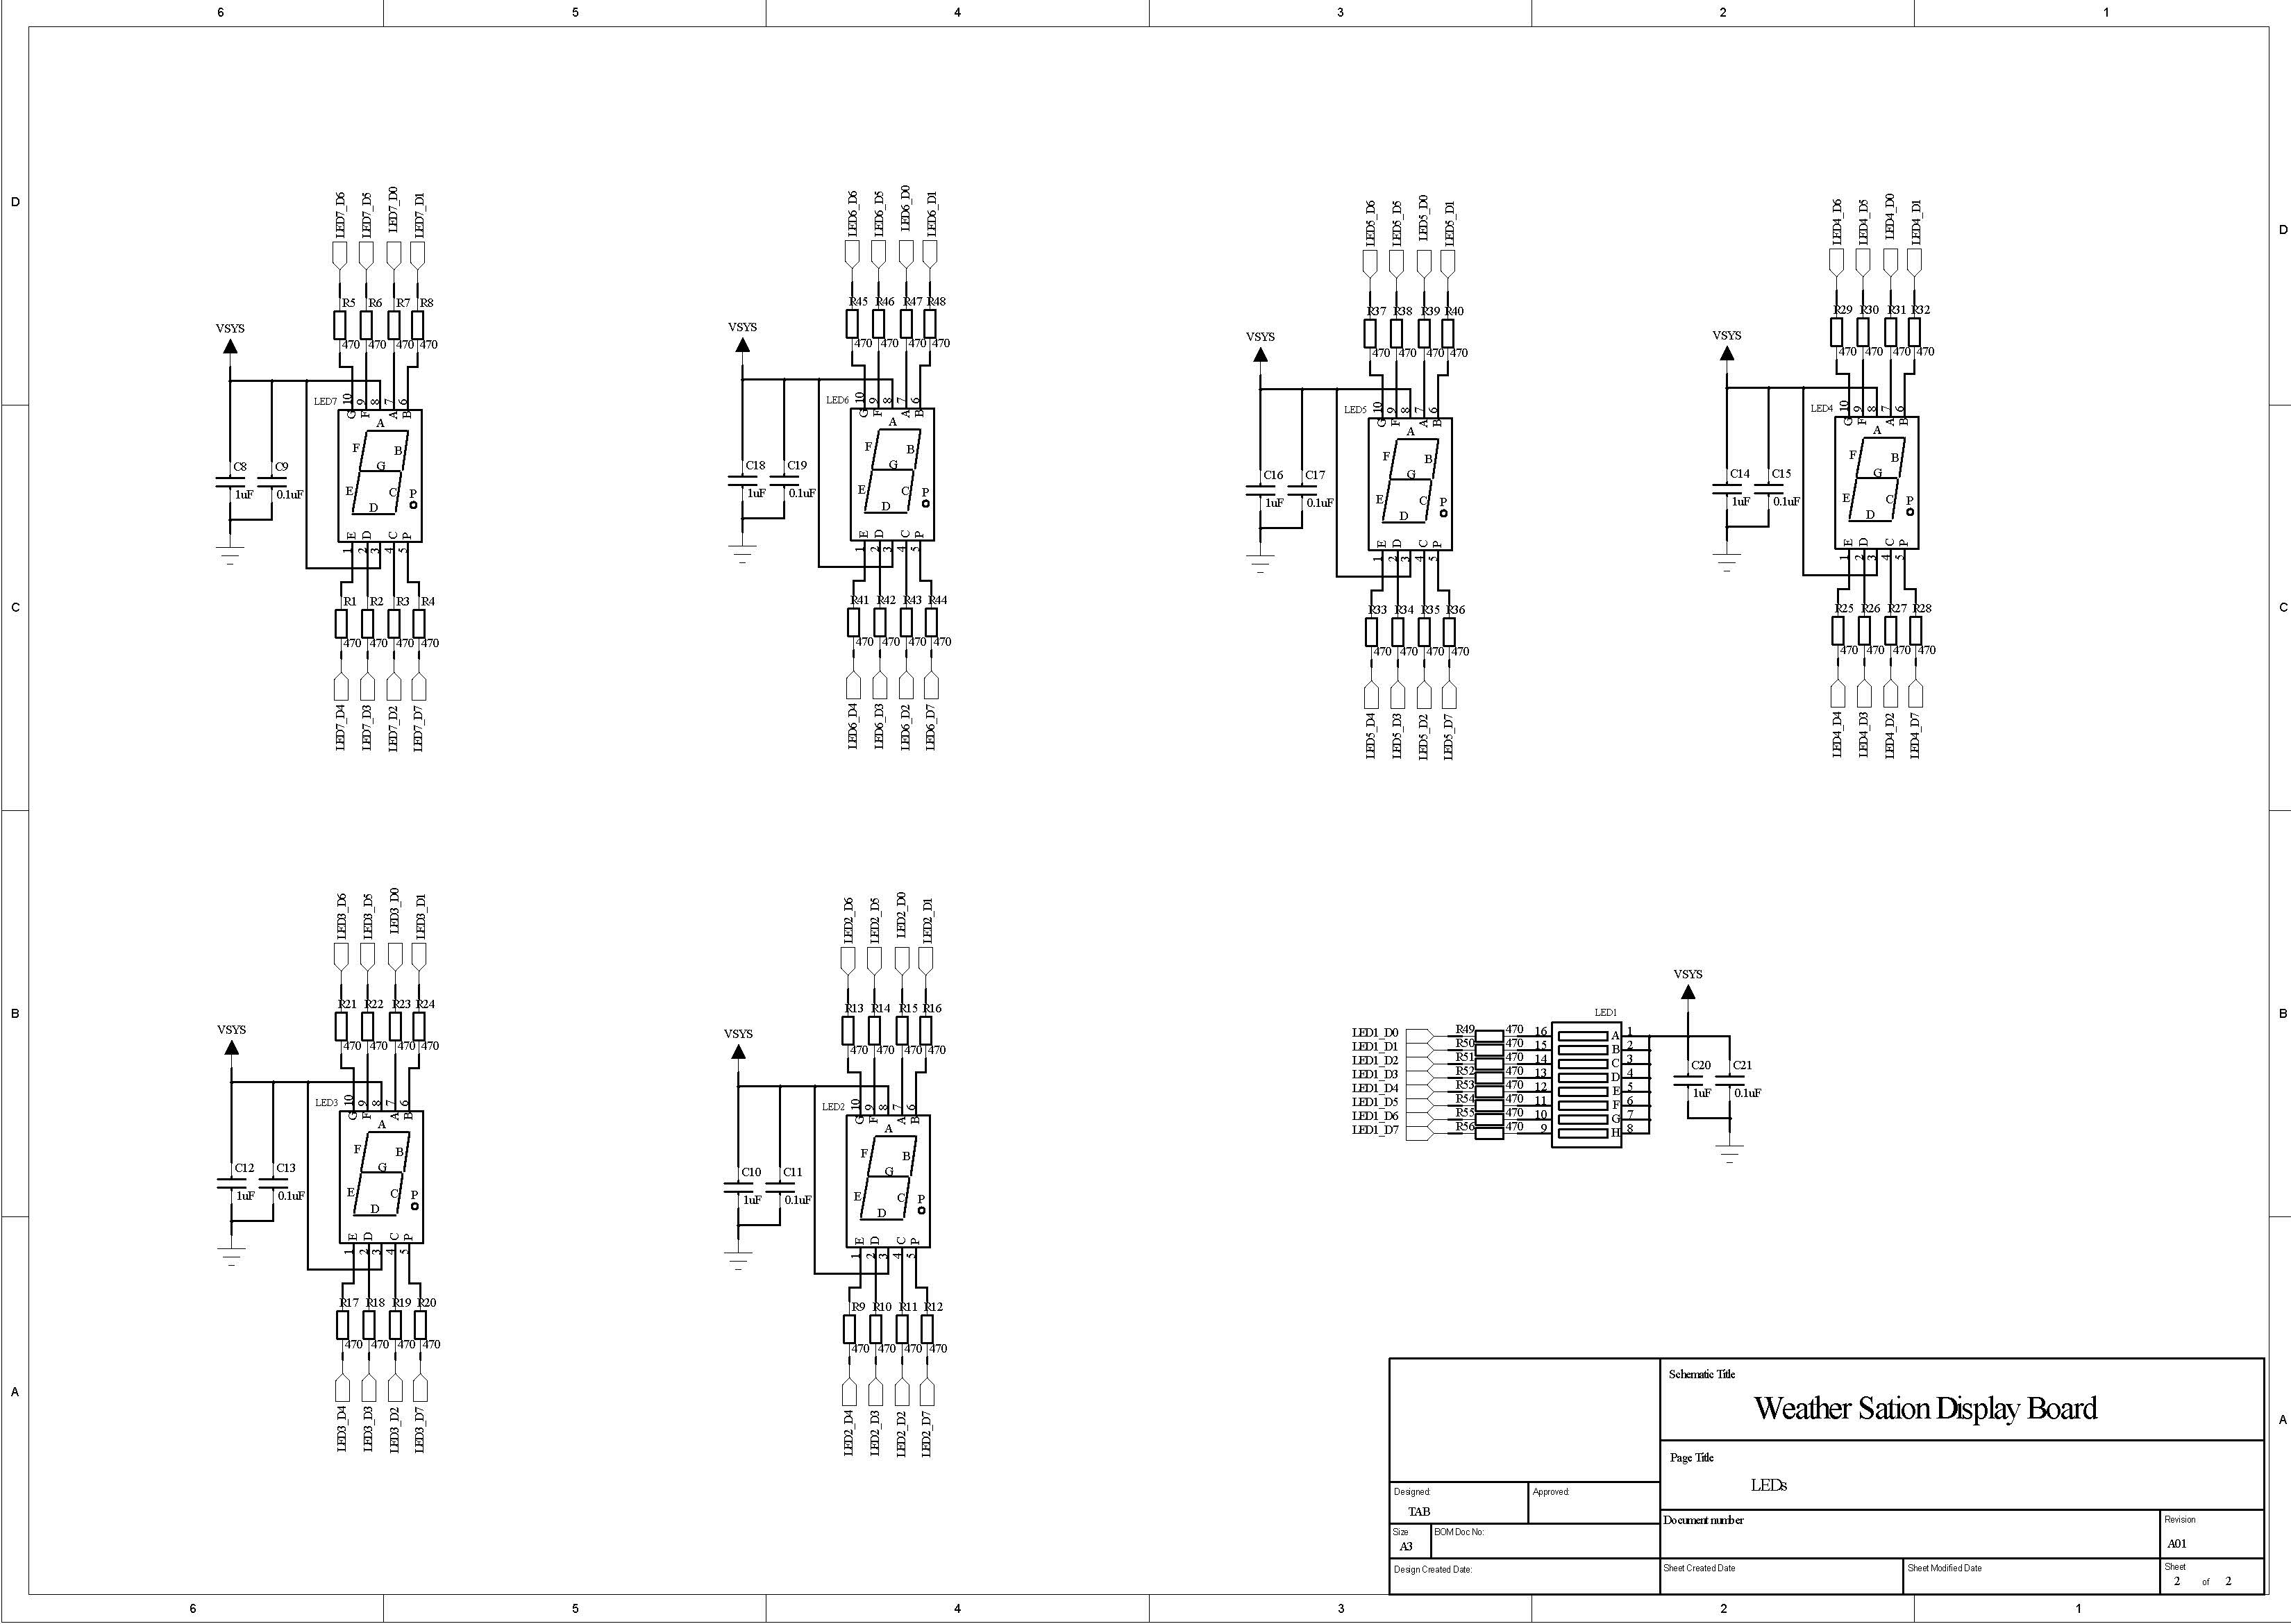
Display and User InteractionThree different kinds of Segment LED Digital Tubes were used for the display screen of the iBox.
I split the display region into three parts. The Main LED is used to display the main values, such as time, sensor values, and so on. The secondary LED is used to display some addtional information, such as the second value of time, sensor index, network status, and so on. The battery LED is used to display the charge on the battery capacitor. Three buttons were used for user interaction.
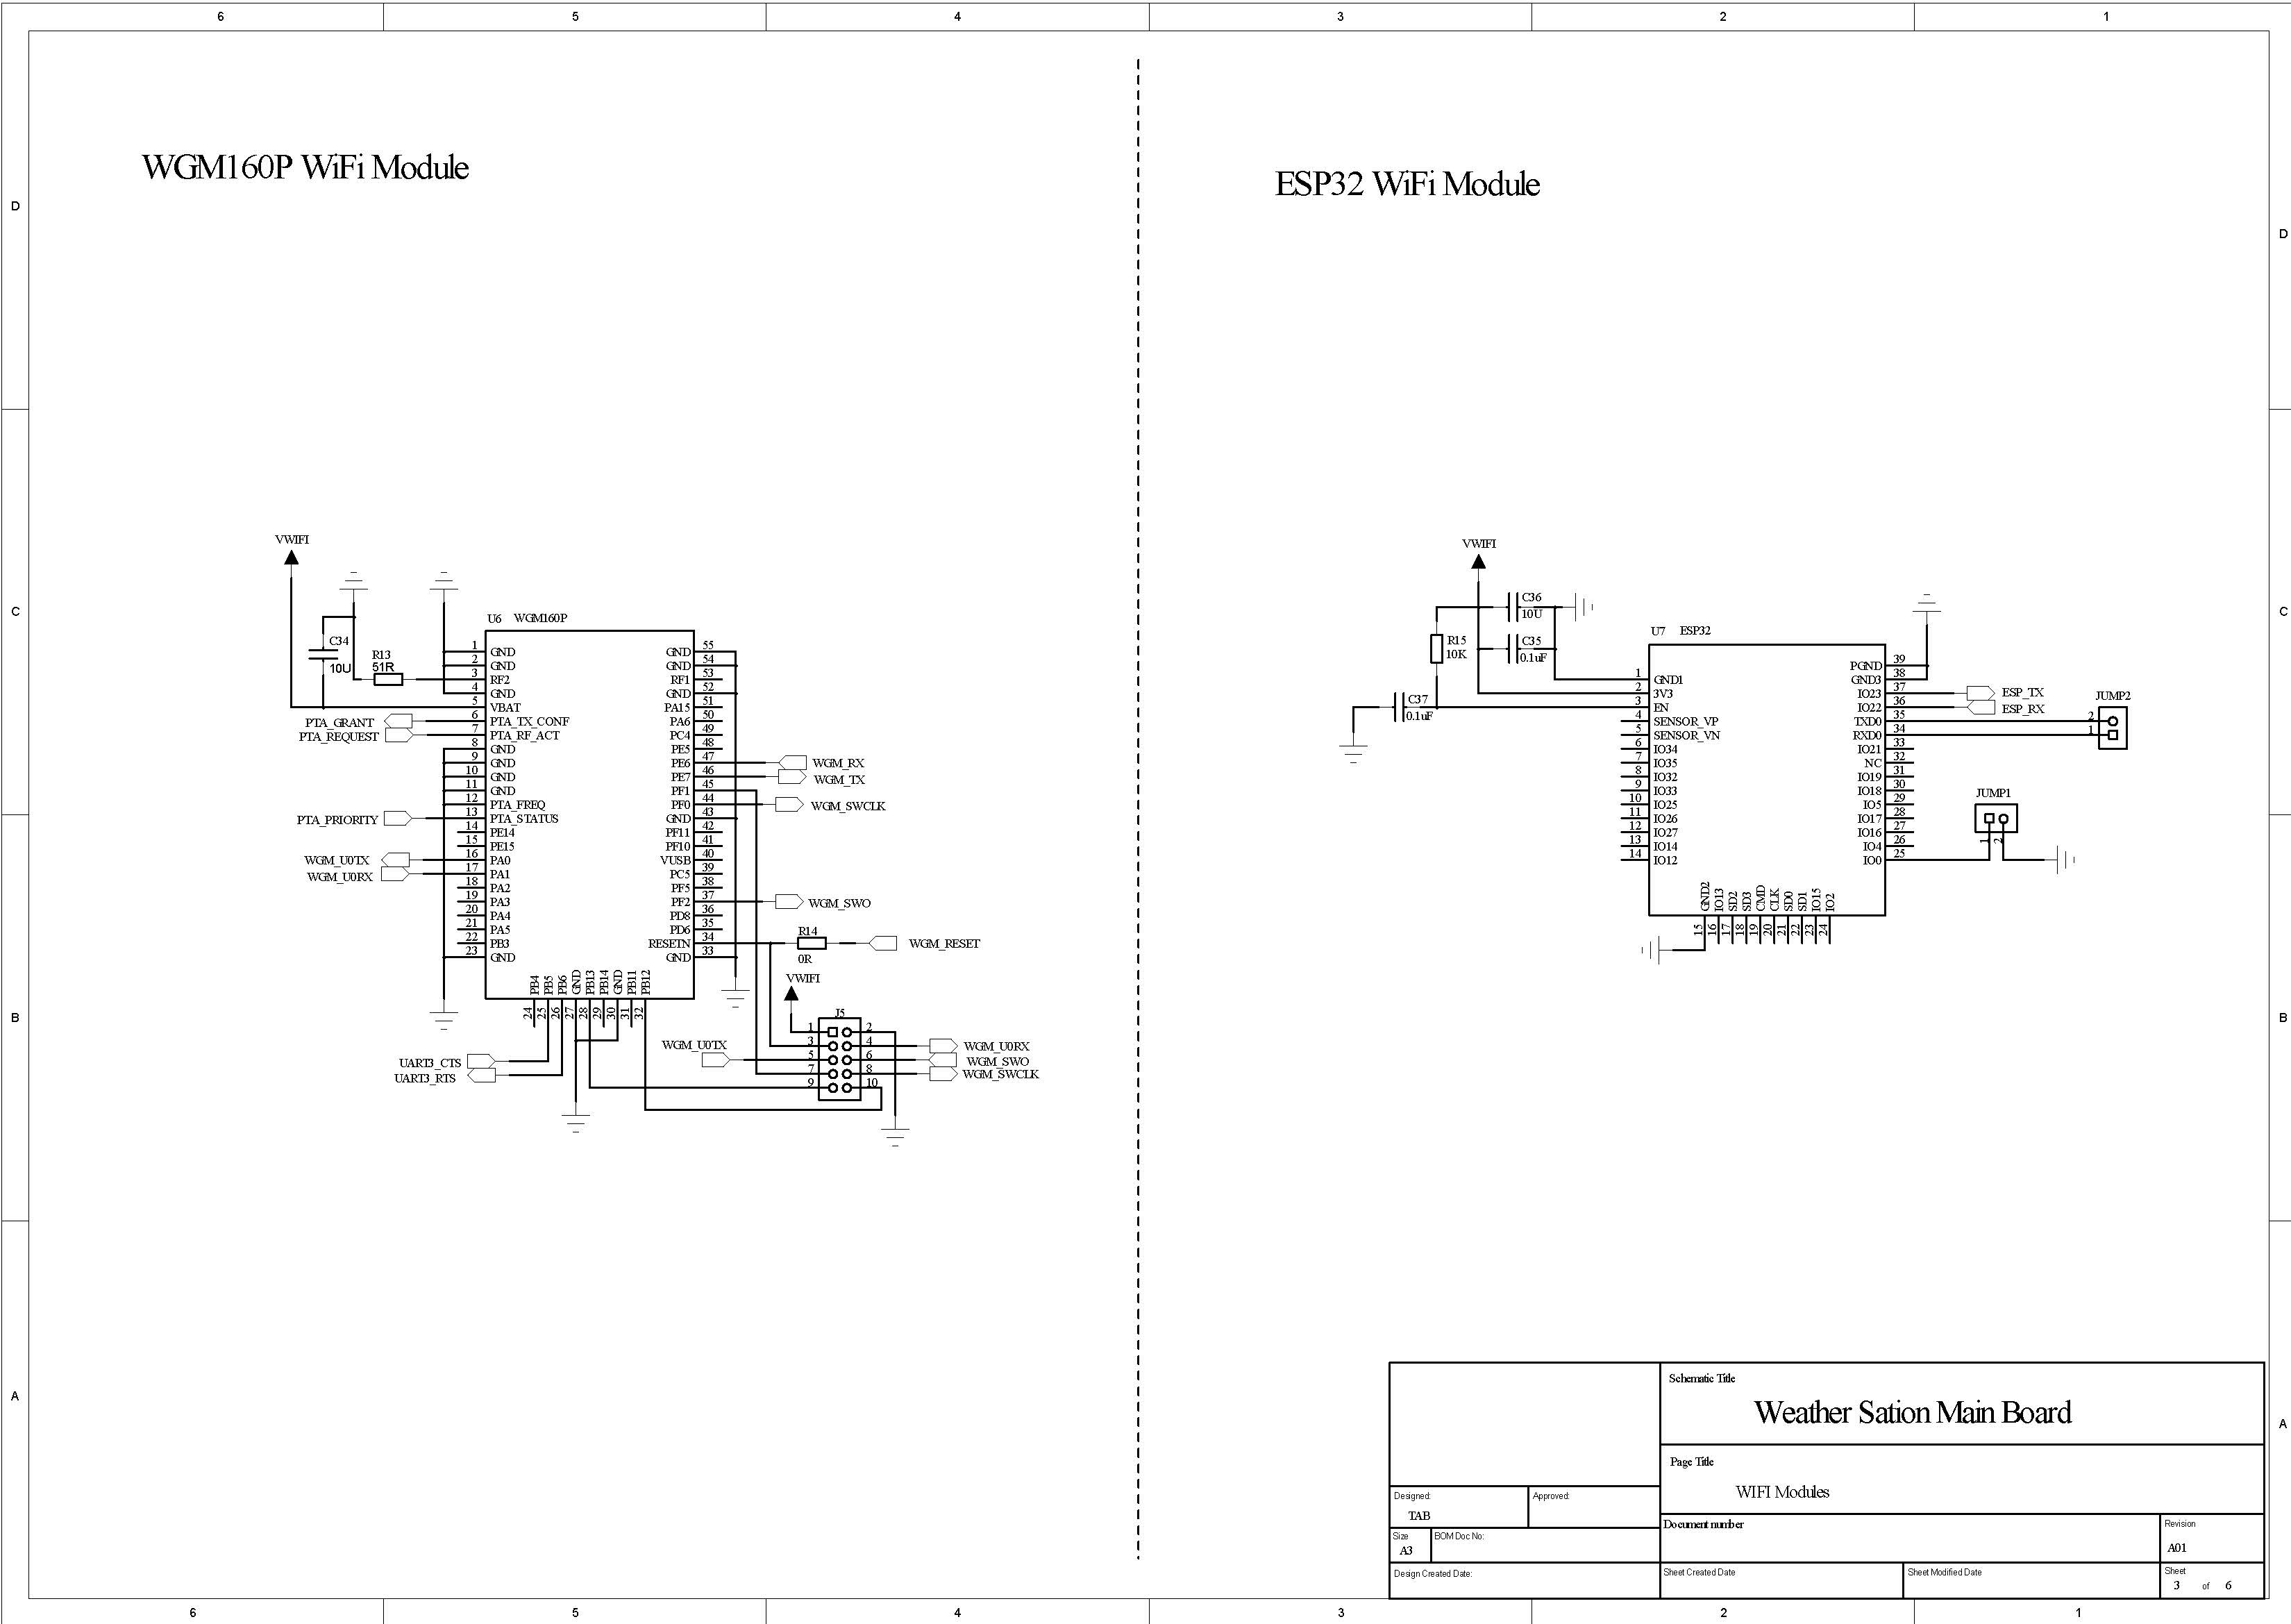
To simplify Wi-Fi development, a Silicon Labs WGM160P Wi-Fi module was used for the NCP. A program needs to be written to send or receive TCP packages to/from the WGM160P via UART. The socket interface and driver can be ignored.
The WGM160P supports both AP (Access Point) mode and Station mode.
· AP Mode: The iBox acts as a Wi-Fi hot spot that another Wi-Fi device can connect to. Note that the iBox works in AP mode and doesn't provide any internet access; it just provides a way of setting it up during the configuration process.
· Station Mode: The iBox acts as a normal Wi-Fi device, just like your phone, laptop, or tablet.
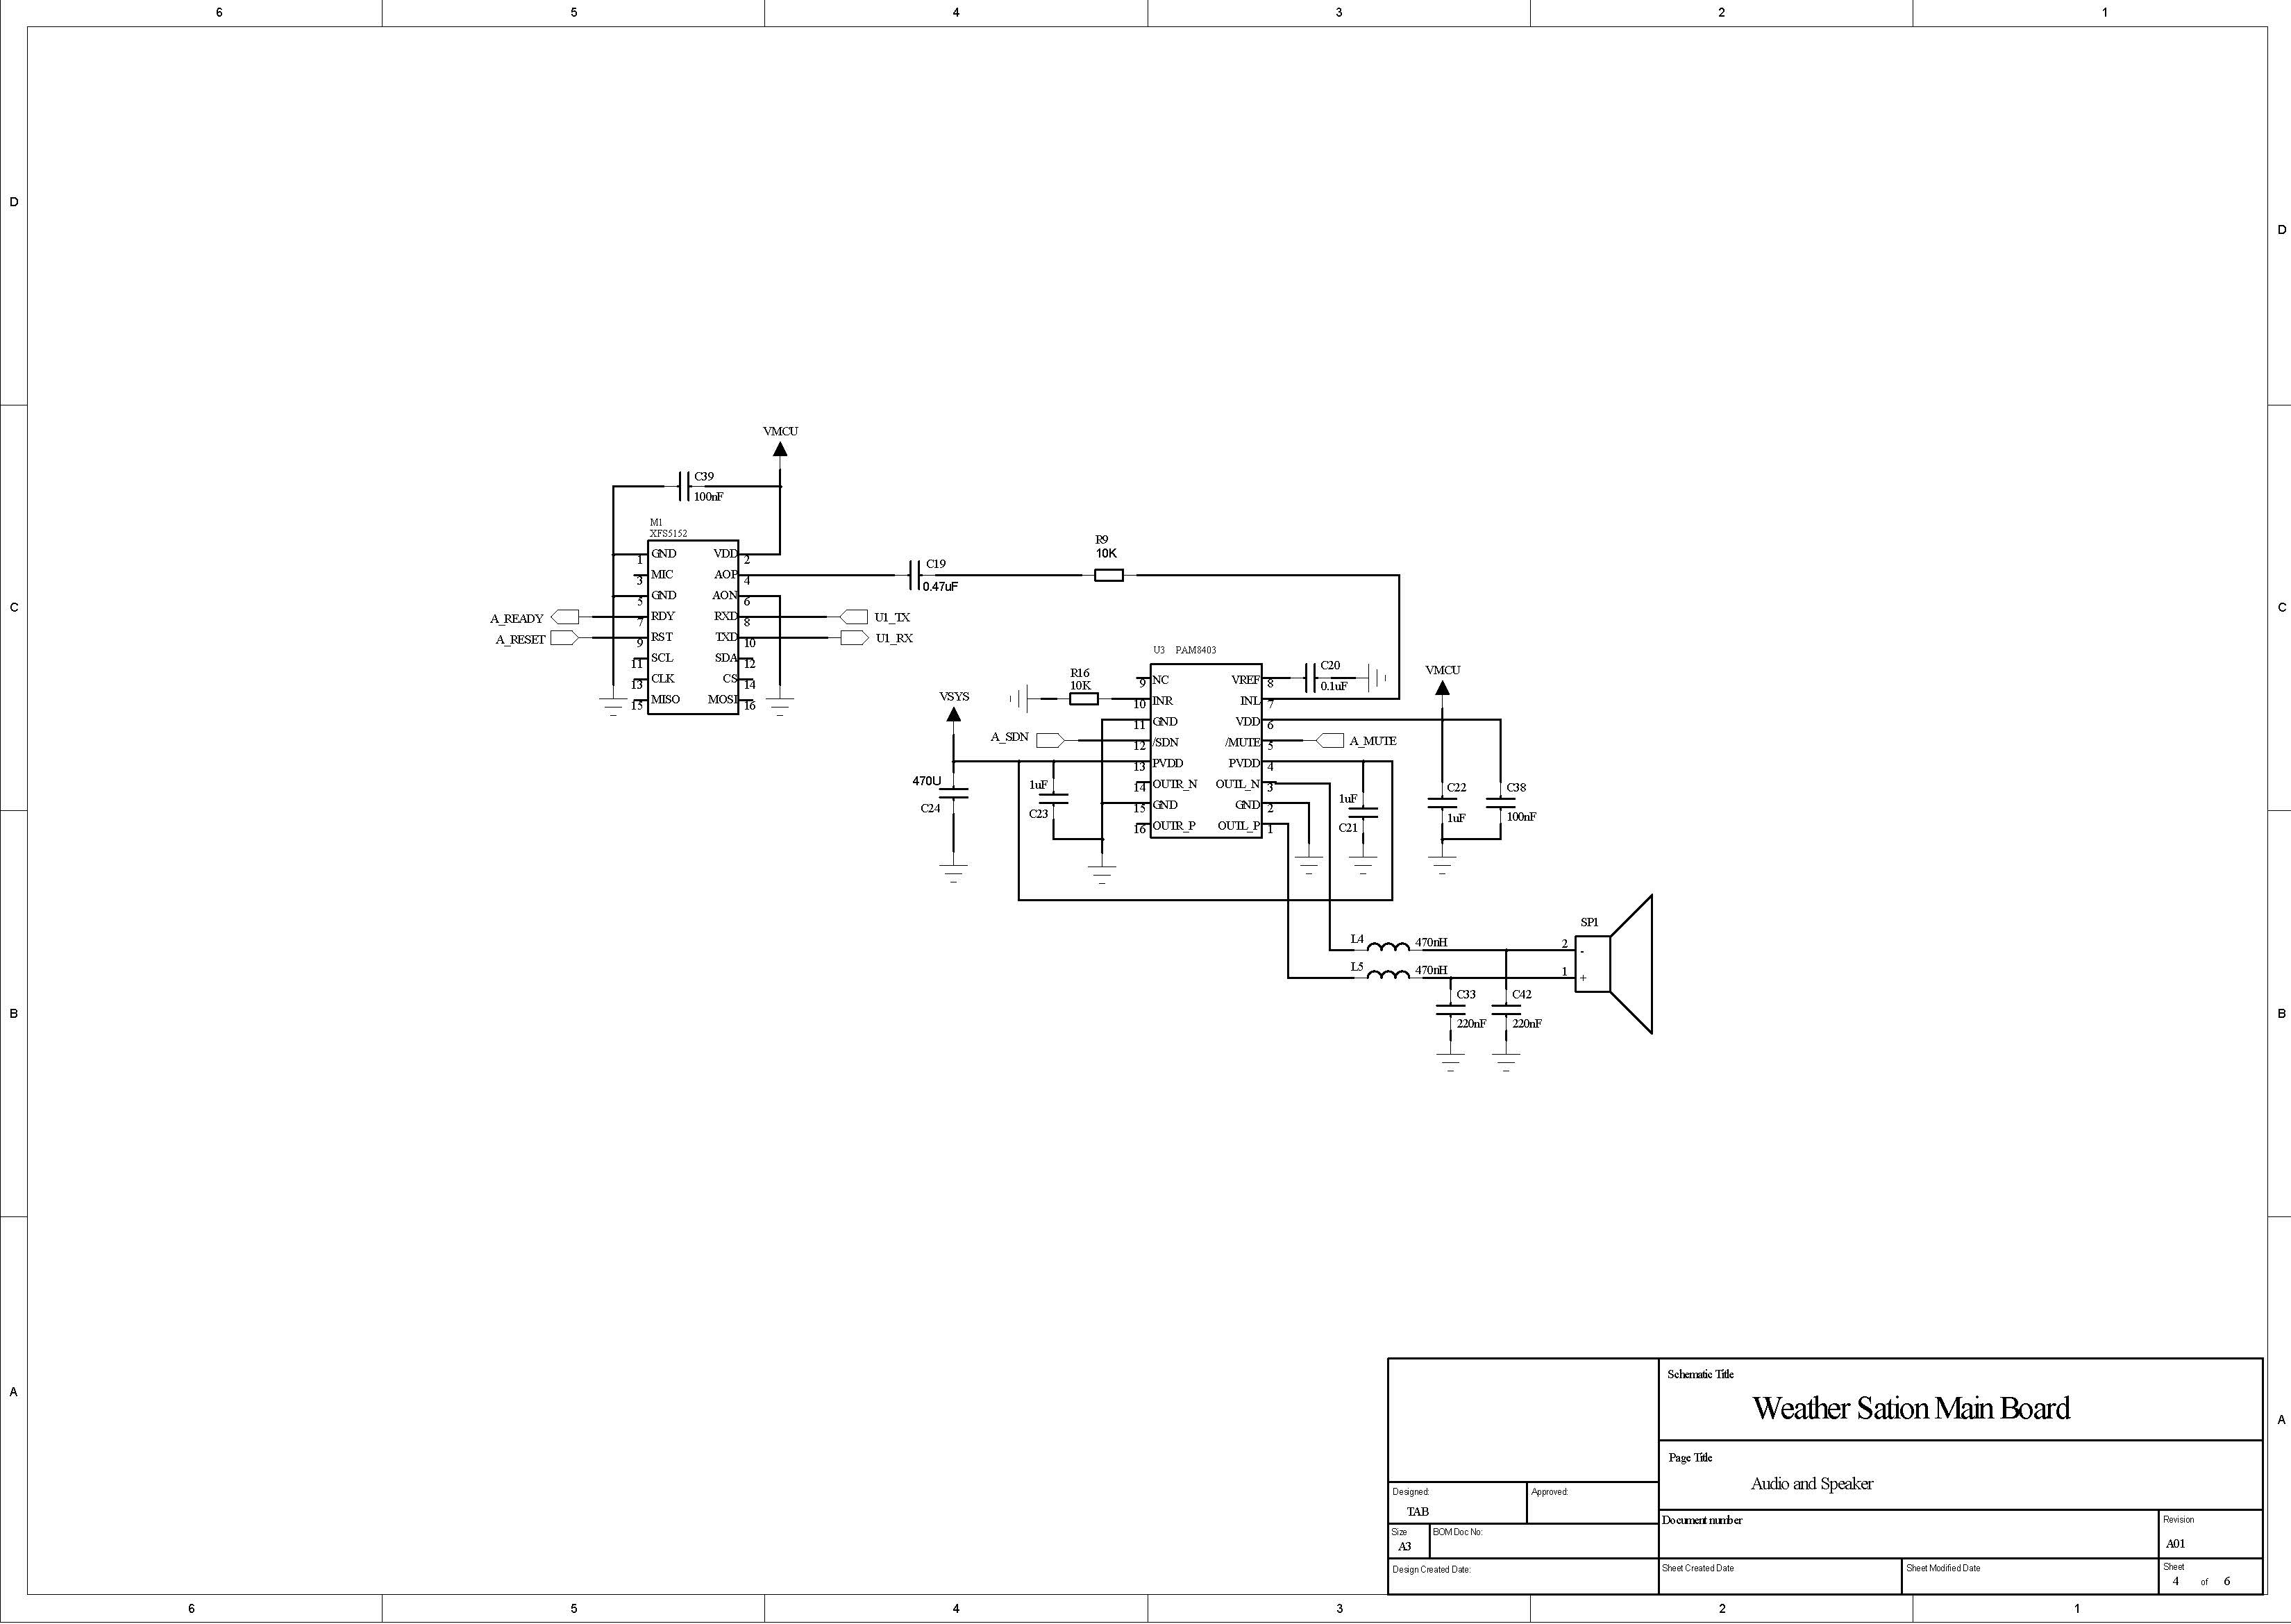
AudioThe XFS5152CE is a well-known audio processor chip from iFLYTEK. It can receive formatted character code and transform it into analog voice signal. It supports Chinese and English.
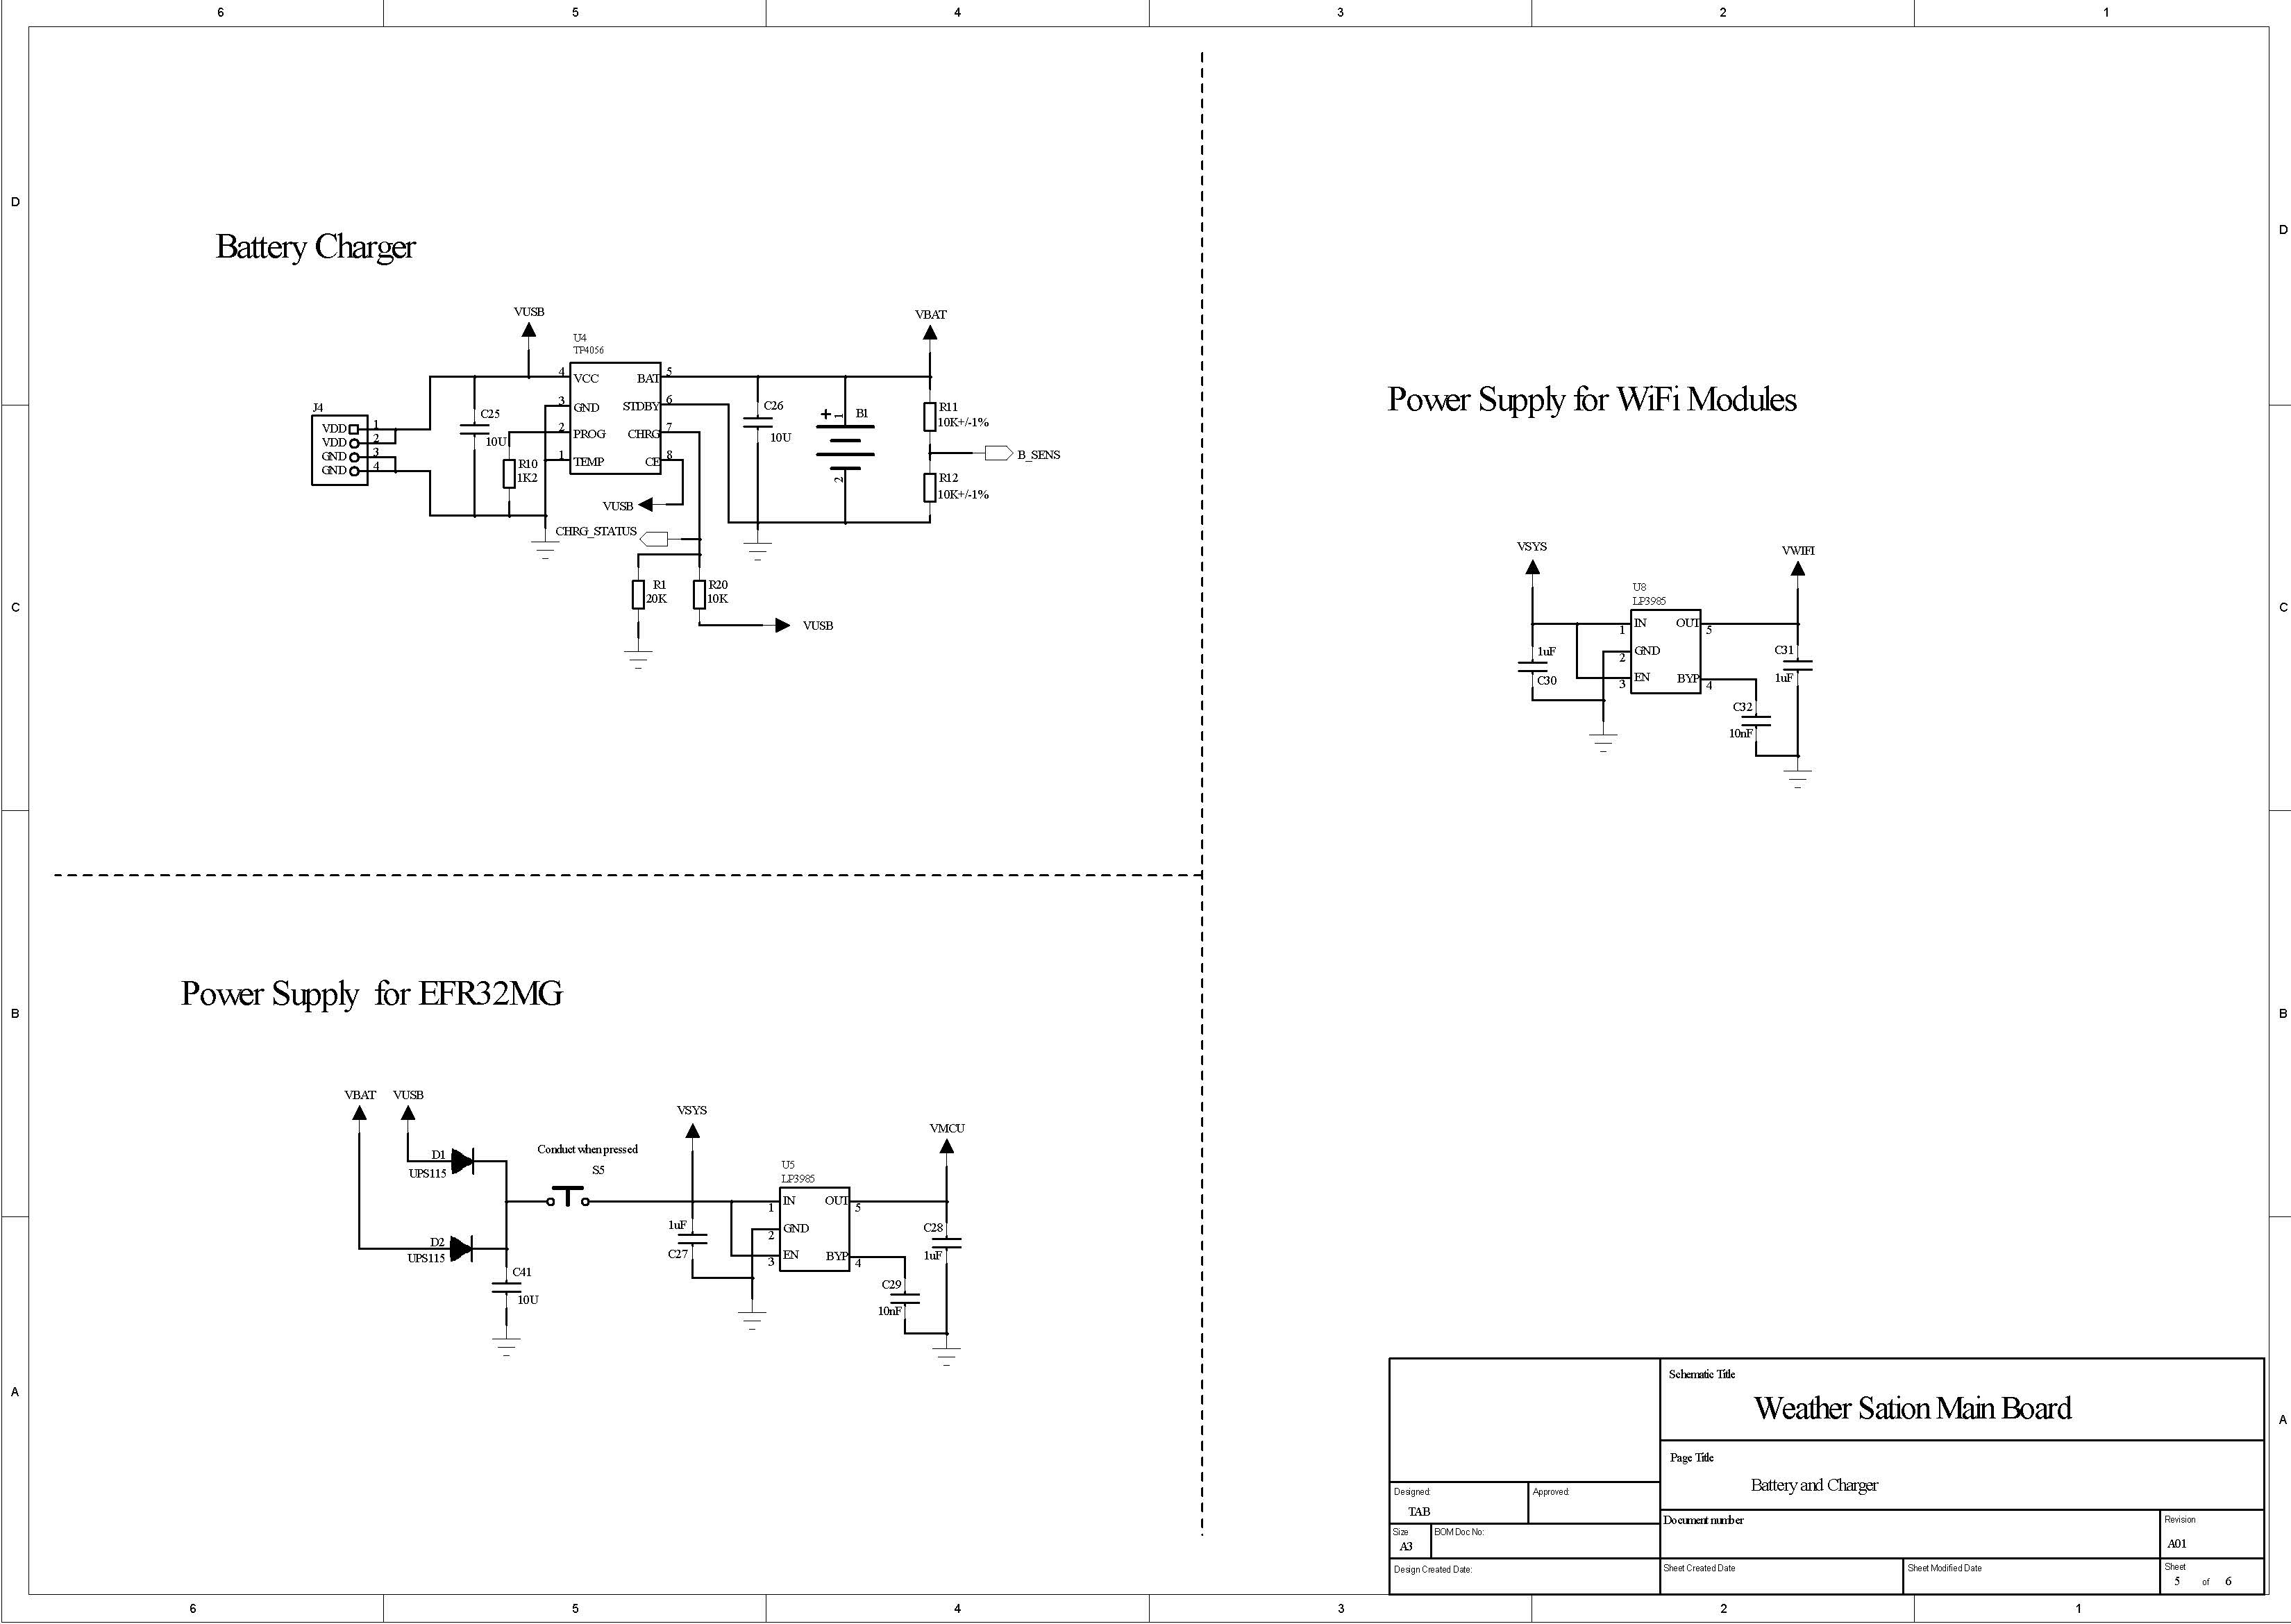
PCBI used two lithium batteries; the total capacitance is up to 6400 mAh. The iBox can work for more than 8 hours when fully charged.
The RTOS is necessary for software development since I need to run multiple tasks to support different functionality, such as LED display, Wi-Fi connection, Zigbee connection support, and etc. I was planning to use the Micrium OS and implement ZigBee applications and other tasks.
Button UsageIf the iBox is being powered on for the first time, it should be connected to an available Wi-Fi hot spot. The iBox will enter AP mode where it can be configured to choose a Wi-Fi hot spot.
· AP ModeWhen the iBox powers on for the first time, or after pressing and holding Button 3 for more than 5 seconds, it will enter AP mode in which a useful Wi-Fi hot spot can be configured.
· Connecting the iBoxAfter the iBox enters AP mode, a smart phone can be used to connect it and browse web pages (a laptop can also be used). The default Wi-Fi SSID is called gecko_os-XXX, and the password is "password". When the iBox enters AP mode, the main LED will show “PP” to announce that it is in AP mode.
· Choosing a Wi-Fi Hot SpotAfter connecting the iBox, access http://setup.comfor a list of available Wi-Fi access points.
The device will exit AP mode in 5 minutes automatically if user didn’t do any network connection configuration.
Network StatusWhen the internet disconnects, it will broadcast "Internet disconnected", and the secondary LED will show “—". "Disconnected" indicates two possible states:
· The iBox is disconnected from a Wi-Fi hot spot.
· The iBox is connected to a Wi-Fi hot spot, but there is no internet access.
Time Zone and LanguageThe iBox can automatically configure the time zone and language from the IP address when it connects to internet. The default time zone is Austin, and the default language is English.
Time DisplayThe iBox will configure the time zone and display local time automatically from the IP address. UseButton 2 to make the iBox go back to time display mode if it is in other mode.
Zigbee End Device ConnectionWe program the Thunderboard Sense 2 to function as external sensor nodes for environmental temperature measurements, and these sensor nodes report the measured sensor data to the iBox via the Zigbee Mesh network. Below are the procedures for how to set up the sensor node and join them to the mesh network.
Pressing Button 2 of the iBox for at least 3 seconds will force it to open the network for joining, and a voice will remind you that the iBox is starting to discover new devices. You must connect a sensor within 30 s. After that, the iBox will close the Zigbee network.
Sensor DisplayShort push button1, the data from sensor will show in mainLED, sensor ID will be shown in secondary LED. Continue click button 1 will switch the data among all Zigbee sensor. Sensor ID 00 is reserved for iBox, other value is used by Zigbee end device. For now, it only supports temperature sensor and humidity sensor, we are intended to add more sensor soon, such as light, curtain and so on, so that you may be able to control it by iBox. To distinguish different sensor type, the mainLED will display different format.
Temperature DisplayFormat: XX.X'CThe temperature of sensor ID 0 stands for the internal temperature of the iBox, not room temperature.
Format: XX'H
The iBox will announce time and remind you to have a break after an hour, thus acting as a smart assistant to remind you to be healthy.
Weather Broadcast and ForecastIf the device is shaken or knocked, the iBox will broadcast the weather forecast for the current day, next day, and week.
This function only applies to China. When you shake or knock device, it may broadcast weather forecasts or current news.
Event ReminderThe iBox provides an alarm function so that you can set reminders at specific times. To use this function, I used a cloud server (silabs-iot.com) to develop an http web server. You need to add a reminder in silabs-iot.com. Detailed steps are listed below.
1. Apply for an account in silabs-iot.com/signup
2. Bind your iBox (You can find the MAC address in iBox back)
3. Add a reminder iBox
After you successfully add a reminder in silabs-iot, the iBox should play "received a reminder" within 1 minute.
ChargingThe battery LED will blink when the battery is charging, and it will stop blinking when it is fully charged or not charging.The battery LED indicates the capacity of the current power level. The greater the number of LED bars, the greater the battery capacity.Please remember to charge when there is one LED bar, and disconnect the charger when full to protect the battery. Note that the iBox will remind you to disconnect the charger when the battery is full. It is necessary to disconnect the charger. To protect the battery, do not merely power-off the iBox since it will continue to charge even though it has been powered off. The figure below shows the charging.
When the battery capacitor is low, the iBox will turn off all LEDs except for the power level LED. To turn the LED on, click Button 2 or Button 1.
Firmware UpdateI put the newer firmware in the cloud server whenever I fix a bug or add new features. Devices will update firmware if they find new firmware in the cloud server. When the newer firmware is downloading, the secondary LED on the iBox will blink. A complete download will last about 5 to 15 minutes.
WelcomeThe iBox is still under development, and we hope to add more sensor types and more features. We welcome your suggestions for new features.






Comments
Please log in or sign up to comment.