


Hardware components | ||||||
 |
| × | 1 | |||
_ztBMuBhMHo.jpg?auto=compress%2Cformat&w=48&h=48&fit=fill&bg=ffffff) |
| × | 1 | |||
 |
| × | 1 | |||
 |
| × | 1 | |||
| × | 1 | ||||
Software apps and online services | ||||||
 |
| |||||
| ||||||
 |
| |||||
Our office-boy Deba is quite a busy man. He is often deeply engrossed in his work of playing Cricket on his mobile phone or engaging into social media. So it becomes very difficult for him to address the petty issues of the people working in the office. So here is what I thought of, let's build a simple system that will notify and inform Deba whenever someone, wants him to carry out a certain task for them.
Multiple approaches can be taken when building such a system but, we had to decide onto the one that was more handy and felt a bit 'awesome' to us. So I thought, what if we could type out the task we want Deva to do, on Slack and display that task on an LCD to notify Deba...
So I used an Arduino to interface the LCD and buzzer and also receive that data over UART from the Bolt. The Bolt itself will be connected to the Bolt Cloud and will be provided with data through Slack and a simple python script. The reason I decided to use Slack for this is because, we use Slack a lot in the office and everyone has it on his/her fingertips. Now I had the following image in my mind regarding the project.
I prefer to begin the project by assembling the hardware and then writing software to tie things up together.
Hardware Setup:
The circuit design is simple and you can refer to the hardware setup of this particular hack (Credits : Team Nitro) to assemble to circuit.
Here's what I didn't tell you. The reference that I gave is limited to interfacing only a LCD but, not the buzzer that we talked about so, follow these instructions to connect a buzzer as well.
- Positive Pin (that's the longer one) to Digital Pin 2 of the Arduino
- Negative Pin (that's the shorter one) to Ground.
Now the hardware is all setup.
Cloud Setup:
Next up, let's connect our bolt to the Bolt Cloud.
These are the steps to do so (If you don't already know them).
- Step 1 :Create a Bolt account if you haven't already done that.
- Step 2 : Download the Android / iOS application and connect your bolt to the cloud with the help of instructions provided in the application.
That's it, now you should have your Bolt device connected to the cloud and ready for some action.
Firmware Setup :
Now we need to flash our Arduino with suitable firmware in order to perform the desired operations. Here is a brief of what the Arduino-Bolt module will be doing.
The Bolt will receive the requested task from the cloud on it's serial and forward it to Arduino's serial. The Arduino will then display the requested task over the LCD and also give an audio feedback by triggering the buzzer.
The following sketch uses the LiquidCrystal_I2C library which needs to be separately included as it doesn't ships as a standard library with the Arduino package.
Flash this sketch on your Arduino and you are done worrying about the firmware.
#include <LiquidCrystal_I2C.h>
long previous_print_time=millis();
LiquidCrystal_I2C lcd(0x3F, 16, 2);
void setup()
{
// initialize the LCD
Serial.begin(9600);
lcd.begin();
// Turn on the blacklight and print a message.
lcd.backlight();
lcd.print("Good Morning!");
delay(2000);
pinMode(2,OUTPUT);
}
void toggleBuzzer(){
digitalWrite(2,HIGH);
delay(1000);
digitalWrite(2,LOW);
}
void loop() {
long current_time=millis();
if((current_time-previous_print_time)>=1000){
previous_print_time+=1000;
// Check if data is available on the serial.
// And trigger the buzzer and clear the LCD to display new data.
if(Serial.available()>0){
int start=0;
lcd.clear();
toggleBuzzer();
// Print all the incoming serial data to the LCD
while(Serial.available()>0){
char data=Serial.read();
if(start==16){
lcd.setCursor(0,1);
}
if(start==32){
lcd.setCursor(0,0);
start=0;
}
lcd.print(data);
start++;
}
delay(10000);
}
}
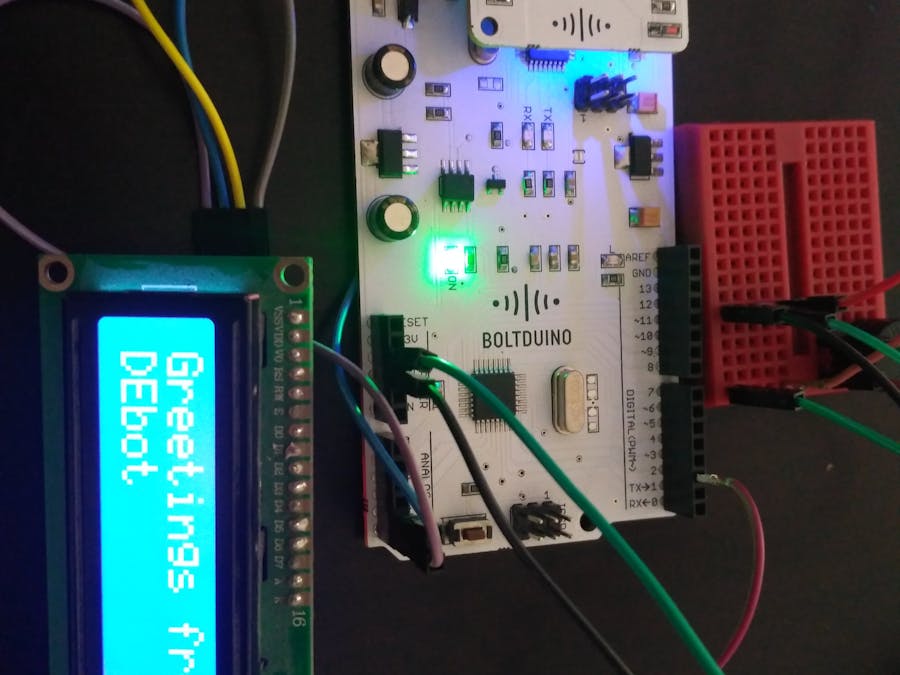
lcd.clear();
lcd.setCursor(0,0);
lcd.print("Greetings from");
lcd.setCursor(0,1);
lcd.print("DEbot");
delay(5000);
}
Python Middleware:
In order to link our Bolt Cloud to the Slack API, we need a certain piece of software that will act as the bridge between the two of these. So we will use a simple python script using Flask to act as a bridge.
Quick Note : Before, we start talking about building things let me tell you something real quick. I have realized three common problems/bugs that you might encounter while testing or making the project so please refer to the last chapter of the story for them.
Now in order to setup this middleware, follow these steps.
- Step 1 . : Ensure that Python is installed on your system. If it is not follow this installation guide (Note : Linux and MacOS users already have Python installed on their systems.)
- Step 2 . : Now we need to install Flask which is a micro framework for creating simple web servers. To do so, simply run the following command pip install flask (Note : If you get an error saying pip is not installed, follow these installation guide for windows, linux, macOS)
- Step 3 . : In order to link our Flask based server to our Slack API, it has to be in the public domain and not on a local host. In order to easily do that we will be using a simple software package called localtunnel. Installation instructions are provided on their site link.
- Step 4 . : Now to actually run a Flask server, create a python file (files with.py extension ) and copy the following code into it and paste your Bolt API Key and Bolt Device ID where required.
  from flask import Flask, request
  from boltiot import Bolt
  bolt = Bolt('<your Bolt API Key>','<your Bolt Device ID>')
  app = Flask(__name__)
  @app.route('/test')
  def test():
     return "<h1>You compeleted step 5</h1>"
  @app.route('/',methods=['GET','POST'])
  def handle_task_request():
     if(request.method == 'POST'):
         command_string = request.form.get('text',None)
         bolt.serialWrite(str(command_string))
         return "Your wish is my command"
  if __name__ == '__main__':
     app.run(debug=True)
Note: Your API key and Device ID can be found from the Bolt Cloud Dashboard.
- Step 5 : Execute the following command to run your Flask server
python <your_file_name>.py
Doing so will trigger the Flask web server on port 5000. This server is currently running on our local machine at 127.0.0.1 and is accessible only to us. To test whether the server is running or not, visit this link in your browser http://127.0.0.1:5000/test
- Step 6 : Our Flask server is running but, it's not out there in the open, it's running on our local machine and not on the 'Internet' hence Slack APIs cannot interact with it. But, localtunnel (yeah the one that we installed a few steps back) will help us. In your terminal type out the following command
lt --port 5000
doing so will output a URL and put our server on public domain over https (so that it is secured) and now you can copy the link that localtunnel outputs to your clipboard. Now let's move towards the final step of the process.
Slack Integration :
Ok so now it's time to get this thing to work with Slack. This is a bit tricky but, don't worry I got you covered.
First of all you need to go to Slack API. We are going to build a custom command inside our Slack workspace to ultimately display the message on LCD.
Let's get started,
First:
Visit the Slack API and click on 'Start Building' to start building your application.
Second:
Click on 'Create New App'
Third:
Enter the name of your application ( I am calling mine DEbot ) and select the Workspace where you want this application installed. And then click on 'Create App'
Fourth:
Now under the 'Addfeaturesandfunctionality' section click on the 'SlashCommands'
Fifth:
Now you will be presented on this page. Click on 'Create New Command'
Sixth:
You will be presented with the following form.
Follow these steps while filling this form,
- Step 1 . : The 'Command' field, enter the command with which you would like to trigger the application. I have personally used /debot.
- Step 2 . : The 'RequestURL' field, paste your localtunnel url.
- Step 3 . : The 'Short Description', enter a short description of what the command will do. Now click on 'Save' and you are done.
Chapter 4 : Conclusions :
It's finally built.
But, there might be a few potholes that you might run into with a system like this but, let me point out a couple of them.
1. localtunnel is not working. If your localtunnel gives an error such as "Check your firewall settings" or crashes with an error, just retry the command. This has never happened to me only once and after 3 retries it started. To get more insight on this issue visit here
2. Localtunnel crashes after a while. Don't panic. Just restart local terminal and reconfigure your app from Slack and replace the existing URL with the new one.
3. Slack returns 'Timeoutreached'. Well this happens when the Slack API doesn't get a response in the given time, this usually happens when the Bolt Cloud is still processing your request. Don't worry everything will work as it is but, you will get an error message on Slack
4. Slack complains about not getting a response. It's again a cloud issue and you haven't done anything wrong just, resend the message after a few seconds.
5. Slack returns a 404. Your localtunnel server is down. You need to restart it and then reconfigure the URL for your Slack application.


Comments