I'm glad you asked! Meshblu is an open-source machine to machine instant messaging platform that also provides some powerful features. A "device" is something that is registered to Meshblu and has credentials (UUID and TOKEN). Data can be stored on that "device" and it can send/receive messages and subscribe/broadcast to other "devices" via their UUID. You can use several different protocols to interface to the Meshblu API! We made it easy for you to connect anything from a low memory microcontroller to a connected car with ease!
How do I do the thing?!For the purposes of this guide, I'll walk you through creating a webpage that can send messages to a Node.js app from anywhere in the world!
Supported Protocols:
- AMQP - Advanced Message Queuing Protocol
- CoAP - Constrained Application Protocol
- HTTP - HyperText Transfer Protocol following REST conventions
- MQTT - MQ Telemetry Transport
- Socket.io Bidirectional event based communication with fall-backs for hostile network environments
- Websocket - Full-duplex communication over a TCP connection supported natively by modern browsers
- XMPP - XML based communication protocol used by many popular chat clients
We're going to first create a webpage that acts as a "device" with Meshblu credentials. It will have a single button that broadcasts a message to "*" (All devices)
- Create a Meshblu connection as the device we'll register
- On Ready make a WhoAmI request to retrieve device data
- Register "sendMessage" function for the button to call
Register a "Device"
We're going to need a UUID and TOKEN before we get started.
There are several ways to do this:
- Meshblu-Util (Node.js command line utility)
- App.Octoblu (IoT Platform built on Meshblu)
- REST API (cUrl)
Register Device with app.Octoblu.com
- Create an Octoblu account
- Register a Generic Device
- Go to My Things and select the Device you just made
- Copy the UUID/TOKEN - save for later
Client-Side Javascript Library
We'll use the client-side Javascript library in a webpage. In a new directory create these files:
index.html
<html>
<head>
<script src="https://cdn.octoblu.com/js/meshblu/latest/meshblu.bundle.js" type="text/javascript"></script>
<script src="./index.js" type="text/javascript"></script>
</head>
<body>
<button onClick="sendMessage()">Click Me</button>
</body>
</html>
index.js
var config = {
"uuid": "UUID-FROM-PREVIOUS-STEP",
"token": "TOKEN-FROM-PREVIOUS-STEP"
};
var conn = meshblu.createConnection(config);
conn.on('ready', function(data) {
console.log("Ready!");
conn.whoami({
 "uuid": data.uuid
}, function(device) {
 console.log(device);
});
});
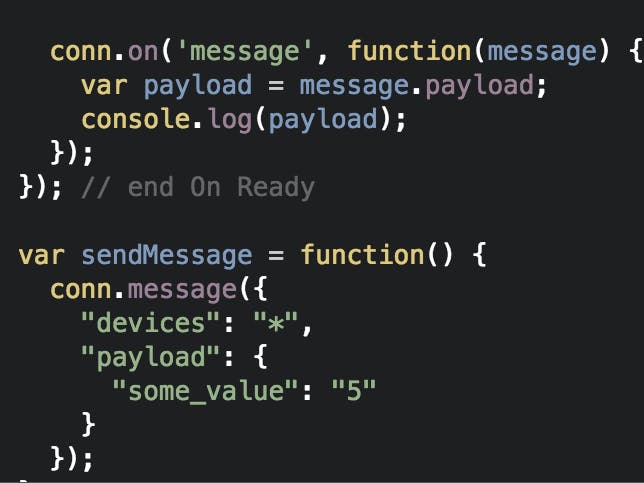
var sendMessage = function(){
conn.message({
 "devices": "*",
 "data": {
   "some_value": "5"
 }
});
};
- Register another device following the instructions from before.
- Install node.js
Open a terminal and enter these commands:
mkdir some-directory/meshblu-test-app/
cd some-directory/meshblu-test-app/
npm init
npm install --save meshblu
Create a main.js:
var MeshbluSocketIO = require('meshblu');
var meshblu = new MeshbluSocketIO({
"resolveSrv": true,
"uuid": "DEVICE-B-UUID",
"token": "DEVICE-B-TOKEN"
})
meshblu.connect();
meshblu.on('ready', function(data){
console.log('Ready');
});
Subscribe to Messages from Device A:
In conn.on("ready" ... add
meshblu.subscribe({uuid: 'WEBPAGE-UUID', type: ['broadcast']});
Be sure to change the UUID in the subscription to match the webpage UUID.
Handle Messages
meshblu.on("message", function(message){
console.log("Message Received: ", message);
});
We're almost done, but we need to make sure that Device B can subscribe to broadcast.sent for Device A.
To do this we need to Update Device A with permissions for Device B.
Subscriptions Documentation (if you want to learn more).
Updating DeviceAfter On Ready for Device A (webpage).
We use a $set to update nested properties so that we don't overwrite anything!
conn.update({
"uuid": config.uuid,
"$set": { "meshblu.whitelists.broadcast.sent": [
    { "uuid": "DEVICE-B-UUID" }
 ] }
});
NOTE: Doing it this way means that you'll be updating every time the Device connects. If you would rather do this just once you can use Meshblu-Util or App.Octoblu by going to the Device's detail page (where you got the UUID/TOKEN) and select the Permission tab.
Run the Node App!In the terminal:
cd some-directory/meshblu-test-app
node main.js
Click the button from the webpage and view the NodeJS console output from the terminal! You've now achieved real time communication from a webpage to a node.js app!
What next?Combine what you've learned from this guide with Johnny-Five, a Javascript robotics library and develop web apps on the fly that communicate with hardware!


Comments
Please log in or sign up to comment.