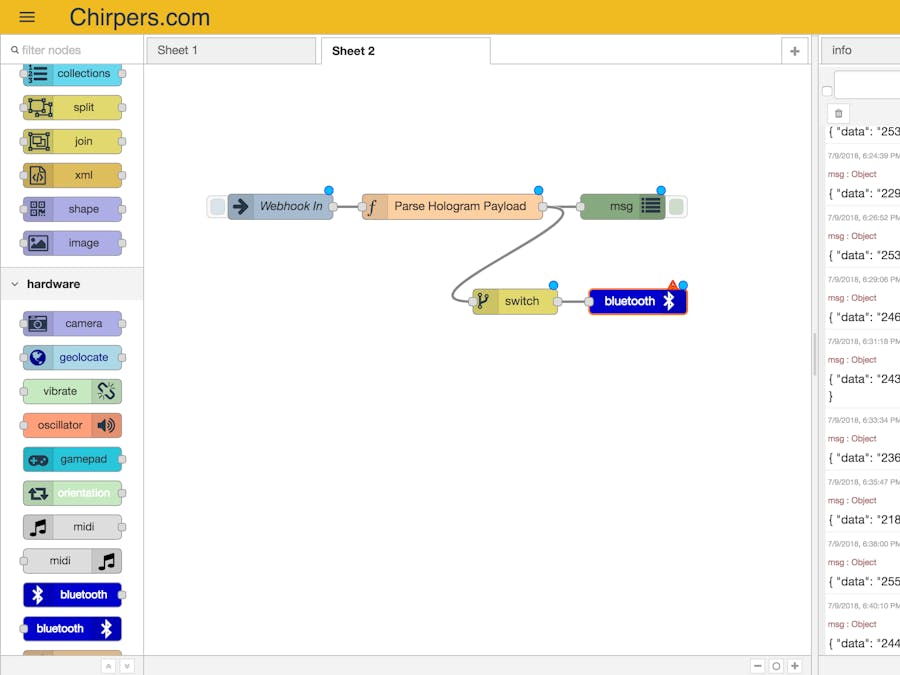
Chirpers.com is a Node-RED based IoT platform. It runs the entire designer in the browser session (even if you are offline) and is specially developed for the web. It has nodes for web-bluetooth, web-usb, and web-midi. You can build full featured IoT applications and connect to other platforms and services.
Best part? Totally free! Just go to the website and sign up!
Hologram NetworkHologram.io is a cellular network provider perfect for makers. At $0.60 /mo plus $0.40 per mb, you'll have plenty of data for most IoT projects. You can get a free SIM card by going to hologram.io and then activate it at dashboard.hologram.io
WiringMost GSM modules like the SIM800L will have Power, Ground, RX, and TX. Although you can use certain other pins for SoftwareSerial, it is unstable. Use an Arduino that has extra onboard Serial pins.
For the Arduino Micro wire to Serial1.
If you end up using SoftwareSerial, set the baudrate to 57600, 38400, or 9600 (unstable)
Before inserting the SIM card make sure you are putting it in the right way.
Install TinyGSM and ArduinoHttpClient- Open the Arduino IDE
- Go to Sketch > Include Library > Manage Libraries
- Search for TinyGSM and ArduinoHttpClient and install them
- Go to Devices > Your Device
- Copy the deviceId from the top right corner and save it
- Go to Account > API
- Generate an API Key and save it
- Download and open this sketch https://github.com/HologramEducation/hologram-tinygsm-examples/blob/master/post_hologram_message.ino
- Place your deviceId and api key in the sketch
// Hologram Credentials
String api_key = "";
String deviceid = "";
You can also change what data and tags you send, just alter the loop function
void loop() {
 // Connect Network
 connect_cellular();
 // Ready Data
 String data = String(analogRead(0));
 String tags = "arduino,hello_world";
 //Send to Hologram
 send_message(data, tags);
 //Disconnect GPRS and HTTP
 disconnect_networks();
 delay(120000); // Sleep for 2 minutes
}
Flash the sketch!
Verify Sketch WorksOpen the Serial Monitor in the Arduino IDE and verify you see this around every 2 minutes
Connecting to hologram OK
Sending Message to Hologram
Disconnecting
Server disconnected
GPRS disconnected
- Login to Chirpers.com
- Open the Designer https://chirpers.com/browser/#
- Copy/Paste the following flow into the designer
[{"id":"S2lXLB0HO4Q","type":"inject","z":"gknIlr1p9Ig","name":"Webhook In","topic":"","payload":"","payloadType":"date","repeat":"","crontab":"","once":false,"allowDebugInput":false,"x":161,"y":168,"wires":[["VcX-MRM9DbA"]]},{"id":"VcX-MRM9DbA","type":"function","z":"gknIlr1p9Ig","name":"Parse Hologram Payload","func":"msg = JSON.parse(msg.payload.payload)\nvar data = atob(msg.data);\nmsg = {\"data\": data};\nreturn msg;","outputs":1,"noerr":0,"x":364,"y":168,"wires":[["v9g6gzGou38"]]},{"id":"v9g6gzGou38","type":"debug","z":"gknIlr1p9Ig","name":"","active":true,"console":"false","complete":"true","x":565,"y":168,"wires":[]}]
- Double click the inject node (the button) and copy the webhook URL (we'll need that in a sec)
- Create New Route
- Pick some tags, in the example we use hello_world tag
- Select "Custom Webhook URL" for the action. (Advanced wont work for this)
- Paste in the Webhook URL from Chirpers
- Save
- Press the Play or Reload button to start the flow
- Open the Debug tab
About every two minutes you should see data come in on the debug tab!
Now you can program flows with data received over cellular!
Be sure to let us know about any projects you make with this by tweeting at @Hologram


_PnKPri8a6q.jpg?auto=compress%2Cformat&w=48&h=48&fit=fill&bg=ffffff)


Comments
Please log in or sign up to comment.