Mi wife always have troubles getting all the family to come when dinner is ready, or I get really frustrated when I need her and cannot find her. A home intercom on each room use to be the coolest. However, wiring each room is a huge en-devour. A wireless solution attach to each person/pet would be ideal to get access to everyone.
OpenThread is an open source project started by Nest to communicate with IoT devices. The communication protocol is based on an IPv6 addressing schema. The technology supports UDP sockets, CoAp client and server (supported by the NXP Rapid IoT Kit), DHCPv6 client and server, DNSv6 client, NCP support, border router, etc.
The Thread network is composed of routers and end devices. These can be configure to be commissioners and joiners. The commissioners have the ability to allow the join of new devices into the network. There is also the OTBR (OpenThread Border Router) which allows to establish an WiFi access point and an network bridge with an Ethernet connector to gain access to the internet.
Creating a network of Thread devices require more than one supported device. We only had an NXP Rapid IoT kit, so we look into the SoC devices available and the NRF52840 chip showed to be widely supported by different boards and as the NXP KW41Z are officially supported by the Thread protocol.
However, due to difficulties explained below we could not create a Thread network, so we decided to go with the good old BLE support.
ComponentsWe use the KW41Z as an end device, a Sparkfun Pro Mini NRF52840 as a joiner/commissioner, an NRF52840 dongle as a router and an RPi 3 as the border router. The below images shows the components used. Note that the last image shows the dongle serving a Thread network.
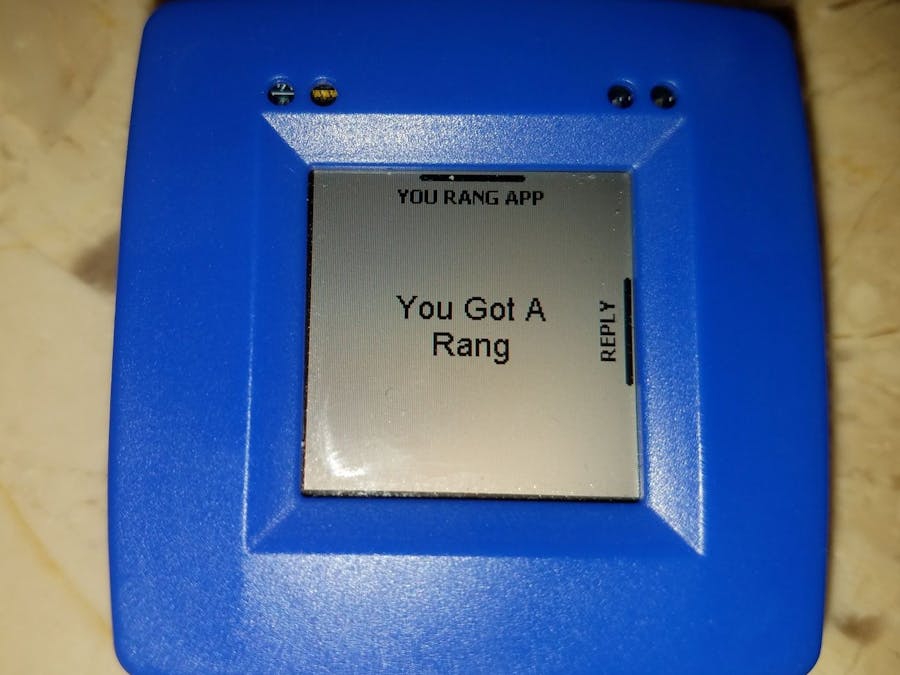
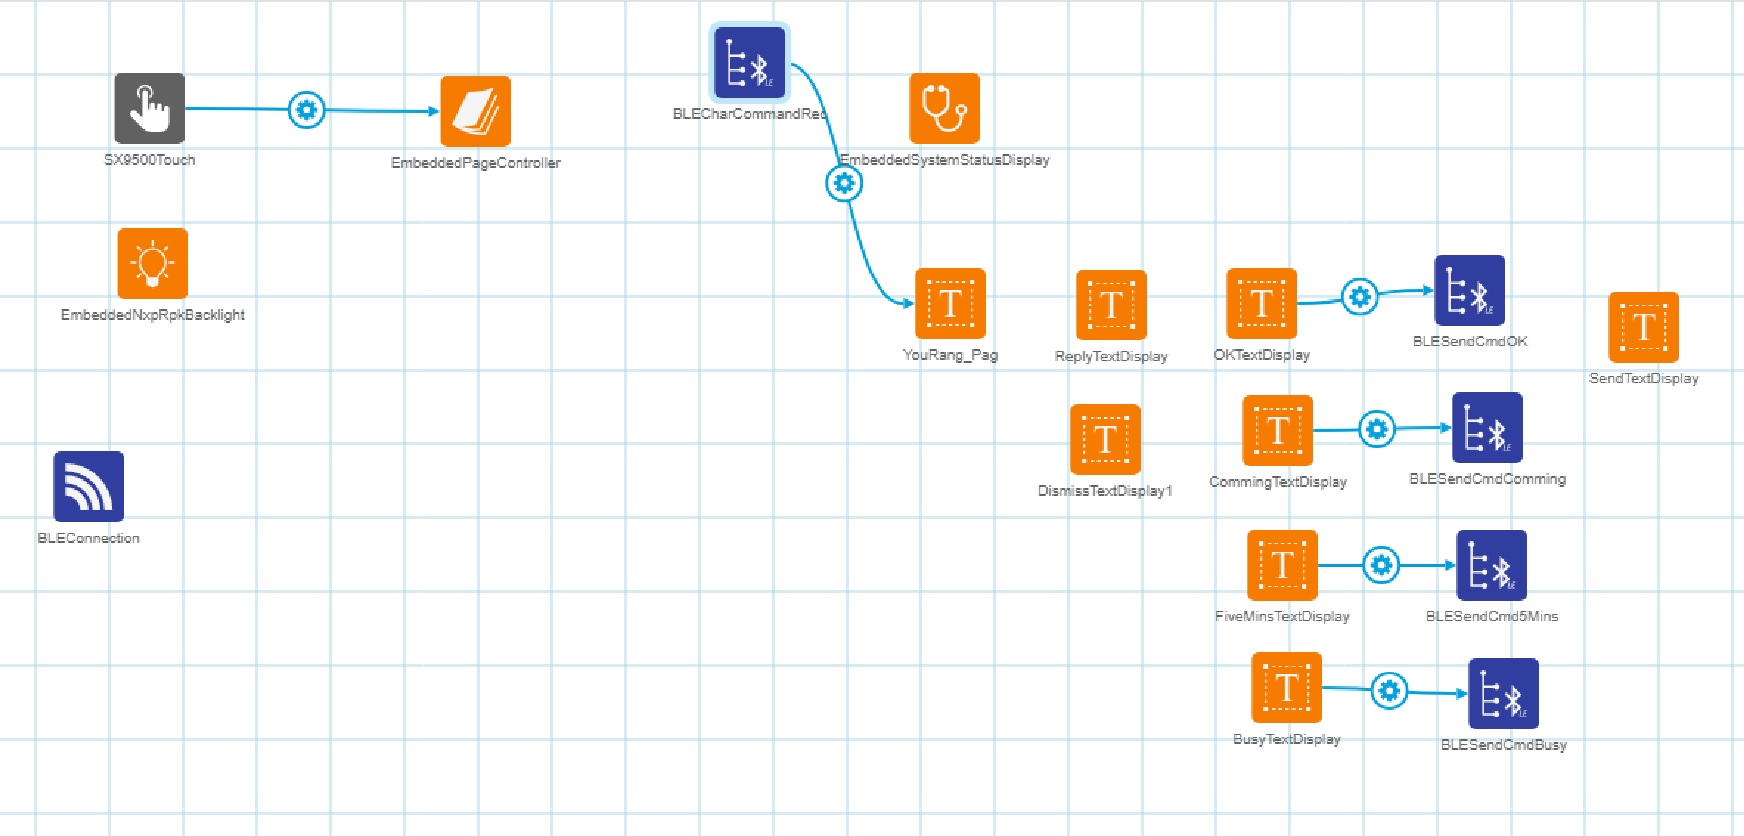
We created a basic application using the WEB UI interface for the NXP Rapid IoT kit. Our intercom communication remains in a listening mode waiting for a message from mobile application. Once the message is received it triggers the event that buzzes a RANG has being received. Then using the touch sides of the NXP Rapid IoT Kit you can choose to dismiss the RANG or select your response.
Using the touch keys you can select the response. There are four currently programmed: OK, Comming, Be There in 5 Minutes and Busy. Selecting Send triggers the set of the BLE characteristic alerting the mobile app of the response.
In order to use OpenThread we decided to program directly the NXP Rapid IoT Kit by using the MCUXpresso IDE. We install and configure the IDE and the corresponding SDK. However, for some reason only the installation on Windows 8 x64 allow us to create a binary firmware that could worked with the NXP Rapid IoT Kit; we tried Ubuntu 18.04 and Windows 10, but the binary files did not produce the results expected on the Hello example. Future work will deal to try to figure out the reason.
The SDK for the KW41Z contains the libraries to access and setup a Thread network, however as you will read below, we could not get that far.
We decided to use the border router approach. After following the instructions on the Open Thread official website (https://openthread.io/guides/border-router), the access point is available as BorderRouter-AP.
Connecting to the network and accessing the Thread server at 10.42.0.1 with an internet browser, you can form a Thread network. The snapshot below shows the status of the form network. So far so good. Now we need to add new devices to the network. To do this there is a Thread application for Android and iOS. The snapshot shows the available Thread network, however here is where things start going south. The next snapshot shows the communication error to the network. We tried different things (compile the whole Thread code, flash the firmware with the latest NCP driver) but nothing worked out.
Looking at the daemon wpantund status there are some errors we could not figure out the reason.
That is when we decided to go with plan BLE.
BLE Escape PlanThe NXP Rapid IoT Kit WEB UI was used to create the intercom application. We hard code the command code for each response in the BLE characteristic block. The code below shows that the data set to the characteristic has being hacked and set to match the command code for the message. In our case OK -> 1, Coming -> 2, Be There in 5 Minutes -> 3 and Busy -> 4.
 ATMO_Status_t BLESendCmdOK_setValue(ATMO_Value_t *in, ATMO_Value_t *out) {
	// Convert to the desired write data type
	ATMO_Value_t convertedValue;
	ATMO_InitValue(&convertedValue);
	ATMO_CreateValueConverted(&convertedValue, ATMO_PROPERTY(BLESendCmdOK, readDataType), in);
   *((uint8_t *)convertedValue.data) = (uint8_t) 1;
	ATMO_BLE_GATTSSetCharacteristic(
		ATMO_PROPERTY(BLESendCmdOK, instance),
		ATMO_VARIABLE(BLESendCmdOK, bleCharacteristicHandle),
		convertedValue.size,
		(uint8_t *)convertedValue.data,
		NULL);
	ATMO_FreeValue(&convertedValue);
	return ATMO_Status_Success;
}
We use the nRF Connect application to sniff the BLE connection and GATT characteristics. Below, we seethe NXP Rapid IoT Kit MAC address, we select it and bond a connection.
We can seethe characteristics defined and expose by the NXP Rapid IoT Kit, and the codes communicated when selecting the corresponding response.
The BLE approach works as expected, but the range of the signal is not ideal. The use of Thread would allow for a better range.
Future WorkSupport the application with Thread.
Improve the mobile application, by using the WEB UI application.
Even though we could not use the Thread network the experience acquire on the project is invaluable, and get us closer to understand and make use if Thread.
Thanks for reading.
Coming soon part 2.


_3u05Tpwasz.png?auto=compress%2Cformat&w=40&h=40&fit=fillmax&bg=fff&dpr=2)
Comments
Please log in or sign up to comment.