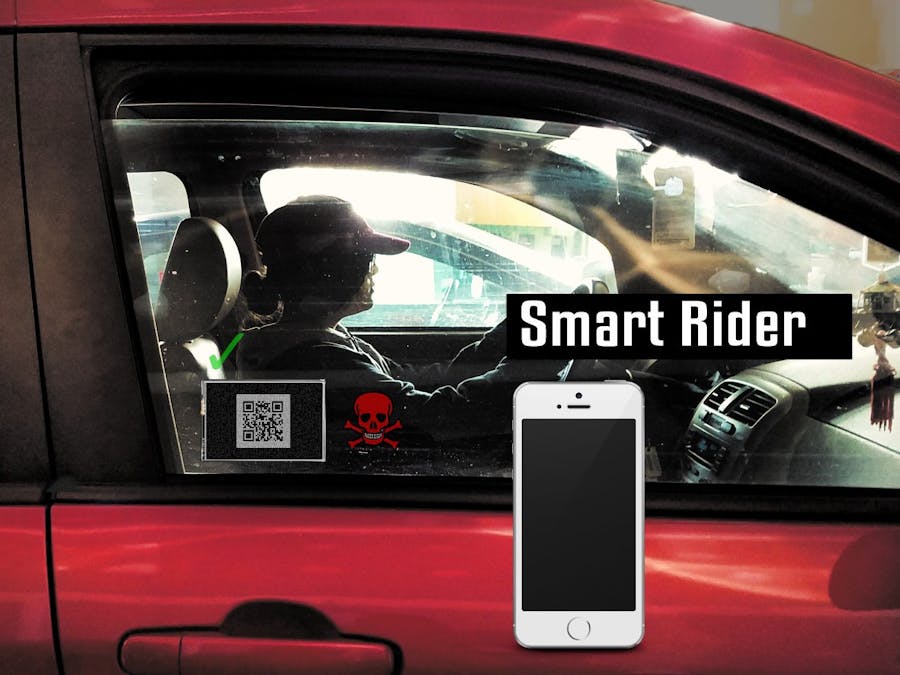
A Smart City requires to provide comfort, value, convenience and SAFETY to the people that lives and visits. It saddens us and worry me as a father when we heard the news about a South Carolina student that was killed when mistakenly ride a car pretending being a popular commercial taxi service. With so much smart devices now days, we thought there should be a way to confirm your ride before boarding it.
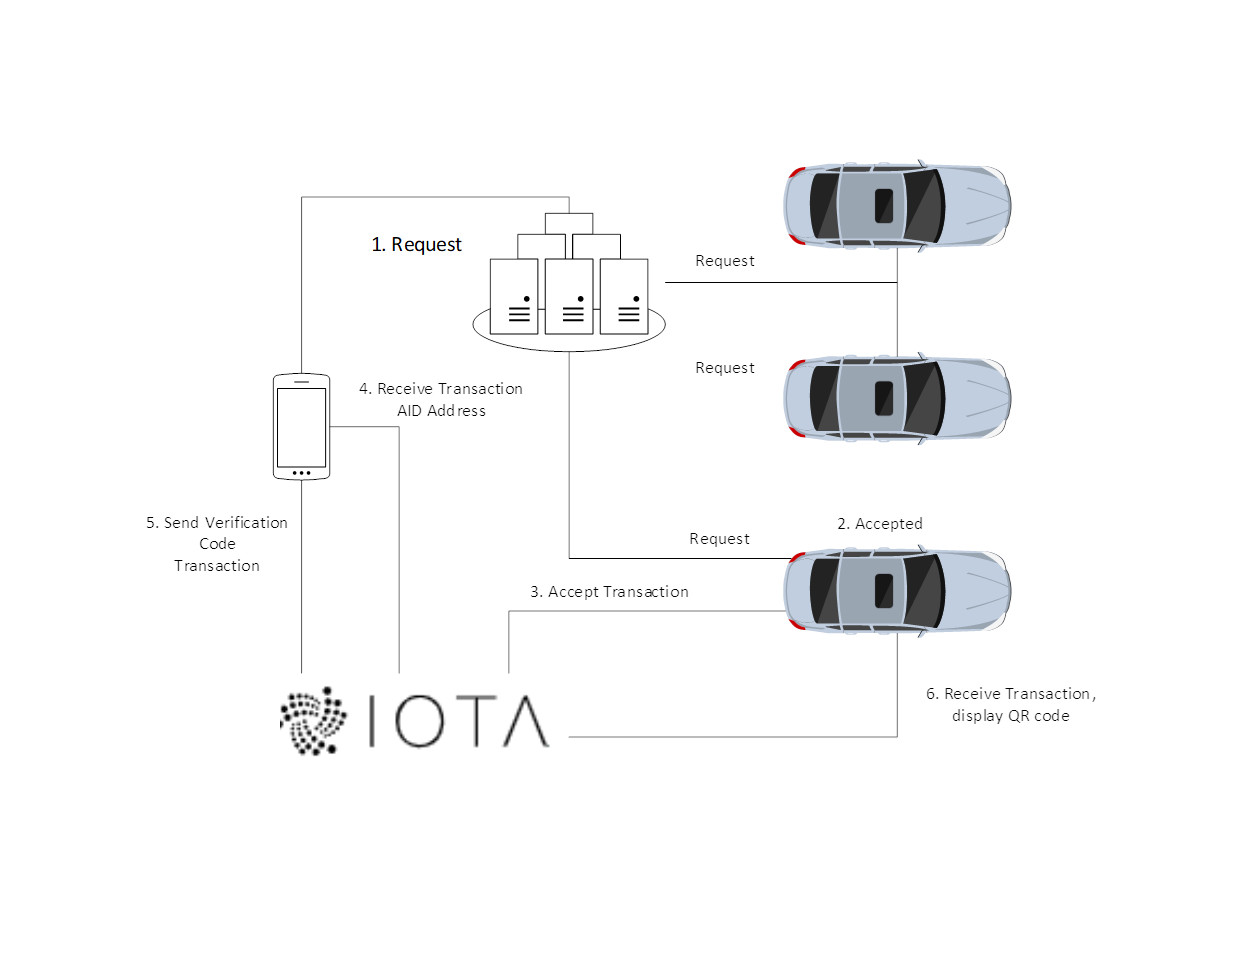
The proposal prototype shows a system that sends a unique confirmation code to the device installed on the taxi service window that can be corroborate by your cell phone.
The project envelopes the request of the service, the authentication of ride identity, the payment of the service and the preserve of the user and driver riding history in a immutable transaction records.
This phase shows the first stage of an authentication of ride identity system based on the IOTA Tangle security and transactions on the transfer of a unique token.
IOTA is a DLT (Distributed Ledger Technology) that has taken momentum and buzz in the blockchain ecosystem. We were thrilled to see so much support for the technology and all the different libraries to support different platforms, from servers to IOT devices. We have to admit that it was complicated to surf our way in which platform to use and develop. The following are some of the projects we found and even though we did not use all of them, we were able to find a platform we could put together a small prototype much faster than using blockchain, Hyperledger Fabric, or Hedera Hashgraph.
- JAVA
You can download a Java library based on IOTA from its github repository here. Compilation of the jar library was not straight forward, but we figure out after properly installing the mvn application, together with the Apache Maven.
- C
The IOTA libraries have a client version programmed in C that can run on an ESP32 board. You can download the library here with a nice explanation on how to install here. In order to use this library you need the ESP32 Espressif make environment.
A complete step-by-step on how to install the environment is found here. The process although well explain take some time for the first time user (like us).
- Arduino
There is an interesting article where they use a light version of IOTA wallet to support Arduino, you can find it here.
- JavaScript
Recently, the IOTA organization release a workshop of samples that goes from the traditional Hello World to the more advance MAM system, you can download them here. These examples were actually the first ones that we were able to run successfully by following the instructions on the github page. The npmi command work like a charm and install all the dependencies and variables needed to run the examples. Kudos. However, when it come the time to program the interface, we were puzzle by our inexperience with the node package manager and to link a user interface libraries to the project.
QR codes on ESP32We started by looking for libraries that could display a QR code on a Feather Wing TFT ESP32 display. We found the QR code libraries that supports ESP8266 with a Oled Driver for SSD1306.
We modified the library to support the ESP32 and the Adafruit FeatherWing TFT ILI9341. We also scale by 2 the QR code to have a better look at the code.
Here is where the interesting part start. We realize that the support for IOTA on Arduino was not gonna be easy to support. Then we decided to use the Espressif ESP32 IDF platform to develop since there is a C client library for IOTA. Check the Authentication Identity section for a detail explanation of the library.
Since we were to use the ESP32 IDF we needed a C library that could support the ILI9341 library. We then found the ESP32_TFT_Library based on the ESP32 make platform. After solving a couple of header files that were not in the path defined, we were able to compile the tft_demo program.
This will be the base for our AID device, once we can merge the C client library based on the Cmake platform with these library based on the make platform. Not an easy task.
Since we run out of time, we decided to use the Arduino QR code library in order to show a prototype of the AID device and later develop the application.
The modified library makes use of the Adafruit GFX library and the corresponding display ILI9341. Here is the header file that substitutes the display instance.
#include <Adafruit_GFX.h>#include <Adafruit_ILI9341.h>class ESP32QRcode{ private: Adafruit_ILI9341 *display; void render(int x, int y, int color); public: ESP32QRcode(Adafruit_ILI9341 *display); void init(); void debug(); void screenwhite(); void create(String message);};
We also scale the QR code image by a factor of two by copying the surrounding neighbor pixels of the original code. Here is the code
void ESP32QRcode::render(int x, int y, int color){ x=x+offsetsX; y=y+offsetsY; if(color==1) { display->drawPixel(x*2,y*2,ILI9341_BLACK); display->drawPixel((x*2)+1,(y*2)+1,ILI9341_BLACK); display->drawPixel((x*2),(y*2)+1,ILI9341_BLACK); display->drawPixel((x*2)+1,(y*2),ILI9341_BLACK); } else { display->drawPixel(x*2,y*2,ILI9341_WHITE); }}
The example to generate a QR code is as follows
 /* *********************************************************************************
* ESP8266 QRcode
* dependency library :
*   ESP8266 Oled Driver for SSD1306 display by Daniel Eichborn, Fabrice Weinberg
*
* SDA --> D6
* SCL --> D7
***********************************************************************************/
#include <SPI.h>
#include <Adafruit_GFX.h>
#include <Adafruit_ILI9341.h>
#include <esp32qrcode.h>
  #define STMPE_CS 32
  #define TFT_CS   15
  #define TFT_DC   33
  #define SD_CS    14
Adafruit_ILI9341 display = Adafruit_ILI9341(TFT_CS, TFT_DC);
ESP32QRcode qrcode (&display);
void setup() {
   Serial.begin(115200);
   Serial.println("");
   Serial.println("Starting...");
   display.begin();
   // Initialize QRcode display using library
   qrcode.init();
   // create qrcode
   qrcode.create("UNIQUECODEBLUE");
}
void loop() { }
We have provide the two files that updates the library to use the ILI9341 display.
We are currently working to port this code into the ESP32 IDF platform.
Smart Rider AppWe developed a prototype on JAVA to simulate the last stage of the program as depicted on the above time chart. The user selects a passcode, the passcode is bundle on a transaction and send to the destination address that belongs to the Authentication Identity Device (AID) device.
The AID device receives the transaction and creates the QR code on the display. The user walks to the vehicle and scans the QR code. If the codes matches the application displays a green check mark icon, if the codes does not match a red icon displays and the user walks away from the vehicle.
At this point we are assuming that the application received the drivers address once the request for ride was accepted.
The status window shows the first two lines, the result of the the message sent to the tangle. The third line thru shows the transactions that have being committed to the specific destination address.
The application calls the SendMessageTest class which creates the IOTA client.
    	iotaClient = new IotaAPI.Builder()
   	        .protocol("https")
   	        .host("nodes.devnet.thetangle.org")
   	        .port(443)
   	        .build();
Here we are creating an instance of an IOTA client that will connect to a public node. In this case the devnet tangle.
The we create the transaction
new Transfer(TEST_ADDRESS_WITH_CHECKSUM_SECURITY_LEVEL_2, 0, StringUtils.rightPad(TEST_MESSAGE, 2188, '9'), TEST_TAG)
We bundle it up and send it to the tangle.
iotaClient.sendTransfer(TEST_SEED1, 2, DEPTH, MIN_WEIGHT_MAGNITUDE, transfers, null, null, false, false, tips);
Finally, we check the transactions submitted using the defined seed, and verify that the message was submitted and committed.
iotaClient.getTransfers(TEST_SEED1, 2, 0, 0, false);
gtr.getTransfers();
You can see from the code that currently we have the destination address hard coded. This was done in order to proof the concept. A future version of the application will receive the the destination address by checking the acceptance transaction from the driver.
Authentication Identity DeviceThe Authentication Identity Device (AID) prototype is based on an Adafruit HUZZA32 ESP32board. The device will receive a transaction with the passcode to be converted into a QR code and display.
In order to read the QR code we are using an app for android in our phone to scan and display the QR code data. We use the QR Code Reader app which scans the code and displays the encoded message. At this point we verify that the message matches the one sent in the transaction.
The next step is to integrate all the platforms and to support 4G cell phone communication instead of WiFi.
We hope this can inspire on developing a more SAFETY support system.
Thank you for reading.


Comments
Please log in or sign up to comment.