Having a smart-meter in your house handles Electricity and Gas, common done by digital P1 interfacing (see P1 project). Water is in my area still old-fashioned meters with a dial and rotating counters. Elster is company mostly used, and here are some examples:
My meter is using the metal(magnet?) disk, and Elster (and 3rd parties) are providing a induction-based or reed-contact based sensor to be mounted on top of the meter. These items costs something like 50-100 euro each, and if you don' t have the meter with the metal disk, it doesnt work.
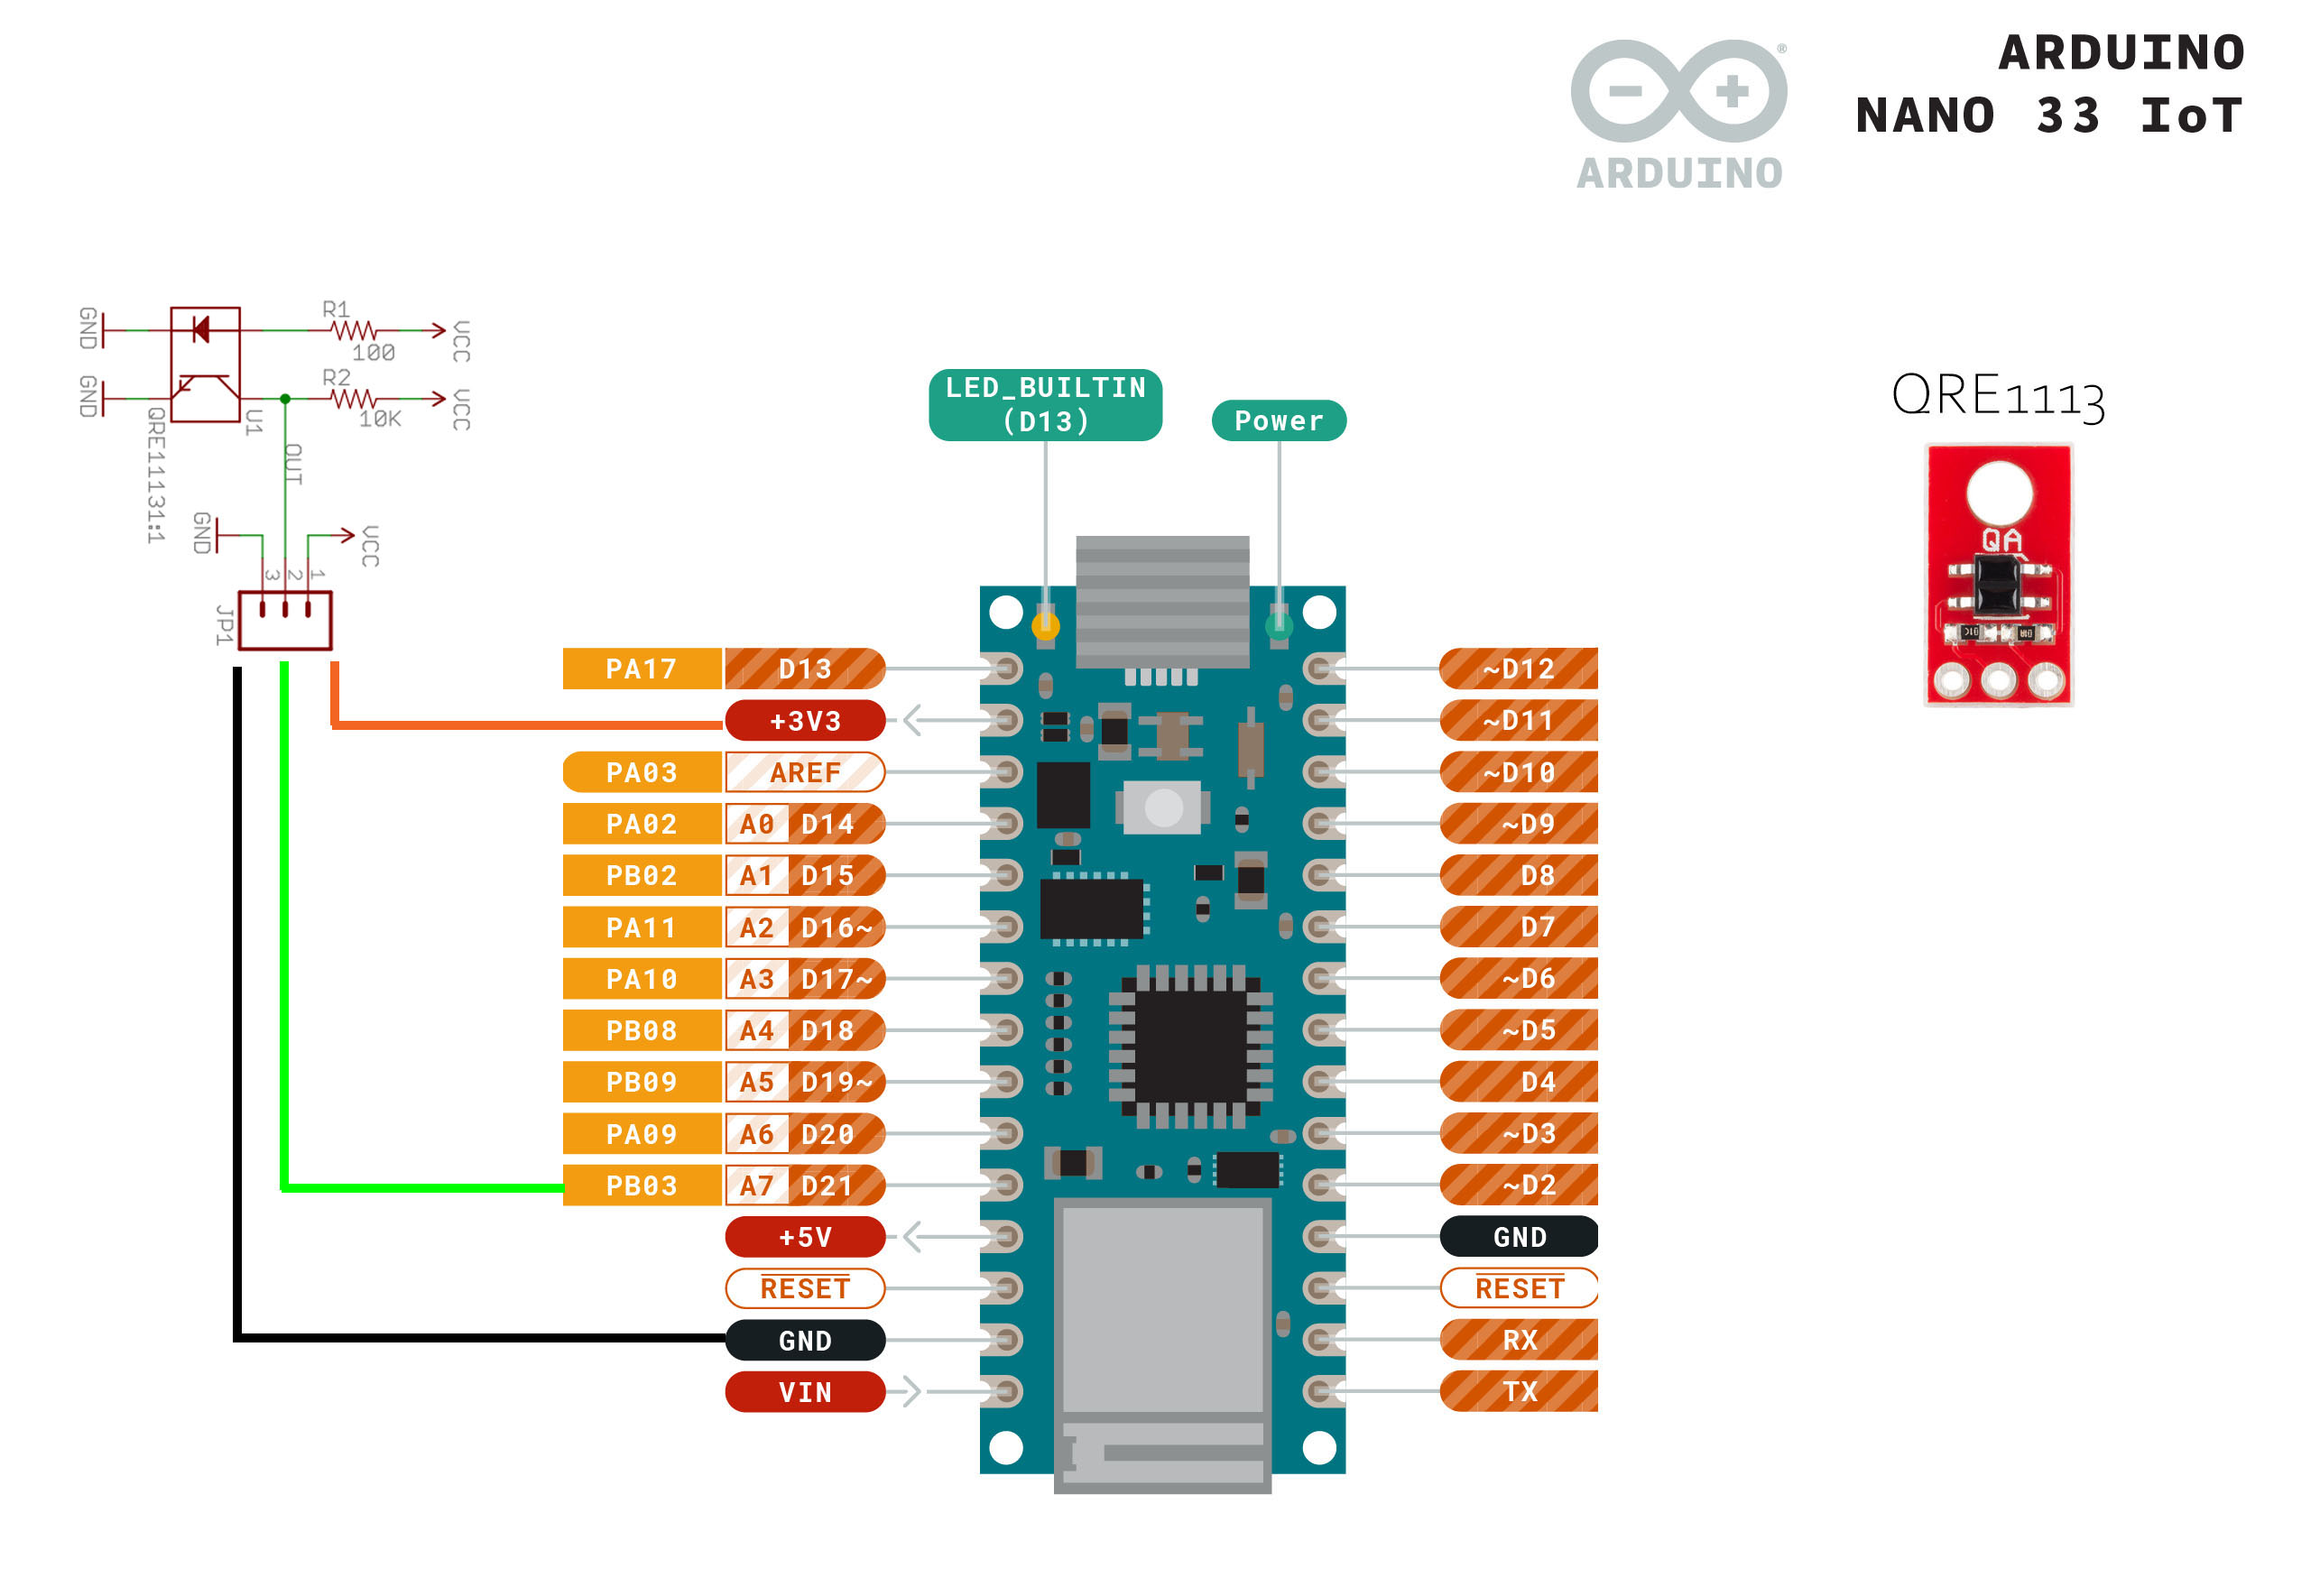
OpticalOther solution is a cheap reflective sensor, however it has to measure through the glass, and reflection between the white background, red needle or the disk could be marginal. and positioning is essential. Time to test this :)I found a nice OnSemi QRE1113 sensor, mounted on a Sparkfun board, cheap and simple :
Reflection is measured by the Photo transistor, low reflection, OUT stays at VCC, high reflection it pulls to GND. You can use it with 3.3V or 5V, constant current or PWM-ed. Sensor is glued with Epoxy on the meter:
Using an Arduino Nano that supplies 3.3V and reads the OUT signal on its Analog port, lean and mean connection :
Using a simple test routine to read the ADC and send out the data serially to the Arduino Serial Plotter gives the following result for various water use (stopped- slow, fast) :
As the sensor could give signals between GND and VCC, we see we loose quite some signal. Nevertheless its stable and we can define logic levels to count the rotating disk: Metal reflection at 1.1V, non-metal reflection around 1.7V, quite easy to make a hysteresis function that shows the high/low levels.
Optional we could use a 1uF Cap to ground on the OUT pin, to remove the reflection spikes at the low side. Additional, when the dial is rotating, the red needle can also be recognised, This would mean this method could be usable for the other Elster water meters. (to be tested with higher accuracy or with 5V).
C ProgramCode is build with various libraries :
#include <WiFiNINA.h>       // https://github.com/arduino-libraries
#include <PubSubClient.h>   // https://github.com/knolleary/pubsubclient
#include <EasyWiFi_nano.h>  // https://github.com/javos65/EasyWifi-for-Nano
#include <RTCZero.h>        // https://github.com/arduino-libraries/RTCZero
#include <WDTZero.h>        // https://github.com/javos65/WDTZero
#include <NTPClient.h>      // https://github.com/arduino-libraries/NTPClient
PubSup for the MQTT posting. It posts the increasing counter, est. water current and daily usage.Easywifi is for setting up your wifi connection, you can use the standard Arduino Lib for that (Easywifi stores login details in NINA-flash, or can use the AP feature to choose your wifi network at setup).The NTP server is used to get a realtime clock. This way we can measure the Daily Water-usage.To set your actual watermeter-counter, a small HTTP webinterface is available accessible by a browser. The counter data is stored in on-board NINA-flash. So by a power-down, it wont loose its data, and starts correctly (assuming the power down was that short, no water was used)
To Do- build small casing - done
- test red needle measuring at 5V
- make battery backup, so sensor keep measuring at powerdown
Build a casing, just in case :)


_3u05Tpwasz.png?auto=compress%2Cformat&w=40&h=40&fit=fillmax&bg=fff&dpr=2)
Comments
Please log in or sign up to comment.