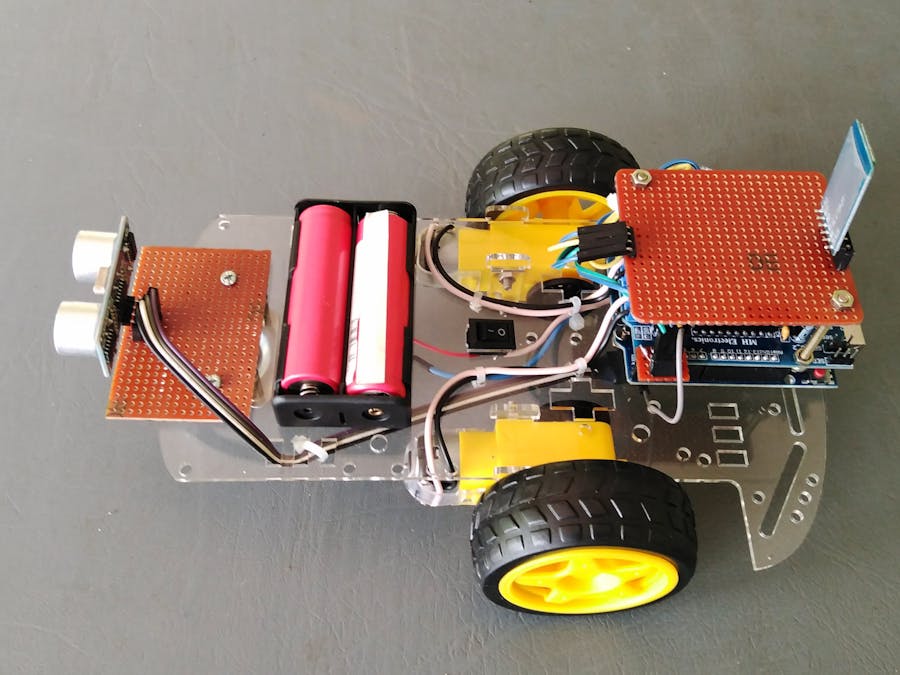
This project includes how to design and develop a Bluetooth Controlled Robot with Speed Control and Auto Breaking System using L293D Motor Driver Shield.
Components Required
- Arduino UNO Rev 3
- L293D Motor Driver Shield
- HC-05 Bluetooth Module
- HC-SR04 Ultrasonic Sensor
- 2WD Robot Chassis Kit with Gear Motors
- 18650 Battery Holder
- 2 x 18650 Batteries
- Connecting Wires / Jumper Wires / Male& Female Connectors/ Heat Sleeves
- Vero Board
- Soldering Iron / Solder / SolderingPaste
- Android Phone
- Bluetooth Controller App
Figure 01: The Basic Connections with the Arduino Uno board, Ultrasonic Sensor, and HC-05 Bluetooth Module.
Figure 02: Power and Motor wiring of L293D Motor Driver Shield
Figure 03: Ultrasonic Sensor and Bluetooth Module wiring of L293DMotor Driver Shield
PhotographsFigure 04: D0, D1, and D2 pins were extended using a piece of Veroboardand connectors.
Figure 05: +5V, GNG, and Analog pins were soldered using male connectors
Figure 06:
Bluetooth shield, using Bluetooth Module, Male &Female Connectors, and Veroboard
.
Figure 07:
Ultrasonic shield, using Ultrasonic Sensor, Male & Female Connectors and Veroboard.
Figure 08: Cable Management, using cable ties and Connector Joint protection using Thermo sleeves
Figure 09: The left-side view of the Arduino Car Robot
Figure 10: The right-side view of the Arduino Car Robot
Figure 11: The rear view of the Arduino Car Robot
Figure 12: The front view of the Arduino Car Robot
Figure 13: The top view of the Arduino Car Robot
Figure 13: The bottom view of the Arduino Car Robot
Options
1.AutoBreaking System
Ultrasonic Sensor was used to build the Auto Brake System. Trigger pin was connected to the D2 pin and the Echo pin to A0. Auto braking systems only work when forward run.
#define trig 2
#define echo A0
digitalWrite(trig,LOW);
delayMicroseconds(2);
digitalWrite(trig,HIGH);
delayMicroseconds(2);
long t = pulseIn(echo,HIGH);
long cm = t / 29 / 2;
if(cm<20){
Stop();
   }
else{ forward(); }
2.MultipleSpeeds
“Speed” was used for the speed variable.
motor3.setSpeed(Speed);
motor4.setSpeed(Speed);
case '0': Speed = 100     ; break;
case '1': Speed = 140     ; break;
case '2': Speed = 153     ; break;
case '3': Speed = 165     ; break;
case '4': Speed = 178     ; break;
case '5': Speed = 191     ; break;
case '6': Speed = 204     ; break;
case '7': Speed = 216     ; break;
case '8': Speed = 229     ; break;
case '9': Speed = 242     ; break;
case 'q': Speed = 255     ; break;
3.MainFunctions
Forward, Backward, turn left, Turn Right, and Stop
Only M3 and M4 are used for Left and right wheels. “Forward” and “Backward” are built-in functions.
motor3.run(carfunction);
motor4.run(carfunction); carfunction = forward /backward
"Release" function is used to stop motors.
motor3.run(RELEASE);
motor4.run(RELEASE);
Android App for Bluetooth Car Robot
Link: https://play.google.com/store/apps/details?id=braulio.calle.bluetoothRCcontroller&hl=en&gl=US


_ztBMuBhMHo.jpg?auto=compress%2Cformat&w=48&h=48&fit=fill&bg=ffffff)


Comments
Please log in or sign up to comment.