I started out the year with new car insurance. The company offered me this dongle that was able to monitor my driving and capture statistics while I'm on the road using the OBD-II port in my vehicle. I've since returned the device but the one feature I found personally useful was that, for every trip, it logged my time on the road and the mileage driven. Privacy issues aside, I actually miss having that ability. It would be nice to able to log time and mileage for use in billing and to create records for my end of year tax returns.
Using the AT&T Starter Kit and an inexpensive GPS module, I felt pretty confident this would be achievable. The AT&T starter kit comes with an Avnet FRDM-K64F microcontroller board and an AT&T 3G communications shield. This shield provides access to the AT&T wireless network and the kits starts me out with six months of service, 300 MB of data plus limited text messaging. It also includes a PMOD socket which makes it easy to connect a GPS module.
Generally, the project is broken up into three parts:
- Software Configuration
- Hardware Setup
- Mapping
Software mostly involves creating the various accounts needed to get the equipment up and running. I had to tweak some of the core components to add the GPS but the startup guide generated most of what I needed.
Accounts:
- Cloudconnectkits.org account for kit registration
- Jasper account for SIM card registration
- ARM Mbed.org account for compiling and modifying the SBC/WNC-Shield software
- AT&T Flow account for implementing the sensor data
- AT&T M2X account for an end-point device used by Flow. Essentially, this is the location where sensor data is stored to and read from.
Protip: I ran into a number of problems using the Microsoft Edge browser. It flat out didn't work for Flow and was quirky in other places. Stick with Chrome or Firefox (I used Chrome) for best results.
It sounds like a lot but it actually was pretty simple and smooth. To make sure I completed everything properly, I followed the AT&T Cellular IoT Kit Getting Started Guide through to page 17. At that point, you'll want to stop so we can implement the GPS or you'll be repeating steps.
Once you have done everything up to and including page 17 of the getting started guide, we'll need to add some code to make the GPS data streams available. Editing the code is quite simple. You'll double-click on a node to open its properties and then can type code directly into the editing window. We'll need to edit one node and add six new nodes.
Flows are a pretty powerful way to get an IoT application up and running on a variety of platforms. Each widget encapsulates enough NodeRED code to make interesting things happen. You simply connect the various widgets together, configure them and you're up and running. You can organize your flows onto multiple tabs to keep your application organized. Some flows are single use and setup while others are your core functionality.
Working from the fork you already made of the Avnet Starter Kit Dev application, jump to the Data tab and double-click the M2X lead-In function.
We need to add the streams for the six GPS data points (longitude, latitude, altitude, speed, course, and gps_satellites) to the JSON values for msg.payload. The italicized code is what we added. Once you've pasted the code, you'll click OK.
//Post multiple values to multiple streams example
var timestamp = msg.payload.timestamp || new Date().getTime();
timestamp = new Date(timestamp).toISOString();
//msg.topic = "devices";
//msg.action = "postMultiple";
//msg.topic_id = msg.payload.deviceID || global.get("deviceID");
msg.url = "https://api-m2x.att.com/v2/devices/";
if(msg.payload.deviceID) {
   var deviceID = msg.payload.deviceID || global.get("deviceID");
   msg.url += deviceID + "/updates";
} else if(msg.payload.serial) {
   msg.url += "serial/" + msg.payload.serial + "/updates";
}
msg.headers = {
   "X-M2X-KEY": global.get("M2X-Key"),
   "content-type": "application/json"
};
msg.payload = {
   "values": {
   "temp": [
       { "timestamp": timestamp, "value": msg.payload.temp  }],
   "humidity": [
       { "timestamp": timestamp, "value": msg.payload.humidity  }],
   "accelX": [
       { "timestamp": timestamp, "value": msg.payload.accelX  }],
   "accelY": [
       { "timestamp": timestamp, "value": msg.payload.accelY  }],
   "accelZ": [
       { "timestamp": timestamp, "value": msg.payload.accelZ  }],
   "heatIndex": [
       { "timestamp": timestamp, "value": msg.payload.heatIndex  }],
   "latitude": [
       { "timestamp": timestamp, "value": msg.payload.latitude  }],
   "longitude": [
       { "timestamp": timestamp, "value": msg.payload.longitude  }],
   "altitude": [
       { "timestamp": timestamp, "value": msg.payload.altitude  }],
   "speed": [
       { "timestamp": timestamp, "value": msg.payload.speed  }],
   "course": [
       { "timestamp": timestamp, "value": msg.payload.course  }],
   "gps_satellites": [
       { "timestamp": timestamp, "value": msg.payload.gps_satellites  }]
   }
};
return msg;
Protip: If you can't click the OK button, you have an error in the code. Look for red X or yellow ! symbols to the left of your code. Hovering over it will explain the problem. Having misplaced commands and braces are common problems here.
Next, switch to the Registration tab. Under that tab, you'll need to add six function widgets to create each of the new streams.
You'll find the function widget about halfway down the column of widgets. I shifted things around to make room and then added six of these widgets and wired them just like the existing functions on the screen.
Each function needs to be programmed as follows:
//altitude
msg.url += "streams/altitude";
msg.payload = {
   "display_name": "Altitude",
   "unit": {
       "label": "meters",
       "symbol": "m"
   },
   "type": "numeric"
};
return msg;
//latitude
msg.url += "streams/latitude";
msg.payload = {
   "display_name": "Latitude",
   "unit": {
       "label": "Latitude",
       "symbol": "°"
   },
   "type": "numeric"
};
return msg;
//longitude
msg.url += "streams/longitude";
msg.payload = {
   "display_name": "Longitude",
   "unit": {
       "label": "Longitude",
       "symbol": "°"
   },
   "type": "numeric"
};
return msg;
//gps_satellites
msg.url += "streams/gps_satellites";
msg.payload = {
   "display_name": "Satellites",
   "unit": {
       "label": "Found",
       "symbol": ""
   },
   "type": "numeric"
};
return msg;
//speed
msg.url += "streams/speed";
msg.payload = {
   "display_name": "Speed",
   "unit": {
       "label": "meters per second",
       "symbol": "m/s"
   },
   "type": "numeric"
};
return msg;
//course
msg.url += "streams/course";
msg.payload = {
   "display_name": "Heading",
   "unit": {
       "label": "Heading",
       "symbol": "°"
   },
   "type": "numeric"
};
return msg;
Once you've completed these changes, you can Deploy your Flow application and continue with the Startup Guide page 18. After registering your device from Flow to M2X, you should see all twelve streams under your Virtual Starter Kit Device in the M2X Devices Panel.
Hardware SetupContinuing with the Startup Guide on page 19, you'll need to upgrade firmware on both boards and assemble the hardware components. Complete these instructions and stop on page 24 before you reprogram the board. To make the GPS accessible, you'll need to make one more change to config_me.h
Change iSensorsToReport to include your GPS. You can now continue with the starter guide from page 24, step 6.2 continuing through the end of page 26. I've forked the original repo to one with the GPS enabled. You can also download an exported version from the overall project repo.
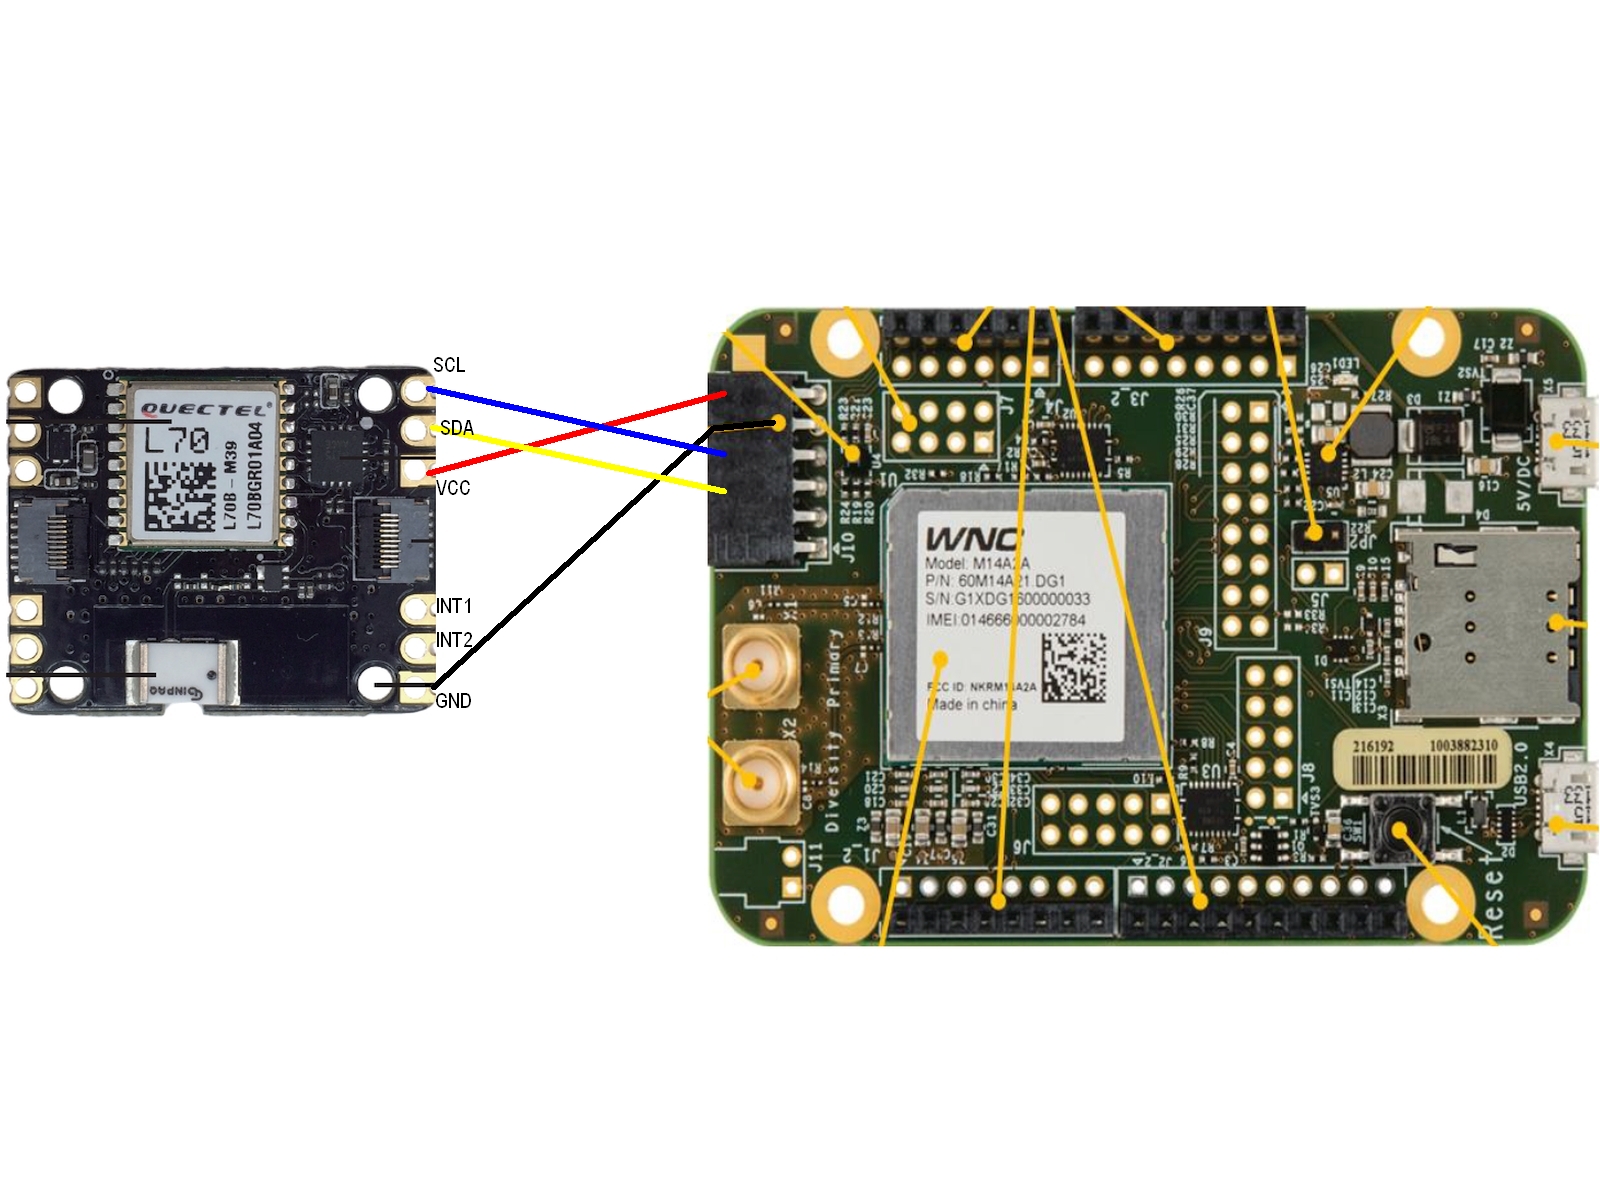
Finally, I went ahead and soldered some headers onto the GPS unit.
This made it easy to connect the GPS to the Avnet WNC Shield using a small breadboard and four M/M jumper wires.
You should now have a fully functioning data logging system.
If you need more help getting the SeeedStudio Xadow GPS v2 connected, use this excellent guide.
Protip: I had a lot of difficulty indoors getting the GPS to acquire enough satellites. It needs six or seven before it proceeds to the data logging stage. If you connect the USB cable to the FRDM board (left connector by the reset button), you can use your favorite terminal program (I use putty) to connect to the COM port and watch the activity. No login is required. While the GPS is acquiring satellites, you'll see a series of V? where ? is the number of satellites currently enumerated by the GPS board. To speed the process, I powered the WNC board using a portable USB battery pack and took it outside. After 30 to 120 seconds, it acquired enough satellites to continue.
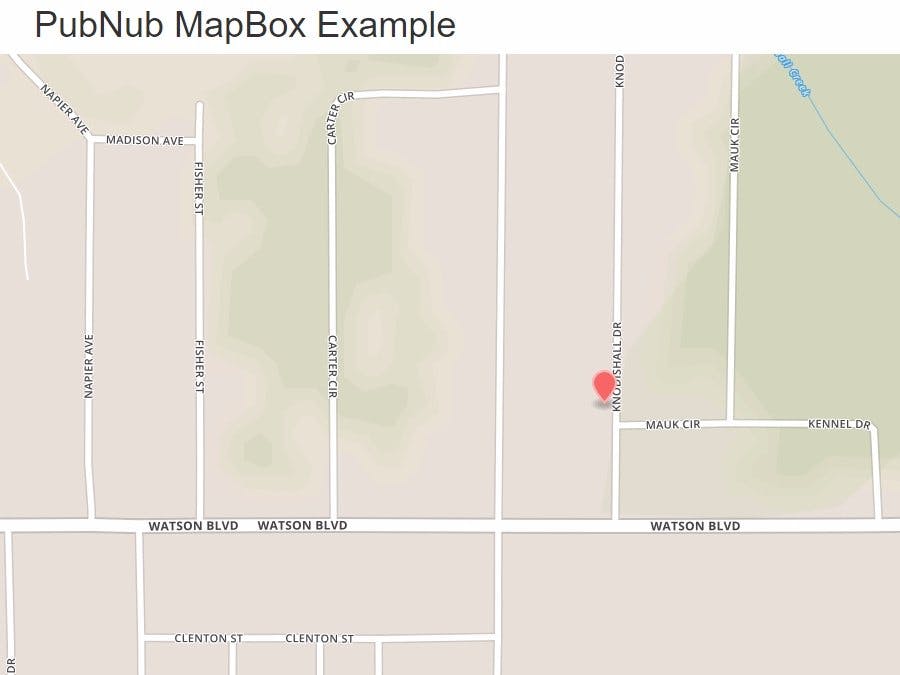
This was by far the most challenging part. Most of the available tutorials are simply wrong or outdated. To make the mapping work, I updated my Flow application to send the streams to PubNub. Once I was able to view the streams in the PubNum console, I proceeded to create a MapBox account and was able to hack together a basic webpage with Javascript to update the map in real time.
First, go create a new account at PubNub. Create a new App.
Click on the new app and create new keyset.
Toggle to a new tab and log back into Flow and open your existing app. On your Data tab, you'll be adding a PUBNUB OUT widget. Type pubnub into the search at the top of the widget list. Drag PUBNUB OUT to a position where you can wire it from the M2X lead-in function. Wire them together.
Double click on the PUBNUB OUT function. Click the pencil icon and copy and paste the publish and subscribe keys you just made in PubNub. Create a channel name. The actual name is unimportant but you'll need to refer to it later so make it memorable. I used map.
You should be able to jump to the PubNub Console to verify data is flowing. I ran into a bit of a problem here. The messages panel was giving me an authentication error. To fix this, I clicked the PAM button, entered my secret key and enabled both read and write. After clicking GRANT, my status changed to Connected and I was off and running. Don't forget to put the correct channel name in the channel field.
If you haven't already pulled down my repo from Github, you'll need to grab the three files files in the mapping folder. There is one gotcha here. First, if you aren't running a server with SSL, the javascript will fail in Chrome. Turns out Google has deprecated Geolocation API for insecure connections as of April 2016. You can still run it from your LOCALHOST. I haven't tested this in Firefox or other browsers. Anyway, place these three files in your preferred location and edit the mapBoxExample.html file. You'll need to enter your mapBox access Token and PubNub keys into the script.
Wait... You don't have a mapBox account? Go create one! Once you've created the account, head to the developer's page and create your free access token.
That is about it! My map is boring. I haven't moved much since I started writing up the project. Next step (subject to a new project) is to extend the application with mapbox to calculate driving distances per trip. It looks like I will also be able to translate lat/long to addresses (at least within the USA) so I'll be data-mining the streams for tax purposes.


Comments
Please log in or sign up to comment.