
Hardware components | ||||||
 |
| × | 1 | |||
 |
| × | 1 | |||
 |
| × | 1 | |||
 |
| × | 1 | |||
 |
| × | 1 | |||
Software apps and online services | ||||||
| ||||||
 |
| |||||
Hand tools and fabrication machines | ||||||
 |
| |||||
 |
| |||||
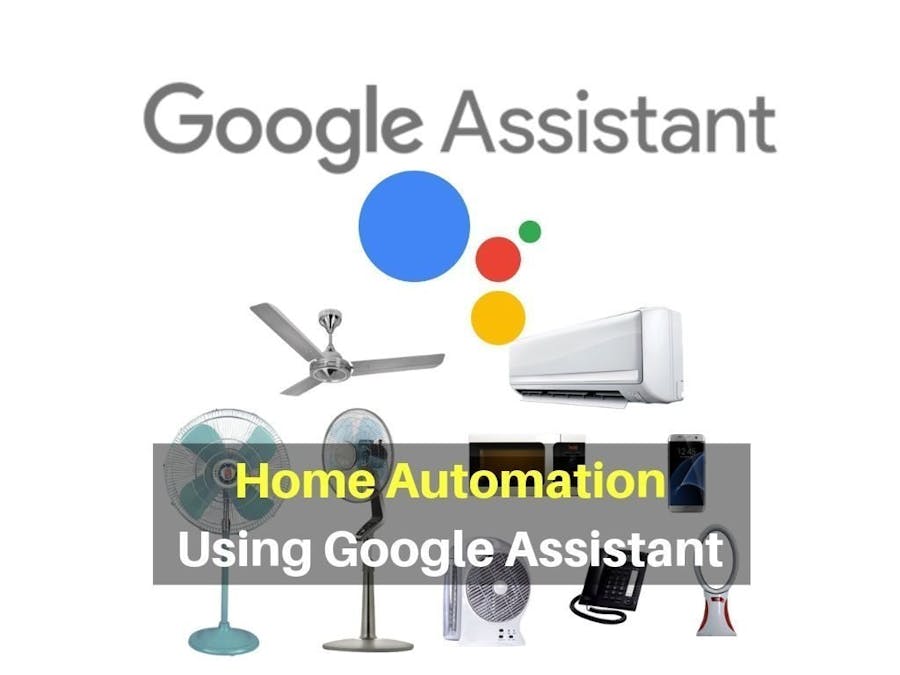
This is a project on Home Automation where we can control home appliances by making use of IoT. As the demand for automation is rising, we use Bolt IoT to make switching of appliances easy. In this project, we control a Led strip by voice commands using google assistant. We give commands of our choice by IFTTT to control the appliances and also specify the reply we get by giving those commands. By this, we turn the appliances On and Off by just sitting at a place comfortably.
BOLT:
Bolt is an IoT Platform for the most rapid development of IoT products and services. Bolt IoT platform gives us the capability to control our devices and collect data from IoT devices safely and securely no matter where we are. We can get actionable insights by deploying machine learning algorithms with just a few clicks to detect anomalies as well as predict sensor values.
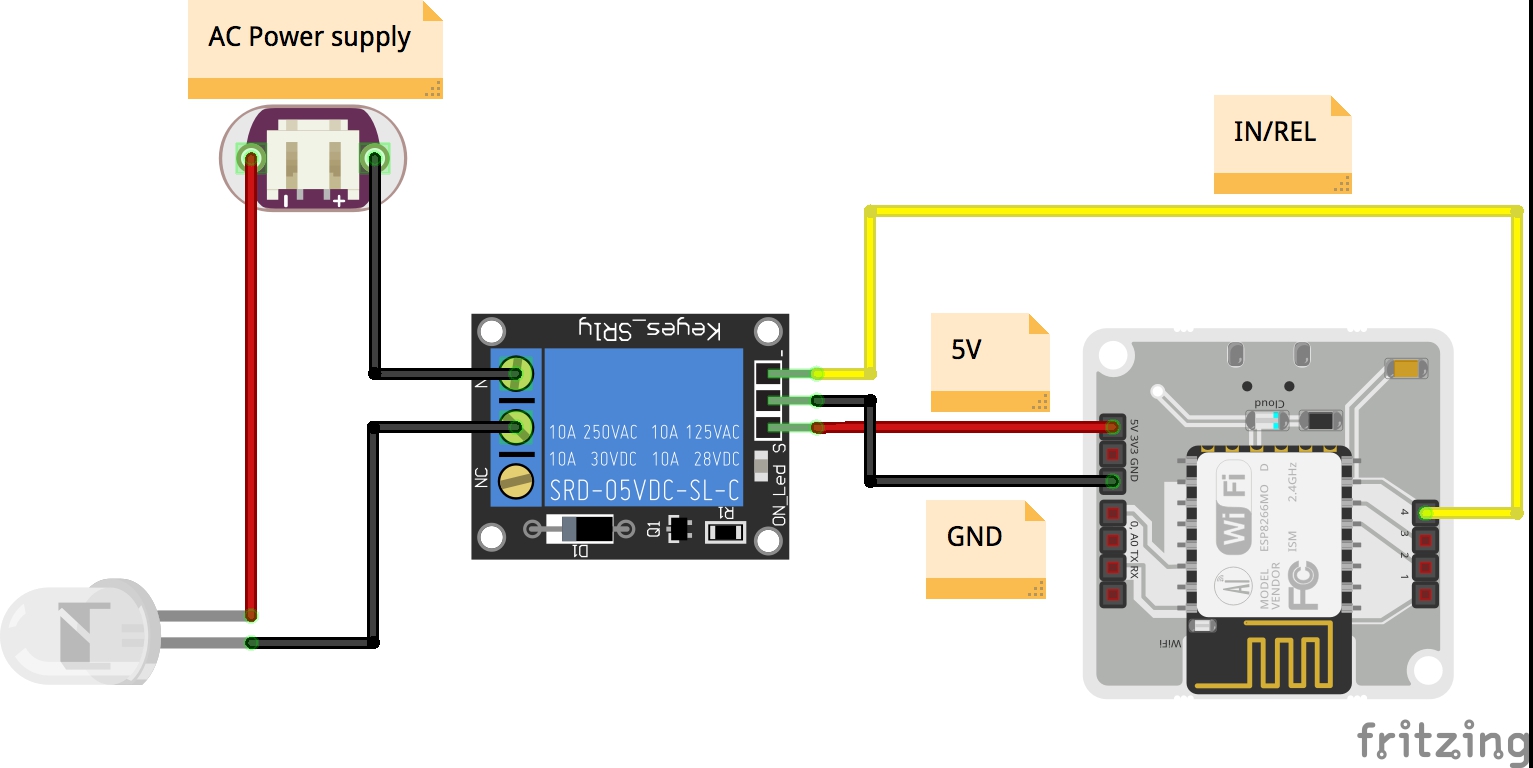
We use a relay for switching purposes. The type of relay depends on the number of devices we want to connect. If we want to connect a single appliance, we use a single channel relay.
We connect the relay to our bolt wifi module and give supply to it for switching purposes.
Steps for connection :1) Connect 3.3V from our bolt wifi module to the VCC of relay. Connect the ground of wifi module to the ground of relay and connect the digital pin from the wifi module to IN of the relay.
2) Connect the LED strip to the LED connector.
3) Now connect a wire from the connector of LED to the NO of the relay module.
4) Connect a wire from 2 pin socket to COM of the relay module.
5) Join the remaining part of the 2 pin socket to the remaining part of LED connector.
That's it. We have successfully completed our connections.
Getting our bolt device info :In order to link the device with services like Google Assistant, we need to provide the bolt API key and Device Id. So login to the Bolt IoT website and copy the API key and Device Id, then paste it in a word file/notepad. The API key is found by clicking on the API Tab. Copy the key and click on Enable(found above the key). The device id is found in the device tab.
Setting up IFTTT for using Google Assistant :
IFTTT stands for “if this, then that.” i.e, we can specify what we want to do on a particular action. Open the IFTTT website and login using your email id which is used in google assistant. Click on create and select "+this"
Then search for Google assistant in the service section. We are asked to select a trigger according to our needs. Choose an appropriate trigger and select it.
Type the command you want to say in two or three different forms and specify the reply from google assistant in the response column, eg: Turn the lights ON. Select the language and click create trigger.
After this, we will be redirected to the next page, click "then that" on that page, then select webhooks as the service. Webhooks is used to make web requests. Then we get this page :
URL is used to access and operate the LED by digitalWrite() with our bolt cloud. Paste the URL given below and change the API key, Device id, state by our API key and device id.
URL: https://cloud.boltiot.com/remote/API_KEY/digitalWrite?pin=PIN_NUMBER&state=HIGH/LOW&deviceName=DEVICE_ID
For turning the LED ON :
URL: https://cloud.boltiot.com/remote/API_KEY/digitalWrite?pin=PIN_NUMBER&state=LOW&deviceName=DEVICE_ID
For turning the LED OFF :
Create another applet by following the procedure as above and enter the URL as shown below:
URL: https://cloud.boltiot.com/remote/API_KEY/digitalWrite?pin=PIN_NUMBER&state=HIGH&deviceName=DEVICE_ID
NOTE: To turn the led ON, we use the LOW state and we use the HIGH state to turn it OFF as we operate it by a relay.
After entering the URL, select the method as "GET" and content type as "application/jason". Then click on CREATE and finish the process.
We have successfully completed the setup process. Connect your bolt device after checking the connections properly and then plug the 2 pin socket.
Now open your Google Assistance and control the lights by commands given in IFTTT.
Alternative:If you want to control the lights by a click button(ON or OFF) on your device, create a product on the bolt website and link it with your device, then paste the code written below and run it on the bolt website.
Explanation of Code:
We include javascript file by using <script>. API key and device id are taken by setkey(). Then we create buttons to control to LED and specify the function it must provide. We access digitalWrite() and provide digital pin and the state as parameters. i.e, digitalWrite(0, 'LOW') is used to turn the LED ON. LOW is given in the parameter as we use a relay, so it sets the LED ON. digitalWrite(0,'HIGH') is used to turn the LED OFF.
THAT'S IT !!
By this, we have completed the project on HOME AUTOMATION using Bolt IoT successfully. Enjoy controlling your device !!
Working Video:


Comments