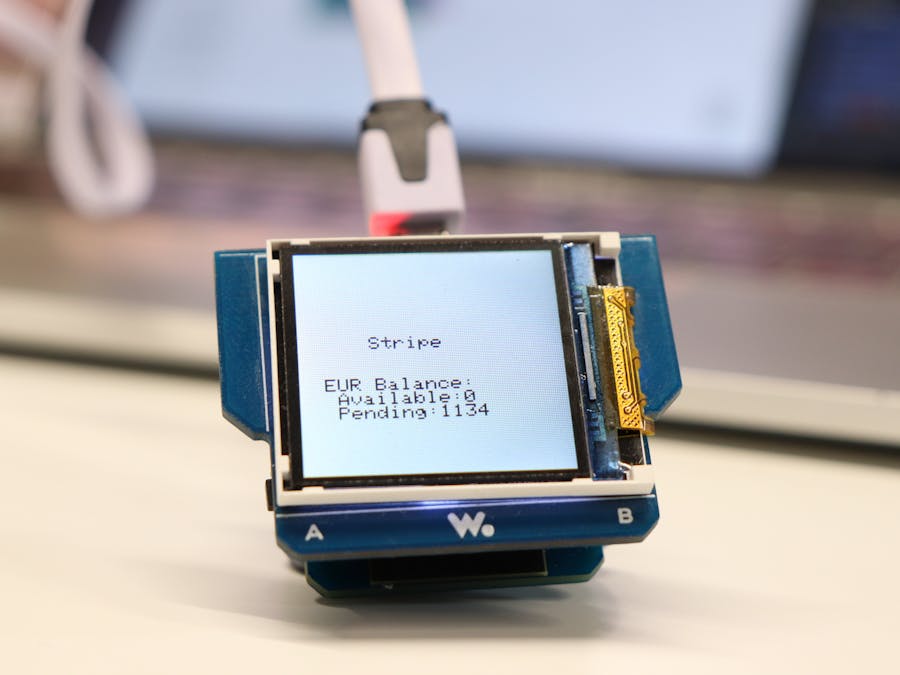
In this tutorial, we will be making a Stripe Balance Tracker using a Dot One and displaying the latest balance to a TFT screen.
Figure 1
What you will need- Wia Account - You will need to be signed into your account. Sign up / sign in here. (https://dashboard.wia.io/login)
- Wia TFT Module - Buy Yours Here
- Wia Dot One - Buy Yours Here
- Micro Usb Cable - Buy Yours Here
- Create an account at Wia if you haven't already - refer to this tutorial to get started with Wia here.
- Create a Stripe developer account. Once logged in to the dashboard, obtain your access tokens and store them for later. You’ll need your secret key and test key.
- Set up your Dot One You will need to have a set up Dot One and you can find a tutorial on how to do that Here.
- Set up your code project Now you will need to create a space and then a code project on your Wia Dashboard
-------------------------------------------------------------------------------------------------------------------
What we will be doingCreating a flow to:
- Make a http request to the Stripe API after a specified number of minutes
- Obtain information about the given Stripe account balance from this request
- Parse the response to get the balance values
- Update the devices state with the values obtained
- Creating a code project to instruct the Dot One to
- Connect to Wifi
- Retrieve the device’s state (i.e. the account balance)
- Print this value to the TFT screen
-------------------------------------------------------------------------------------------------------------------
Create an HTTP request URLBefore we begin, we have to make sure that our authorization has been accepted. To do this we can open a new tab and input the following URL - https://api.stripe.com/v1/balance?key=secret-api-key
Note: A dialogue may appear and ask you to log in - fill in the input boxes with the details provided below (from Stripe Dashboard) and click Login.
Username : your-test-secret-key
Password: your-secret-key
Create a flowNavigate to the flow tab on the Wia platform and set up a new flow.
This flow comprises of Five nodes:
- First drag the “Timer” node in the trigger tab to the editor and configure it’s settings to "trigger" every minute.
- Next, drag the "HTTP Service" node under the service tab to the editor and edit its configurations to match the image below. Place the API URL including your secret key into the box below URL. It should look something like this:
https://api.stripe.com/v1/balance?key=YOUR_KEY_HERE
This node essentially just makes an http request and returns the response from the api, this particular request api doesn't need any headers.
- Next, drag the "Run Function" node over to the editor from under the logic tab and copy and paste the following code below and place it in editor
‘’’
var available = JSON.parse(input.body).available[0].amount;
var pending = JSON.parse(input.body).pending[0].amount;
output.body.data = {
available : available,
pending : pending
};
‘’’
This code uses JSON to parse the response from the http request and takes the amount value in the response as this is the current value of your stripe balance in euro.
- For the last nodes, we are going to drag two "Update State" nodes from the Logic tab to the editor. We use two “Update State" nodes so we can get both the available and the pending balances. Lay the options out like so:
This node allows the user to either update the input device state or update another device's state.
Lastly, ensure all nodes are connected together and configured accordingly before moving onto the next steps.
Creating a blocks projectNavigate to the code tab on the Wia platform and set up a new blocks project.
To create the code for this project, we’ll be using drag-and-drop blocks to put the instructions for the device in place, and the code will be generated for us automatically. For this project what we’re telling the device to do is connect to wifi, get the state of the device (i.e. the balance retrieved in the previous steps) and print that value to the TFT screen.
At the end of the blocks project your blocks project should look something like this :
Once all the blocks are in place, deploy your code by clicking the rocket icon at the top right of the code editor. You’ll be asked to select the device you want to send the code to and your code will start to compile. To download the code onto the device, simply press the reset button on the board (the left button to the left of the USB). The blue LED will flash quickly while the code is downloading, it will pause briefly then resume flashing as normal to indicate the code has been successfully deployed.
Congratulations and well done on completing the tutorial. Hope you enjoyed it!
Here's another tutorial you can do using your TFT screen module -
Get the beer of the day to display on your TFT screen
If you are more into building and making your own electronic devices and hooking them up to the cloud, why not out some of these tutorials -
Coffee Counter with TFT Screen and Button
Slack Toggle Presence with Wia Button Module and Dot One
or build something from our hackster projects


Comments
Please log in or sign up to comment.