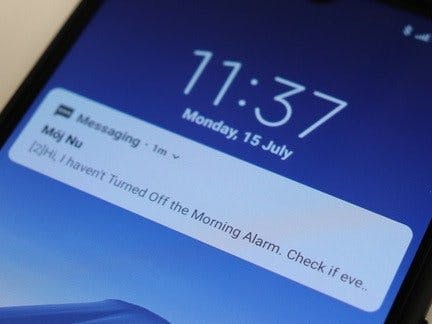
The aim of this tutorial is to create an IoT Alarm Which Alerts Your Manager or Person of choice if you haven't deactivated the alarm for X number of minutes by sending out an SMS text message.
List of items required to create this project:
- Wia Dot One (Buy Yours Here)
- Dot One TFT LCD Screen Module (Buy Yours Here)
- Wia Grove Module (Buy Yours Here)
- Grove Button Module (Buy Yours Here)
- Grove Speaker Module (Buy Yours Here)
- 2x Grove Cable (Buy Yours Here)
- MessageBird Account
Step 1: Create a Wia account with the Dot One connected. If you haven’t done so yet, you can follow this tutorial over here.
Step 2: Create an Account on MessageBird (LINK)by registering using Google/ Github account or by using an email address.
Step 3: Once you have verified your email address a prompt asking you to pick an interface will show up. Select "Rest APIs".
Step 4: Click on the " SMS API" once prompted to as shown in the screenshot.
Step 5: Select "SEND SMS" box
Step 6: A window will show up asking you to send your first message with a sample code. Ignore this and press the "Skip" button
Step 7: You will then be greeted with a screen similar to this one. On the right hand side of the screen an you will see an "API Key" tab. Click on on the "Show" text beside the Live Key and Copy this key over as we will be needing it later. The Api Key will consist of letters and numbers.
Step 8: Open dashboard.wia.io and select your space. Click on the flows Icon. Create a new flow using the blue "Create a Flow" button. Give your flow a name and press the blue button "Create flow".
Step 9: The final flow chart should look like this.
Drag the "Timer" node from the "Trigger" Pane and set your desired activation time. I set it at 7am UTC Time
Drag the "Run Function" node from "Logic" Pane and Paste this Code into the code editor. This code will activate the alarm from Monday to Friday. You may change this by changing the if statement. Note Value of N: 0 is Sunday, 1 is Monday, 2 is Tuesday etc.
var d = new Date();var n = d.getDay();if (n < 6 && n>0){ output.process = true;}else { output.process = false;}
Drag the "Update State" node from the "Logic" Pane and select "Update devices from list". A list of connected devices should appear and select your device of choice. In the "Key" box type in "state" and in the value box "alarm-on".
Connect all these 3 flows together.
Drag the "Event Created" node from the "Trigger" Pane and type in "button-pressed". Select your device from the box below.
Drag the "Update State" node from the "Logic" Pane and select "Update devices from list". A list of connected devices should appear and select your device of choice. In the "Key" box type in "state" and in the value box "alarm-off".
Connect these 2 flows together
Drag the "Event Created" node from "Trigger" Pane and type in "alarm-stop". Select your device from the box below.
Drag the MessageBird "SMS Message" node from the "Services" Pane. A pop up prompt should appear asking you to configure the MessageBird Integration. Click on "Click here to configure" and paste in your access key from Step 7. After clicking the blue "Create Integration". Click on the "Settings" beside the "Send SMS Message" node and customise the Originator, Recipient and Body as per your liking.Note: In the free version you can only send messages to your own phone.
Drag the "Update State" from the "Logic" Pane and select "Update devices from list". A list of connected devices should appear and select your device of choice. In the "Key" box type in "state" and in the value box "alarm-off".
Connect the 3 states in an upside down "Y" shape as shown in the previous image.
Step 10: Click on the Code Icon on the left side of the Wia dashboard and Create a code project. Give your project a name and click on "Blocks Project" and layout below. Alternatively you can create a "Code Project" and Paste the code found underneath to the code editor. Once completed upload your code to the device using the rocket icon found on the top right hand side of the screen.
#include <WiFi.h>
#include <Wia.h>
long startcountingtime;
Wia wiaClient = Wia();

void setup() {
    WiFi.begin();
    delay(2500);
    pinMode(26, OUTPUT);
    pinMode(19, INPUT);
}

void loop() {
    startcountingtime = millis();

    while ((wiaClient.getDeviceState("state")) == "alarm-on") {
        digitalWrite(26, HIGH);
        delay(50);
        digitalWrite(26, LOW);
        delay(15);

        if (digitalRead(19)) {
            wiaClient.createEvent("button-pressed");
            delay(1000);
        }

        if (millis() - startcountingtime > 60000) {
            wiaClient.createEvent("alarm-stop");
            delay(1000);
        }
    }

    delay(10000);
}
Step 11: Connect the Grove Button Board to Grove Connector "19 & 23" on the Wia Grove Module and the Grove Buzzer Board to Grove Connector "26 & 18" as shown below.
Step 12: If done correctly the Alarm will activate at 7am UTC Time Mon-Fri. The user has 60 seconds to deactivate the alarm. If the user does not deactivate the alarm within 60 seconds, a sms text message will be send to the person of choice and alarm deactivates automatically.
Congratulations and well done on completing this tutorial, hope you enjoyed it. Here's other fun projects you can try out -
- Proximity Detector Using Proximity Sensor and Wia Dot One
- MSFT Stock Tracker
- Awesome Fortnite Stat LCD Displayer Using Wia Dot One and TFT


Comments
Please log in or sign up to comment.