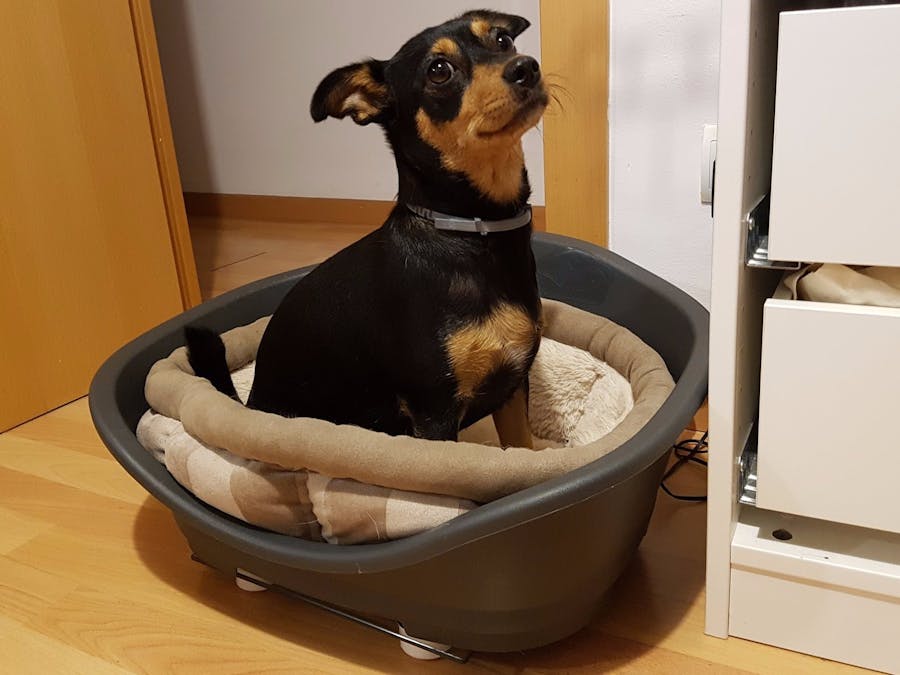
The idea of this project is to use weight sensors and put them under your dog's bed, then using an Android Things board we're able to measure the data from the sensors and we can analyse it to measure the sleep quality of your dog, as well as how often did your dog get up during the night and how much does your dog sleep during the day.
I use an activity tracker which helps me understand the quality of my sleep and I wanted to take this idea and apply it to the life of my dogs, so I decided to create this smart dog bed that can do all of that for my dogs.
Understanding the challengesIn order to build this project we'll use a Raspberry Pi 3 running Android Things, 4 load cell sensors (load capacity will depend on the dog size and number of sensors).
For my initial tests I used this load cell, a load cell is just a circuit made with some resistors forming a Wheatstone bridge with a variable resistance (it varies when weight is applied to one of the ends of the sensor). This great article by Sparkfun that explains in detail how these circuits work. But essentially the resistance varies when weight is applied to one end of the sensor, and that causes a differential in voltage between the two ends of the sensor output. We can measure that differential to figure out when the sensor is idle and when it has weight in it.
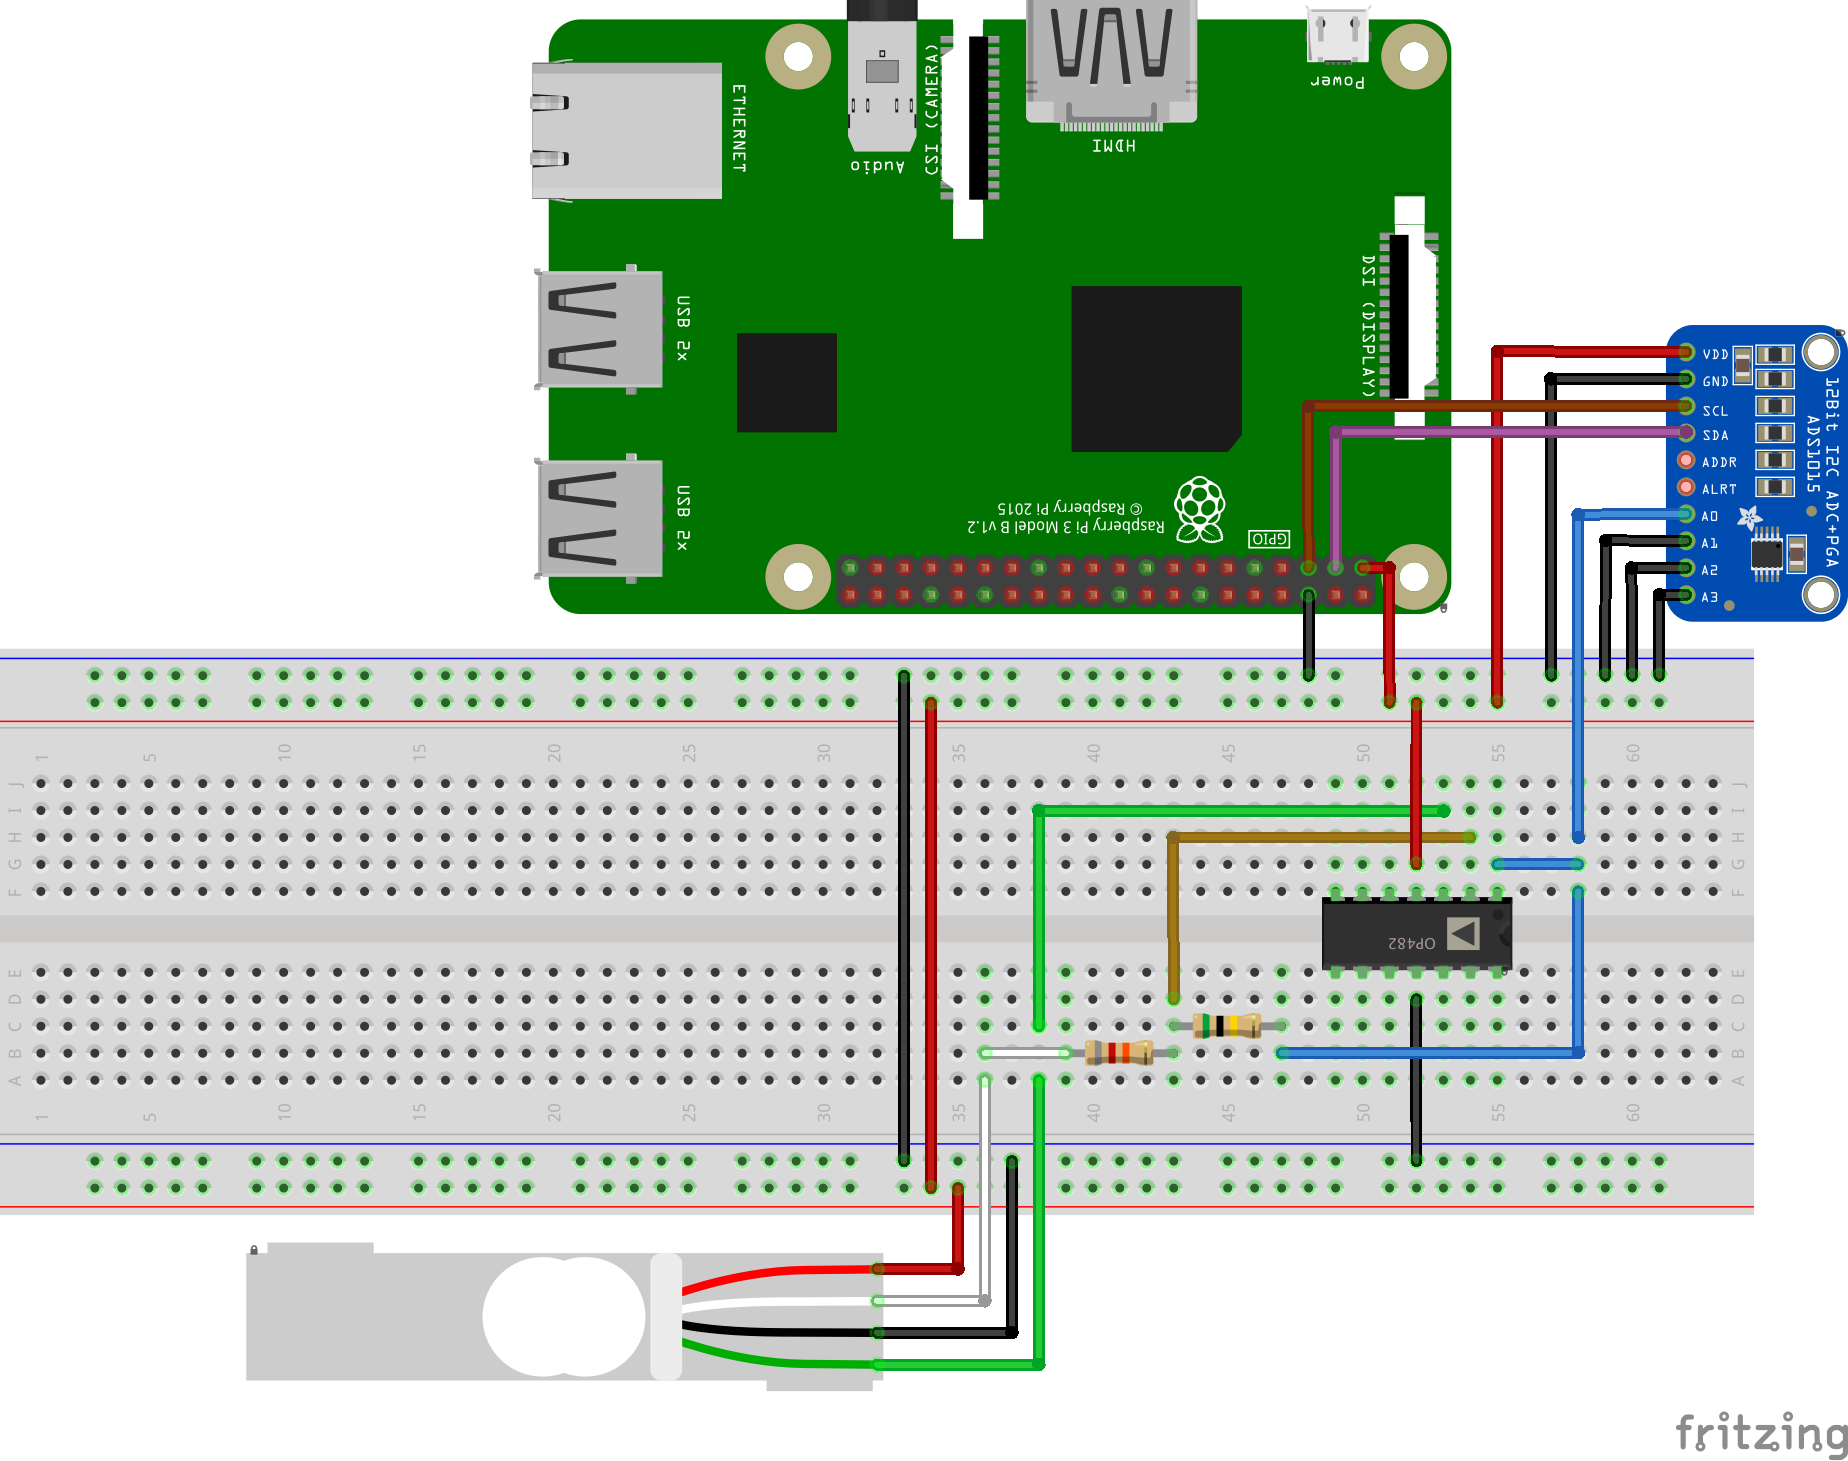
Since the load cell sensors suffer such small variations (the reading from the multimeter was of less than 1mV variation when applying weight to the sensor), we have to use an op-amp in order to amplify that voltage differential so that we can actually measure it. In order for an op-amp to actually amplify, we need to use 2 resistors to create a negative-feedback amplifier.
If we want to know what the gain of our amplifier will be we just need to divide R2/R1 and this means that if we increase R2 or if we reduce R1 we'll increase the amplification and reducing R2 or increasing R1 will reduce the amplification (and also the noise!).
In my case I decided to use a resistor of 500kΩ for R2 and 385Ω for R1, which means we should be getting an amplification of 500kΩ / 385Ω = 1298, so we'll be amplifying around 1300 times the differential from the sensor. This means that when applying weight to the weight sensor, instead of getting less than 1mV variation we'll get variations of around 500mV, this is something we can read now from Android Things!
But wait, we can't just plug in the Raspberry Pi 3 to the output of the op-amp as we won't be able to read any data. This is because we're dealing with Analog data (we have an infinite amount of possible values), in order to read this data we have to convert it to Digital data first (a group of 1s and 0s) so it can be read from Android Things. We'll need to use an analog-to-digital converter (ADC).
In my first tests I used an ESP32 running Espruino for a quick prototype as it's essentially an Arduino board that can be programmed with javascript. It includes a 12-bit ADC so it was very easy write a quick test to ensure the wiring was correct.
The code was rather simple:
var repeatAfter1second = function() {
  setTimeout(function(){
    printReading();
  }, 1000);
};
var printReading = function() {
  var reading = analogRead(D36); // reading is a float between 0 and 1
  console.log("Reading: " + reading);
  repeatAfter1second();
};
printReading(); // start the program
What this does is: every second it performs an analog read (so convert an analog signal to digital) and print the result (reading). When applying weight to the sensor, the reading would vary.
Fortunately, there's ADC that can be used relatively easy with Android Things. A 12-bit converter should be enough for the purposes of this project, but using a 24-bit converter will allow you to reduce the amplification (therefore reducing noise) while getting really precise readings. For this example we'll be using a 12-bit converter such as the Adafruit ADS1015. Big kudos to my colleague Paul Blundell who took the time to port Adafruit's Arduino code for the ADS1015 to Android Things and he's created a really easy-to-use driver.
Building the IoT deviceNow that we know how to use all the parts of the project it's time to go ahead and start building the smart dog bed. After thinking about it for a while I decided the easiest and simplest solution for me would be to buy a cheap digital bathroom scale (it was 12€), strip out the unnecessary parts, plug in the scale weight sensors to the op-amp and use the scale case/frame as the base for our smart dog bed, as that'd mean we should be able to use different dog beds.
The first step s to remove the white case from the back:
Luckily enough, this scale uses four single-strain sensors (3 wires each) connected to a combinator (green little circuit board from the pictures). The combinator is used to combine the 12 wires into 4 wires that we can use as input of our op-amp. Read more about this combinator circuit here.
So we can go ahead and desolder the green board from the rest and then we can solder some wires to it in order to attach it to our op-amp.
We can get rid of the main board as we won't be using it and we can now proceed to connect the combinator to the op-amp:
Finally, we can reassemble everything, so that it looks like a scale again
Of course the last thing is to actually put the dog bed on the scale, otherwise there's no point!
Time for the first field test with Bella!
In order to be able to have a smart dog bed, we have to store data from our sensors somewhere. I've chosen Firebase as it integrates with Android in a very simple way.
We need to create a new android project that will contain both the code for the IoT app and the mobile companion app. See my repo here.
Once that's done, we'll want to set up Firebase so that we can read and write the data. After that we can already store data to the Firebase database. For now we just need to store when the bed changes state from "idle" (not being used) to "busy" (being used) and a timestamp, and we'll also store the date for convenience.
As a result, we now have a database collecting data from our Android Things device:
In addition to the Android Things board reading data from the sensors, we're also going to build a mobile companion app to present the data so that we can see how much sleep our dog is getting.
Again we'll need to set up Firebase for the companion app module and then we have to query to get all nodes for a given date (for simplicity, we're only going to show how many hours the dog has slept for the current day, but this could be extended to show more data in a more visually-appealing way).
Once we query the database we can already show data in our Android app:
As future plans the project could use some visual improvements in the companion app. Another feature that would be really beneficial would be using the Google Cloud Services stack to collect more interesting insights on the sleeping habits of our dog.
The project could also use TensorFlow to train a model based on the data captured from the sensors so that it can detect anomalies and strange behaviour which could help detecting diseases for our dogs early. Another neat feature would be to actually collect the weight measurement in Firebase and keep track of it to see if you're feeding your dog correctly according to its daily activity.
In a real world project the user would have to sign in with a Google account and the results would be linked to the user's profile so that the they have a timeline view of the sleep quality of their dog, as well as the ability to view this data from multiple platforms.


_3u05Tpwasz.png?auto=compress%2Cformat&w=40&h=40&fit=fillmax&bg=fff&dpr=2)

Comments
Please log in or sign up to comment.