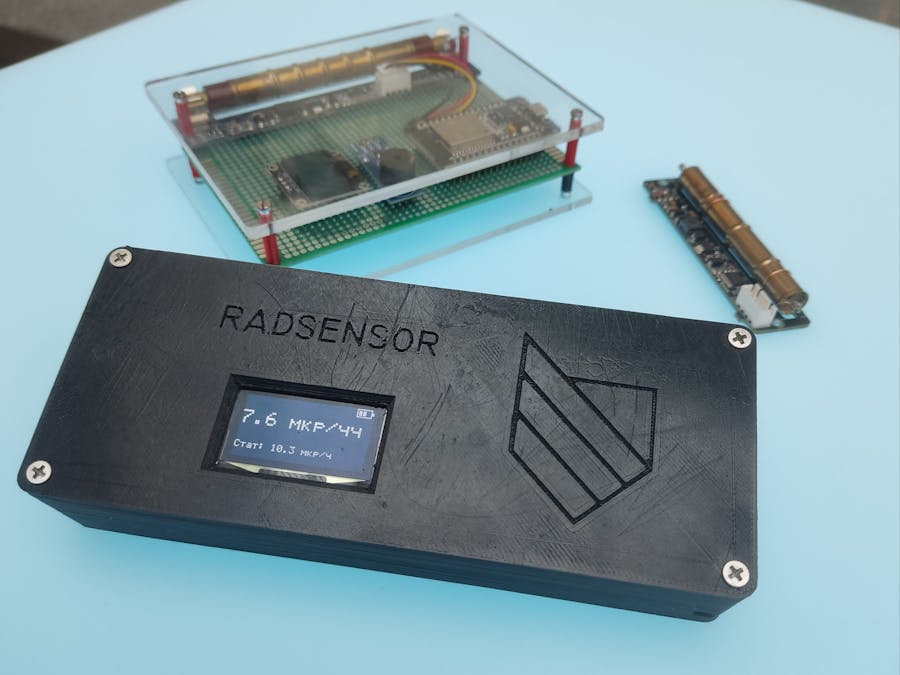
In an ever-changing world, a dosimeter is not only a way to satisfy curiosity and catch at least a few Sieverts, but also a way to detect very real threats: from checking the “intteresting old thing” from the grandfather’s garage, to tracking the radioactive background in the areas where nuclear power plants are located, from ensuring safety when going into abandoned places to monitoring global and local man-made disasters.
We set ourselves a practical task - to assemble a cheap, functional and convenient dosimeter from ready-made components. Wemos D1 and the RadSens module (arduino dosimeter based on the Geiger tube SBM-20) will be used as the main elements.
RadSensor (is the proud name of our detector) takes the best from previous projects, takes into account their mistakes and expands the functionality of the counter, in particular
- increased battery life;
- audio feedback functionality;
- improved ergonomics and versatility of the case;
- simplified and freed from “crafting”.
Next, you will find a step-by-step instruction for assembling the device from purchasing components to code and testing.
Purchase Plan (BOM) you'll find in "Things" section. Total components cost ~$80.
The price is comparable to Chinese dosimeters. A similar, but modern solution on Amazon already costs $200.
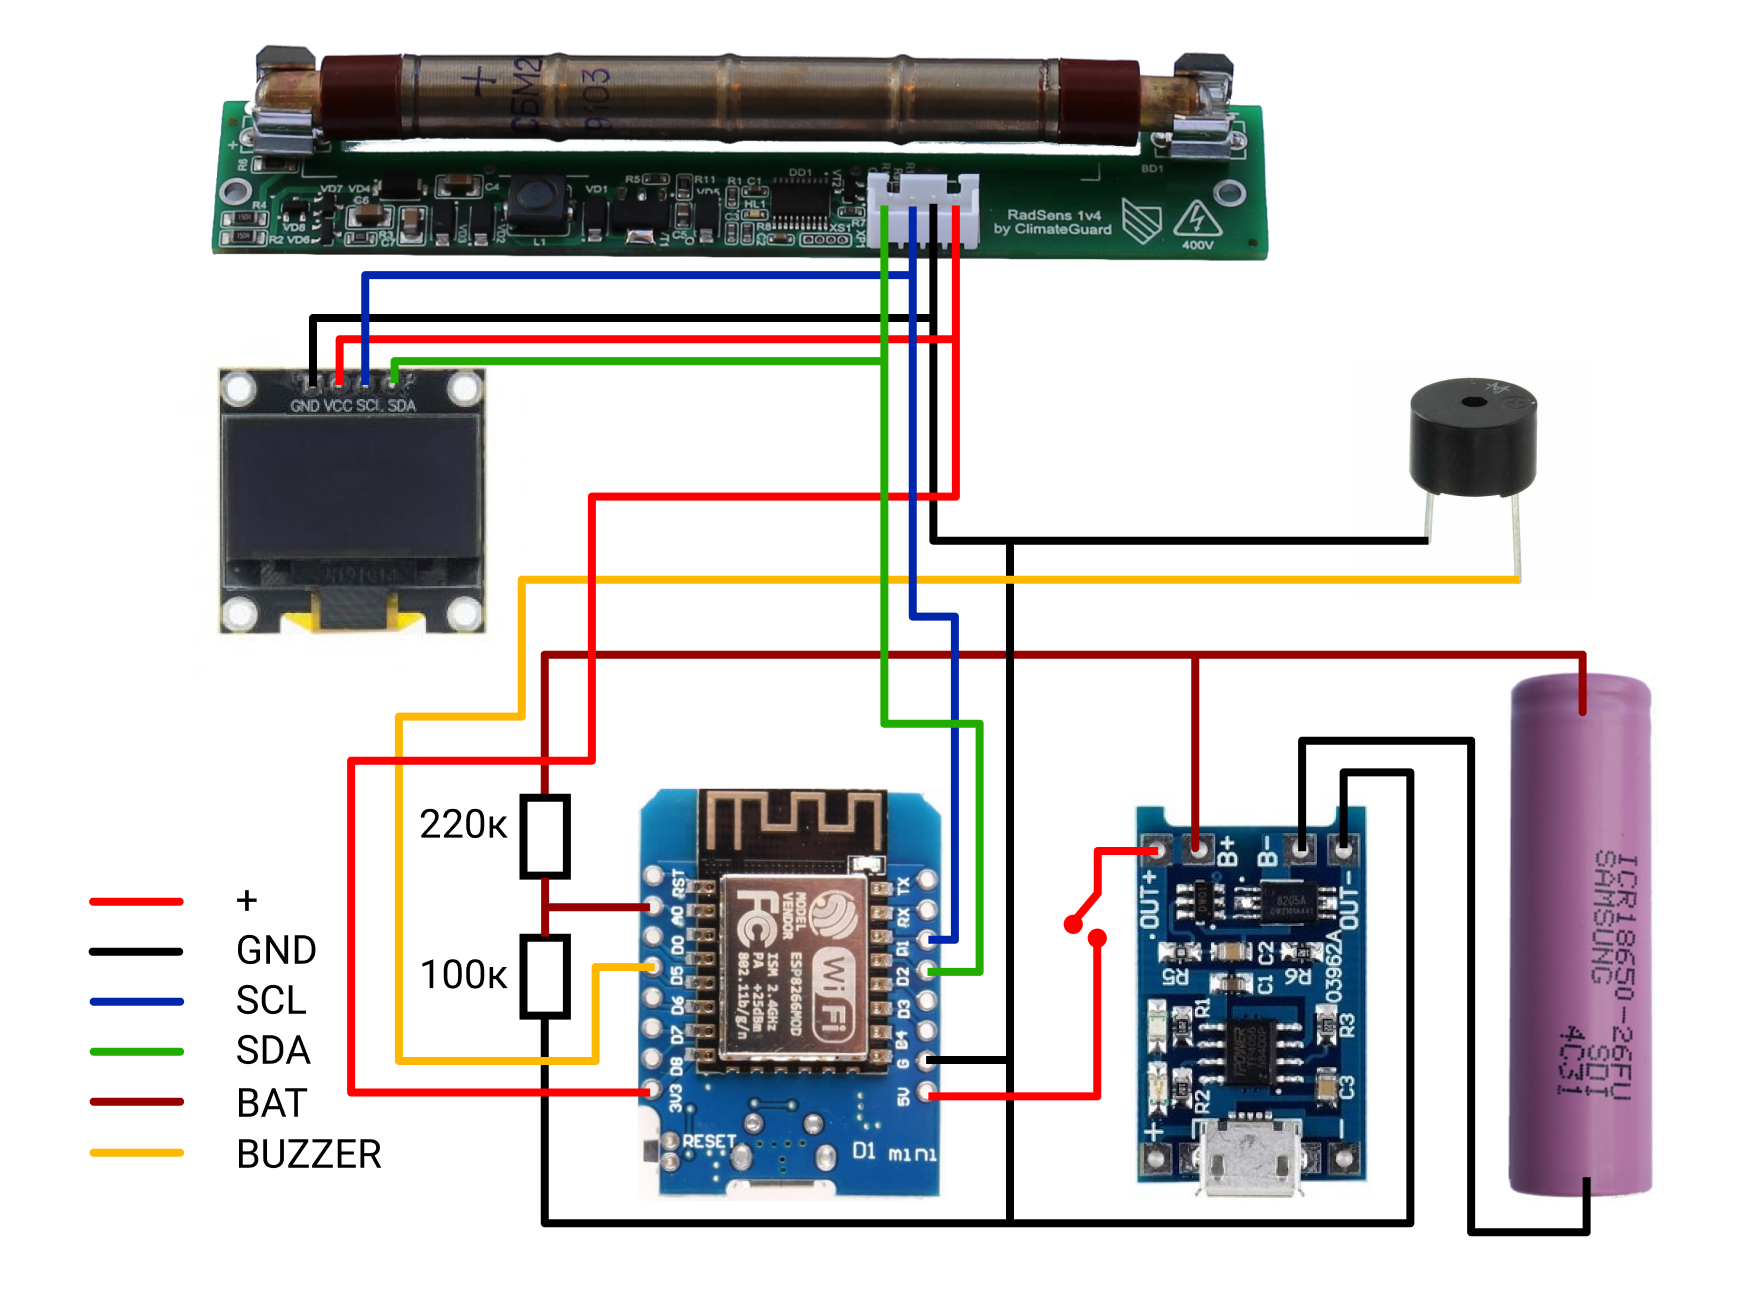
Device schemeThe connections are shown in the diagram below. Features:
- At the top of the protoboard - Wemos (2 pins from the edge) and OLED (2 pins from the edge).
- At the bottom of the protoboard - charge board TP4056 (Type-C is shifted as close as possible to the edge of the board) and a piezo emitter (any convenient position).
- The switch is on the break of the positive output pin of the charge controller.
The result should be a similar device. We recommend isolating the contacts on the front side of the board. This is one of the possible ways to assemble, so we welcome criticism and suggestions :)
We tried to create the most convenient case for printing, assembly and operation.
At the corner there is a lug with a diameter of 3 mm.
Slots are made under the Geiger tube for the possibility of detecting alpha particles, holes are made for the piezo emitter.
The dosimeter mounting holes are adapted for the long and short versions of the RadSens module.
The power button is recessed and protected from accidental pressing.
The lid has a mounting hole for an OLED screen to prevent it from sinking, side walls have been added to increase stiffness of the case.
The model is adapted for 3D printing, the optimized wall thickness is selected, the number of supports is minimized.
You can find case models (stl and step files) in our GitHub.
CodeFor the project, a slightly modified code from our previous article "DIY dosimeter for the youngest engineers" was used. Updates:
- added a welcome sound when the device is turned on;
- added charge indication;
- a warning is implemented when the radiation intensity threshold is exceeded.
To work with the OLED screen, the GyverOled library is used.
You can also find the code in the RadSens library examples at GitHub.
Assembling a mobile DIY dosimeterTo make it more compact, we have minimized the free space inside the case. Therefore, it is necessary to adhere to a simple assembly algorithm.
1. Install the box for 18650 with a screw with a diameter of 3x7 mm and insert the switch into the hole from the edge, solder the wires to it to break the +OUT line of the charge controller.
2. Solder the wires from the box to the corresponding outputs of the charge controller, the wires from the switch - into the break between +OUT and the positive contacts of consumers. Then we connect two cables for the dosimeter and the screen, bring them out and fasten the case with three 2.5x7 mm screws. Insert the battery into the box.
3. Connect the RadSens module and fasten it with 2.5x7 mm screws.
4. Fasten the screen with 2.5x5 mm screws and connect it.
5. Fasten the cover with 3x5 mm screws.
For testing purposes we will use potassium sulfate.
In this article, we described only the baseline. The project can and should be further developed: create an application for collecting and recording statistics on the phone, integrate it with LuftDaten ets., add the functions of a flashlight, a temperature sensor. Please, choose a problem for yourself, offer new ideas and help us.
Our new challenge is an autonomous dosimeter powered by a solar battery and transmitting data via modem to LuftDaten. Wait, soon in the open spaces of Hackster...
Taking this opportunity, the ClimateGuard engineering team sends thanks and respect to:
- permanent (and immortal) author Ilya Radchenko (@octopoly) for preparing the material;
- Alex Gaver (@AlexGyver) for the excellent GyverOLED library;
- to the Ampercut store for providing components and the desire to create cool and useful educational kits;
- Tindie store for help with selling our crazy stuff;
- a community that supports projects and participates in our lives;
- ...and of course to you, dear readers, for your time and interest in the article!
Let's bring DIY to the world!


Comments
Please log in or sign up to comment.