

Hardware components | ||||||
 |
| × | 1 | |||
| × | 1 | ||||
 |
| × | 1 | |||
Software apps and online services | ||||||
 |
| |||||
Hand tools and fabrication machines | ||||||
 |
| |||||
Couple of month earlier I made a thermostat using Arduino Pro Micro, a DHT22 sensor and a 0.96' OLED, which fit into a Wemos housing perfectly.
But I wanted something smaller that I can plug into the USB port on my screen. So I bought some DigiSpark clones, a spare DHT12 sensor (both prove to be unwise decision, I will explain later) and a 0.91' OLED.
The DHT12 module I have claim to support both I2C and single-wire communication, my initial thought was to use I2C since the OLED module supports that as well, however I was not able to find any DHT12 I2C library that is small enough to fit into the limited memory ATTiny85 has on DigiSpark.
To use the single wire comm mode, simply connect the SCL to GND, use the SDA as data pin.
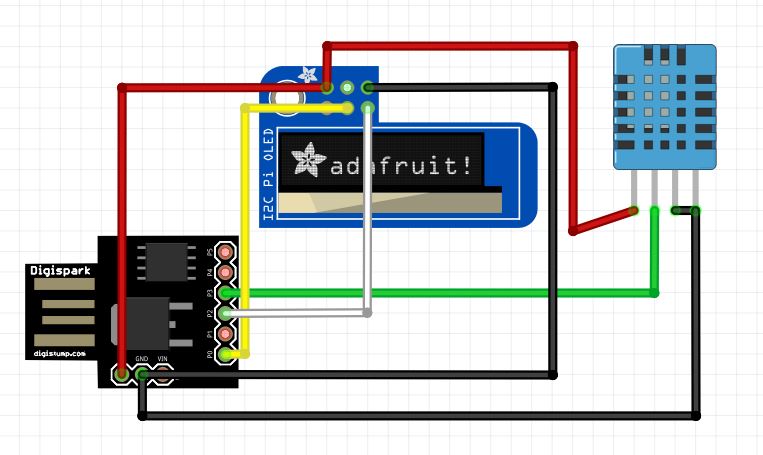
OLED to DigiSpark
GND --> GND
VCC --> 5V
SDA --> P0
SCL --> P2
- DHT12 to DigiSpark
GND --> GND
VCC --> 5V
SCL --> GND
SDA --> P3
(Note the P3 is shared with USB+, you need to unplug DHT12 when you upload the code to SigiSpark, it is pain in the bottom but sicne DigiSpark only has 4 analog pins, among them 2 are shared with USB, 1 shared with I2C, P5 does not work on the Chinese clone).
How to set up your DigiSpark is here:
http://digistump.com/wiki/digispark/tutorials/connecting
Since the DigiSpark has only about 6KB of space for the code, I had to modify the library for both OLED and DHT, remove some unnecessary public variables and code to reduce the footprint from dht.h and dht.cpp (sadly you can only choose to read either temperature or humidity). Modified library files are attached.
Credit goes to RobTillaart for the DHT12 library and the person who created Tiny4kOLED Library.
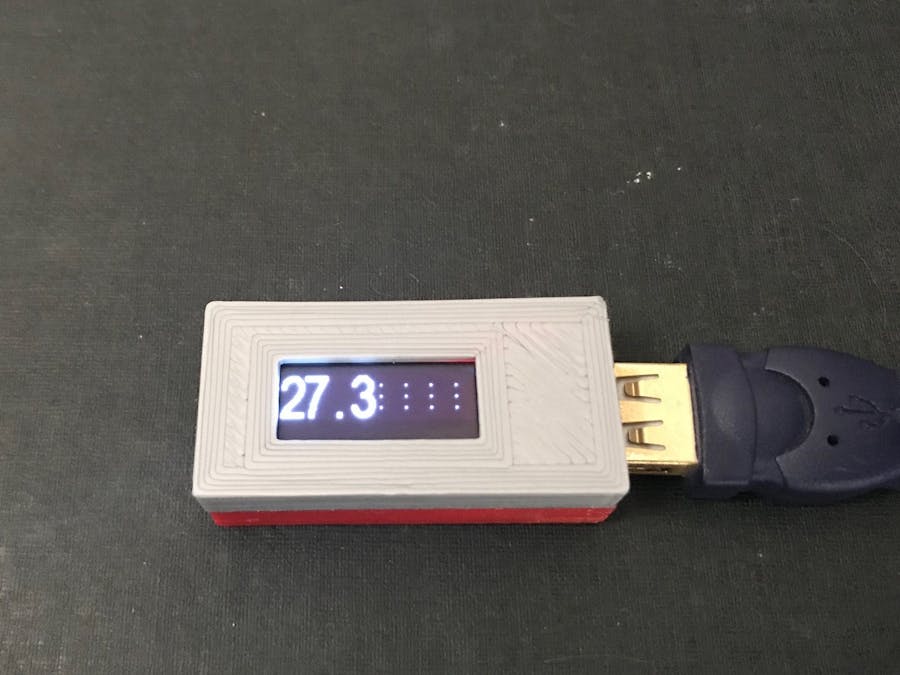
The 0.91' OLED is capable of displaying both 8x16 and 16x32 size font, I find the 8x16 a bit small so I settled with 16x32(downside is no font for alphabet, only numbers), I tried creating some simple font with "The Dot Factory" but couldn't get it to display in my OLED.
You need to comment out the unused font in Tiny4kOLED.h to reduce footprint, I am using FONT16X32 so I have the rest commented out.
With all the libraries modified, code uploaded, you will get something like this:
I have designed a case to fit all the components
STL files are here: https://www.thingiverse.com/thing:3465493
Issue with DigiSpark Chinese clones (but they are dirt cheap!!)
1. Doesn't come with the latest version of bootloader, always goes into bootloader instead of code.
Resolution:
- Download the micronucleus version 1.11 which has a compressed version for ATTiny85 from here: https://gist.github.com/Ircama/22707e938e9c8f169d9fe187797a2a2c
- Run "micronucleus.exe /?" to check your bootloader version
- Run "micronucleus.exe --run micronucleus-1.11-upgrade.hex" to load the ver 1.11 bootloader, after this, the DigiSpark will be good to go.
2. Doesn't like to work with all USB ports
Resolution:
Get a USB extension cable, connect it to your powered USB hub or USB port then connect DigiSpark to it. Sometimes it won't get recognized by Windows, download the micronucleus library, run the "Zadig" program with Administrator privilege and install "libusb". This worked on all my win10 laptop and Win7 desktop.
3. Pin P5 is a reset pin unless you set the fuse. Since we won't be using this pin, ignore it.
References:
https://github.com/RobTillaart/Arduino/tree/master/libraries/DHTstable
https://digistump.com/wiki/digispark/tutorials/basics
https://www.hackster.io/M-V-P/large-fonts-for-oled-128x32-driven-by-attiny85-715372


Comments