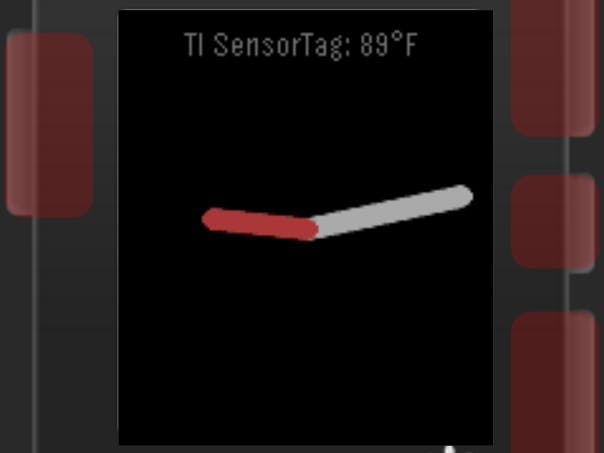
I wanted to create a device that logs my movement, but I didn't really want to spend a whole lot of time on it. I've had a Pebble Time Steel for a while now, and saw that they're developing an SDK that runs JavaScript on the watch itself. So I followed their tutorial, and then made some simple changes to it so that the watch logs geolocation data to the Samsung ARTIK Cloud.
In addition to logging geolocation data on a regular basis, I created a configuration screen that allows anyone to view their own device statuses on the screen of their Pebble Time (or Round, or Pebble 2) Smart Watch.
Logging the geolocation data of a user opens up a lot of potential applications, from monitoring employees and assets, to giving your smart home or office more data to work with to be smarter. For instance, you can use this data to create rules that could turn on the heat or air conditioner at home as you left the office to ensure a comfortable living space by the time you got home.
ARTIK CloudTo make things easier, instead of having to have every user create devices and generate tokens manually through their ARTIK cloud dashboards - you can create an application that calls a configuration utility on the Pebble SmartWatch to generate tokens, create devices and select the data you want displayed on your Smart Watch.
First, we have to create an application that can access the various sensor data types. To do this, log into your ARTIK cloud Developer Dashboard and select "+ New Application"
Once you've clicked the button, fill out the application name and description. It's important that you select "Client credentials, auth code, implicit" for the Authorization Methods, as the configuration screen uses the implicit authentication method to generate tokens for the devices. Finally, point the authentication callback to http://literate-string.surge.sh/auth.html. If you're not familiar with surge.sh, it's a great free static webhosting service perfect for this application.
Finally, we arrive at the device/profile permissions screen. Add the publicly available Pebble Watch Geolocation device and any other devices you may want to display on your watchface. Be sure to grant read/write privileges so the app can read/create tokens.
After that, click on the "Show Client ID and Secret". We need the client ID so that our Pebble Watch app goes through the Samsung Authentication process to configure the values that will be displayed on the watchface.
To simplify things, I've used cloudpebble to develop the watch face. Create an account and login. We need the source code, so either download the zip or clone the project with
git clone https://github.com/zanycadence/pebble_artik.git
Unzip the file. Create a new project on cloudpebble, and in the prompt, make sure you choose Rocky.js (beta) for the project type.
We need to add a new source file to the project. When prompted, select Rocky.js for the type.
Copy the contents of rocky/index.js from the extracted repository download into the newly created file. It's based off of the Rocky.js watchface tutorial published by Pebble. The frequency of the updates is set in the "minutechange" event handler. It's currently set to 5 mins, but feel free to change this to be more or less frequent by changing the number following timeSinceLast >=
rocky.on('minutechange', function(event) {
 timeSinceLast++;
 if (timeSinceLast >= 5){
   rocky.postMessage({'fetch': true, 'post': true});
   timeSinceLast = 0;
 }
 // Request the screen to be redrawn on next pass
 rocky.requestDraw();
});
Once you've finished copying/modifying rocky/index.js, we need to create a new file. This file is a PebbleKit JS file named index.js.
Copy the contents of pkjs/index.js into the newly created file. Again, this is a pretty simple script. Change the clientID variable to match the variable of your application.
var clientId = 'YOUR_CLIENT_ID_HERE';
Save the files and then go to the settings of the project. First, we need to add the location permission and set it as configurable. Second, we need to change the project type to a watch face.
Then, switch over to the Compilation tab. Build the project and then install it to your watch. Note that to do this, you must enable Developer Connection on your phone in the Pebble app.
That's it! Your pebble will display the data from the ARTIK Cloud and begin to upload geolocation information to the ARTIK Cloud.Sample Data.
The best part is, as you add devices to your ARTIK Cloud and applications, you can easily add them to your watch display as the configuration website grabs all of the devices/data through the REST API, allowing your watch to grow with your projects!
And here's some sample data from my walk home from the office. Happy hacking!
The source code for the configuration website is available at https://github.com/zanycadence/pebble_config_website. To be completely honest, I just followed the ARTIK documentation for accessing devices and generating tokens and put a bunch of helper functions in the artik,js file. The app,js is a little hacky (and there's some callback hell going on in it), but it works relatively well. As long as you have a Pebble Device with read/write capabilities added to the application created on the ARTIK Cloud, this site should serve your purposes just fine. If you don't want to use my Pebble Geolocation device in your application, then just change the initialization for the pebbleExists variable to "true" instead of "false".


Comments