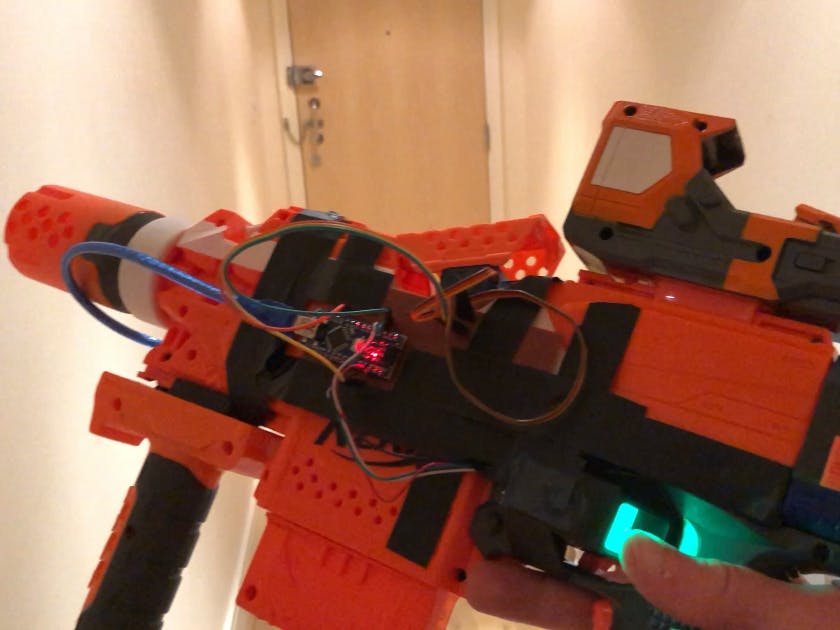
First up the parts for this project were supplied by DFRobot! They contacted me a few weeks back and asked if I had any ideas for a project and I thought a cool one to do would be a biometric fingerprint ID locking Nerf Gun; inspired by the gun in Skyfall.
So thank you DFRobot! Make sure you check them out for your project needs.
Key Goals- Have a Nerf Gun that will only fire when my thumb is placed on the scanner.
- Ensure that when my thumb is not on the scanner/someone else tries, it will not fire.
I sent DFRobot a little shopping list and they kindly sent me the following:
- Arduino Nano
With additional parts from my stuff I have around:
- General wires and things
My initial plans were to have the Arduino on the side with the power-pack and have the fingerprint ID scanner on the left side of the gun so that it can read the thumb print – with a servo implanted within the inner workings of the gun that will essentially jam it from firing until it is moved.
While looking over the workings of the Nerf N-Strike I realised there are a number of safeties built in, one in the mag-well for detecting a magazine and one on the top for detecting the closing of the little door. I figured I could use the servo to spin around and click in the trap door safety at the top when my thumb is identified; allowing the weapon to fire – and then spinning away from it when my thumb is not identified, stopping it from firing.
You can see the little black safety button in the pictures below – and how the servo is positioned to actuate it.
The first place I went was Hackster for a rather handy tutorial on wiring up the fingerprint scanner to the Arduino and also basic use.
I soldered the Arduino to some veroboard similar to my Gravity Gun project and hooked it up according to the instructions above. I then wired in the servo, following the instructions over at… Instructables.
I made sure nothing burnt out and gave the servo a quick test with the code from instructables.
Next up its Arduino IDE time and a nice download of the Adafruit Fingerprint Sensor library.
Within the IDE adding a library is a simple as clicking Sketch > Include Library > Add a.ZIP Library and selecting the downloaded zip from github above.
Once here, with the Arduino plugged into the PC with the IDE on via USB – setting up a fingerprint is easy – File > Examples > Adafruit Fingerprint Scanner Library > enroll.
When the code is loaded up hit CTRL + U and it should compile and send off to the Nano, at this point the console needs to be loaded up Tools > Serial Monitor; set the rate to 9600 and when the Arduino reboots it should provide instructions for adding a fingerprint with an ID – in this case I went for #1.
AssembleI pretty much strapped the Nano and the Power-bank on with electrical tape, as well as some Sugru to hold the servo and fingerprint reader in place.
The code is up on my github. The basic premise is that when a fingerprint is not detected, the servo will stay rotated away from the safety lock – when a fingerprint is detected it will analyse it and check if it is mine, if it is then it will rotate the servo into position – and if not, it will carry on looping and checking for a valid ID.
See instructions above for uploading to the Arduino board.
In PracticeAs usual I went about making a YouTube video to demonstrate the device in action!
It works pretty well – can be a bit tricky to position the thumb sometimes, but generally it works and will prevent the gun from firing Nerf rounds if no fingerprint/the wrong fingerprint is present.
And of course some photos of me goofing about with it:
I think I could wire in the Arduino more directly into the safety mechanisms of the Nerf Gun, but in this case DFRobot had sent me the servo so I wanted to make sure it got used in the project.
The build quality is the usual 314reactor speciality – but its functional!
Let me know if you liked it, if you disliked it – or any improvements!
As for future projects – I think its time I went over some Bond films for more gadget inspiration.


_0oE9kS1W7E.png?auto=compress%2Cformat&w=40&h=40&fit=min&dpr=2)


_0oE9kS1W7E.png?auto=compress%2Cformat&w=60&h=60&fit=min&dpr=2)
Comments
Please log in or sign up to comment.