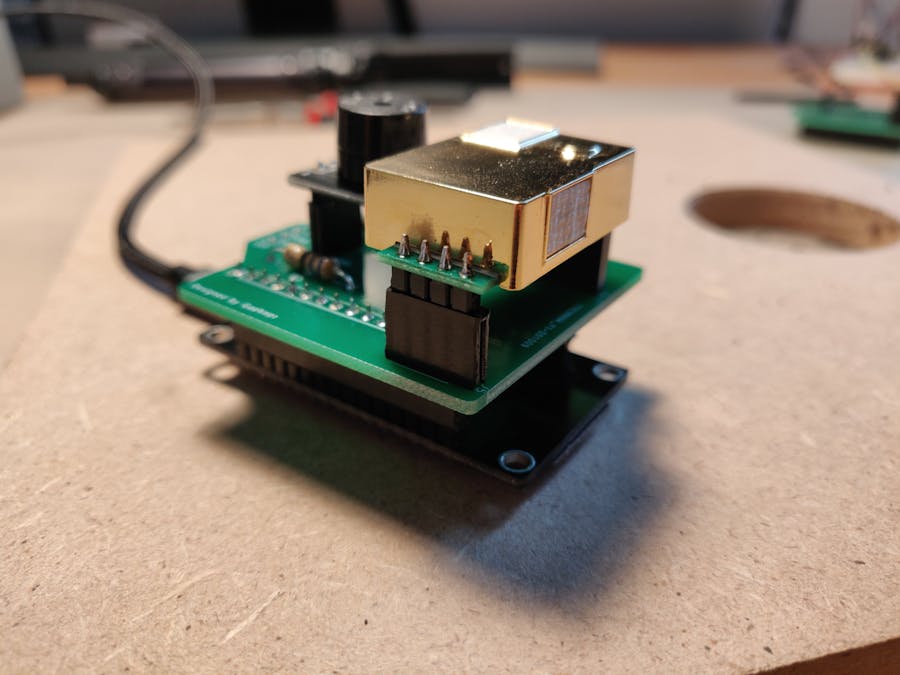
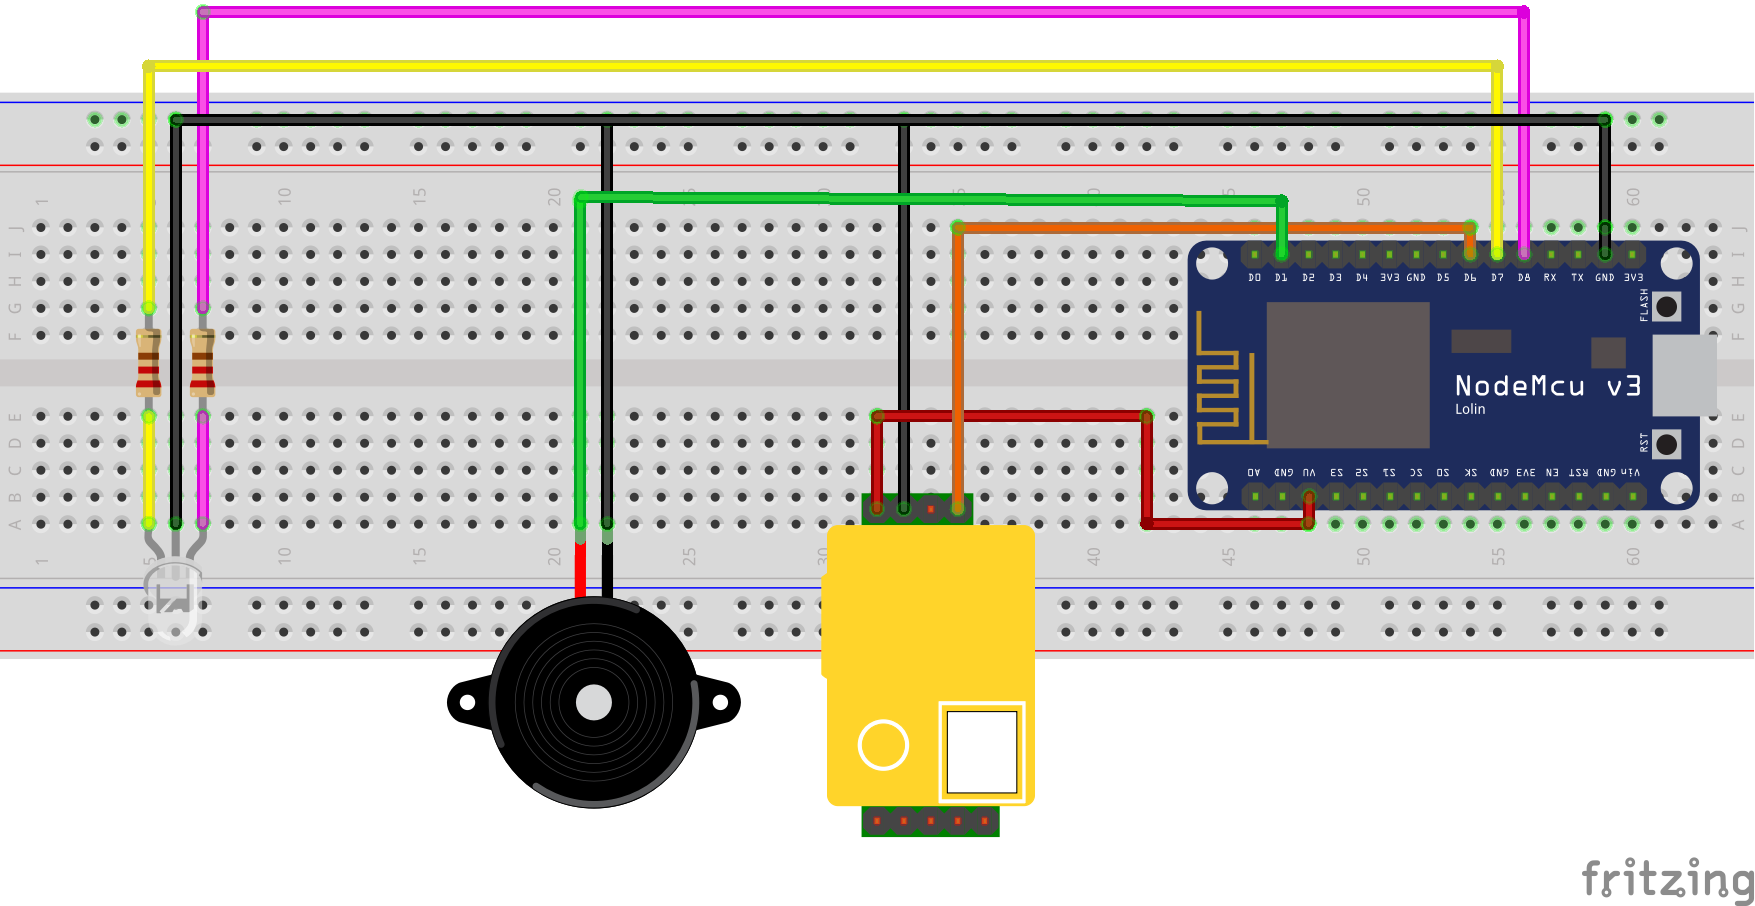
This device provides support for indoor ventilation. It measures co2. It cannot detect coronavirus. A corona infection cannot be prevented with this device!
Idea:The idea was to develop an indicator for the risk of infection with the coronavirus through aerosols. To determine the amount of aerosol in the air we decided to detect the amount of co2 in the air.
When breathing out CO2 is emitted. Over a longer period of time with several people in one room, the amount of CO2 in the room therefore increases.
https://www.umweltbundesamt.de/sites/default/files/medien/pdfs/kohlendioxid_2008.pdf
If there is an infectious person in the room, the amount of aerosols containing the coronavirus will also increase.
The goal was to develop an IoT-device that everyone can get the measured co2 values easily by connecting to the IoT-device with it's own smartphone. So that everyone, for example in a classroom at school, can get the exact co2 value over WiFi on his smartphone without moving from his seat.
Another goal was to develop an simple reminder for ventilating the room.
Components:- 1x ESP8266 Node-MCU V3
- 1x LED bicolor red yellow
- 2x resistor for the LED (ex. 68 ohm)
- 1x MH-Z19B CO2-Sensor
- 1x Piezo Buzzer Alarm Module
For the easy access we decides to build an IoT-device with an ESP8266. The measured values can be accessed by the everyone with his own smartphone. As reminder to ventilate the room, we use a piezo buzzer alarm module, which makes a beep sound when a certain co2-level is reached. An LED also indicates the Co2 levels.
We defined three different air quality areas:
- Green: 0 ppm - 1000 ppm
- Yellow: 1000 ppm - 2000 ppm
- Red: > 2000 ppm
As co2-level steps we definded following values:
- Step 1: 800 ppm
- Step 2: 1000 ppm
- Step 3: 2000 ppm
When the co2-value exceed step 2 the alarm module makes two beep sounds and the led shines yellow. At step 3 it makes three beep sounds and the led shines red. The alarm only sounds once an hour. After ventilating the room and the co2-level falling under step 1 the alarm module makes one long beep sound and the led is turning off. The windows than can be closed.
The measured values and the air quality steps can be accessed over a standalone WiFi from the ESP8266, called "CO2Measurement-XXXX" or over your local home-WiFi. Your home-WiFi can be typed in over the webpage of the ESP8266, when it is in standalone WiFi-mode. In standalone WiFi-mode the ESP8266 can be accessed over the ip-address: 10.10.10.1
In home WiFi-mode the ESP8266 can be accessed over the local ip-address assigned by your home-router, like your fritzbox.
It is also possible to use the co2-sensor in your smarthome. For that the values are provided as xml-file.
When the ESP8266 is connected to your home-WiFi we added a special function. At night the alarm module is deactivated and the WiFi is turned off. You can restart the WiFi again at night by resetting the ESP8266 by turning the power supply off.
WiFi mode deactivated: 23:00 - 6:00 o'clock
alarm module deactivated: 22:00 - 10:00 o'clock
How to:- Download and install Arduino IDE.
- Download latest release version of co2MeasurementDevice from Github.
- Open .ino-file of downloaded co2MeasurementDevice version in Arduino IDE.
- Flash .ino-file to your ESP8266.
- Upload files in the data directory with the ESP8266 Sketch Data Upload button.
A very good tutorial to make Arduino IDE ready for ESP8266 can be found here:
https://randomnerdtutorials.com/how-to-install-esp8266-board-arduino-ide/
And a nice tutorial for uploading files in the data directory to ESP8266 can be found here:
https://randomnerdtutorials.com/install-esp8266-filesystem-uploader-arduino-ide/


Comments
Please log in or sign up to comment.