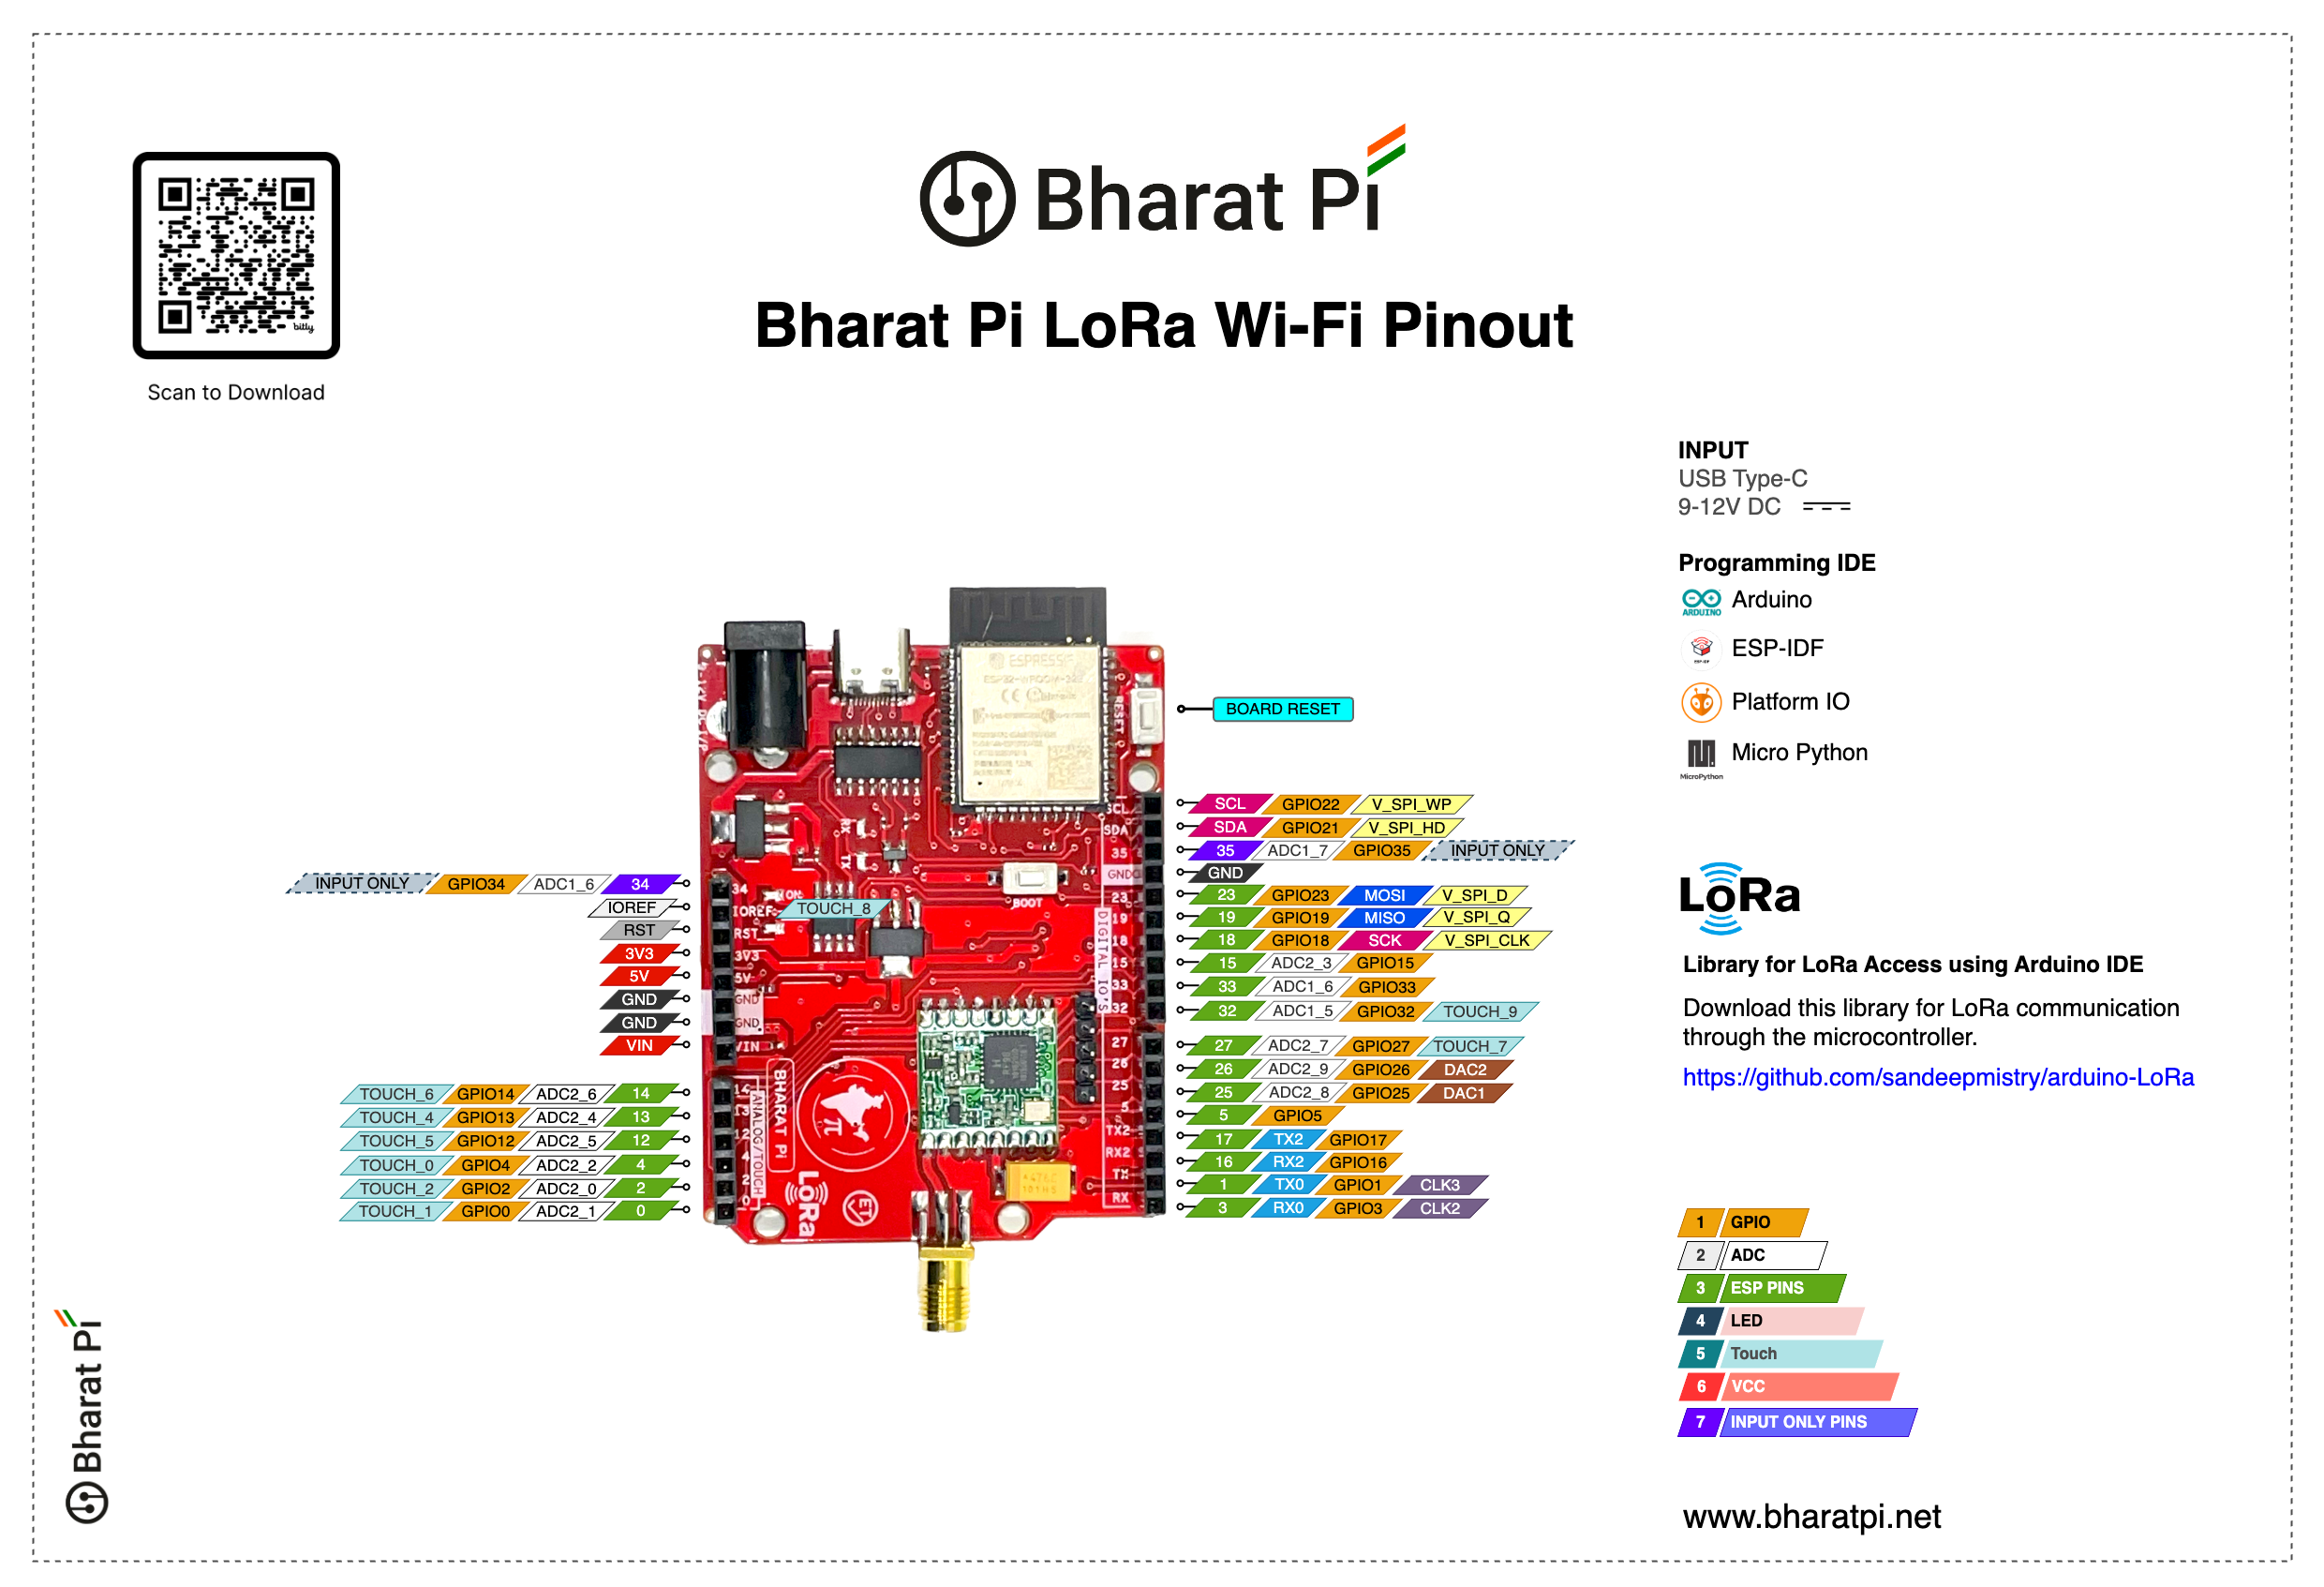
let's review the introduction of Bharat Pi LoRa Board
The Bharat Pi LoRa board is a versatile development platform designed for long-range, low-power wireless communication projects. It combines several key features to make it a popular choice for enthusiasts and professionals alike:
LoRa Module:
- Equipped with the RFM95W LoRa transceiver chip, it offers significant range, typically exceeding 1km in clear line-of-sight conditions.
- Supports multiple frequency bands depending on the region, including 868MHz and 433MHz.
- Configurable spreading factors allow for a trade-off between range and data rate.
Microcontroller:
- Powered by the ESP32-WROOM microcontroller, it provides ample processing power, Wi-Fi and Bluetooth connectivity, and easy integration with Arduino IDE.
- This opens up possibilities for diverse applications beyond just LoRa communication, such as sensor data collection, internet connectivity, and more.
Additional Features:
- Onboard antenna socket simplifies attachment of LoRa antennas.
- Micro USB port for programming and power supply.
- SD card slot for data storage and logging.
- GPIO pins for interfacing with external sensors and actuators.
Applications:
- Internet of Things (IoT) projects: Remote monitoring of agricultural fields, environmental sensors, smart home devices, etc.
- Wireless data acquisition: Collecting data from remote sensors for analysis and control.
- Asset tracking and location services: Locating objects or animals over long distances.
- Emergency communication systems: Providing reliable communication in disaster situations.
Arduino Setup
- To connect the Bharat Pi LoRa board to the Arduino IDE, you'll need to follow these general steps:
- Install Arduino IDE: Download and install the Arduino IDE from the official Arduino website
https://www.arduino.cc/en/software.
- Install ESP32 Board Support Package (if applicable): If the Bharat Pi LoRa board is based on the ESP32 microcontroller, you'll need to install the ESP32 board support package in the Arduino IDE. Go to "File" > "Preferences" and add the following URL to the "Additional Board Manager URLs" field:
"https://dl.espressif.com/dl/package_esp32_index.json"- Then, go to "Tools" > "Board" > "Boards Manager, " search for "ESP32" and install the relevant package.
- Connect the Board: Connect the Bharat Pi LoRa board to your computer via USB.
- Select Board and Port: In the Arduino IDE, go to "Tools" > "Board" and select the appropriate board. Also, ensure the correct port is selected under "Tools" > "Port".
- To check the serial ports in Device Manager on a Windows computer, you can follow these steps:
- Open Device Manager: Press the Windows key + X on your keyboard. Select "Device Manager" from the menu that appears.
- Locate Ports (COM): Under the "Ports (COM & LPT)" section, you will see a list of serial ports available on your computer. These ports are typically labeled with "COM" followed by a number, such as "COM1," "COM2," etc.
- View Serial Ports:Under the "Ports (COM & LPT)" section, you will see a list of serial ports available on your computer. These ports are typically labeled with "COM" followed by a number, such as "COM1," "COM2," etc.
- Identify Serial Device: Look for the serial port that corresponds to your device. If you've connected your Bharat Pi LoRa board, it should appear in this list. The name or description of the port might give you a clue, or you can try disconnecting and reconnecting the board to see which port disappears and reappears.
- Note Port Number: Take note of the COM port number associated with your device. You'll need this information when selecting the serial port in the Arduino IDE or any other software that communicates with your Bharat Pi LoRa board.
- Write and Upload Code: Write your Arduino sketch code to communicate with the LoRa module on the Bharat Pi LoRa board. You can find example codes. Once your code is ready, click the "Upload" button in the Arduino IDE to compile and upload the code to the Bharat Pi LoRa board.
- Monitor Serial Output (Optional): If your code includes serial communication for debugging or data output, open the Serial Monitor in the Arduino IDE (under "Tools" > "Serial Monitor") to view the serial output from the Bharat Pi LoRa board
13 projects • 4 followers
IoT Prototyping platform for students, innovators, startups, OEMs and system integrators. Build any IoT use case using Bharat Pi boards!


Comments