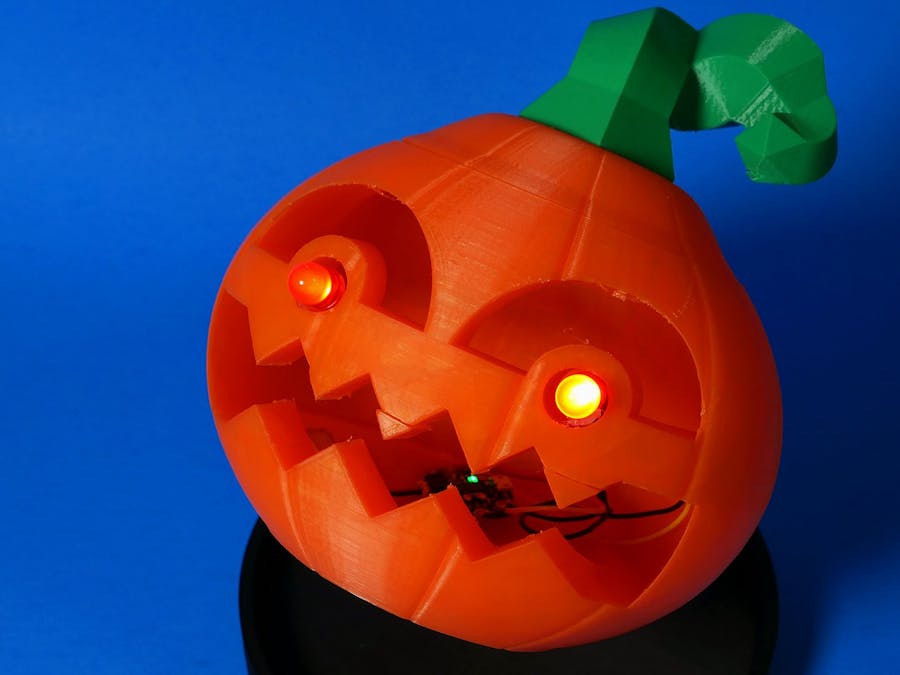
'Tis the season for all things spooky and creepy so I decided to create a project that was awesomely autumnal: Jack, the 3D printed, LED-blinking jack-o'-lantern.
The real challenge for this project came with the modeling. I wanted to model the pumpkin myself in Fusion360. Previously I had only really modeled project enclosures; practical boxy things. To leap to something more sculpture-esque was intimidating but overall I think it went well.
I began by following the advice of Sophy Wong that she gave during one of her lovely talks at World Maker Faire. She discussed doing tiny thumbnail sketches during the design portion of your project (a portion I normally speed thru Sonic the Hedgehog-style) to really plan out how your project will look and feel to make sure you're running with the best possible version of your project's design. This resulted in a page full of jack-o'-lantern face sketches and I'm so glad I did this. Otherwise I can guarantee the face would have been a bit bland and predictable.
Doing this really got me thinking from a more methodical, architectural perspective rather than a deep in the trenches, hyper-focused speed run thru an 8-bit world perspective. All of this planning and sketching helped when finally jumping into Fusion360 with digital sketches. I had a better idea of the shapes I was trying to achieve and it helped the whole process go a lot smoother.
And speaking of Fusion360, I tried to keep the basics of the design parametric so that it could be adjusted as needed. I started by creating sketches for the overall pumpkin shape and then extruding on a wedge-shaped piece that was similar to a crescent moon. This was to eventually allow the pumpkin to be hollow without having to take away material. After creating the crescent wedge, I added fillets on the edges to round them and then revolved it to create the full pumpkin shape.
Next I concentrated on the lid. I wanted the top of the pumpkin with the stem to be able to liftoff similar to a real-life jack-o'-lantern. I added a hexagonal sketch on the top of the pumpkin to perform a cut to separate it from the main pumpkin body. Then I created a pentagon sketch on top of the lid to create a base for the stem. The stem was formed by continuously extruding and revolving to get a twisting, shrinking shape. It was also modeled with the idea of a color change in mind during the 3D printing process, so it sits completely above the lid.
The final step was to sketch out the face and holes for the LEDs. After getting the sketches to the proportions and positions that I wanted I extruded them with a cut to come thru the front of the pumpkin. After this, it was time to export as an.STL file and print the model.
The body of the pumpkin ended up being a very long print; approximately 23 hours. This could definitely be improved by changing the walls of the pumpkin to be thinner in Fusion360. However, with the thicker walls it definitely has a more realistic pumpkin vibe. Supports are needed for both portions of the model to ensure that the face and stem print correctly. I had an issue with my supports for the pumpkin body where I missed that two of the teeth were set to print in mid-air. I was able to pause the print and apply some sticky tack to save my print and then later exported pieces of the teeth as new.STL files to basically cap Jack's teeth, but this can all be avoided by properly previewing your model in your slicer software and not rushing at midnight like I did.
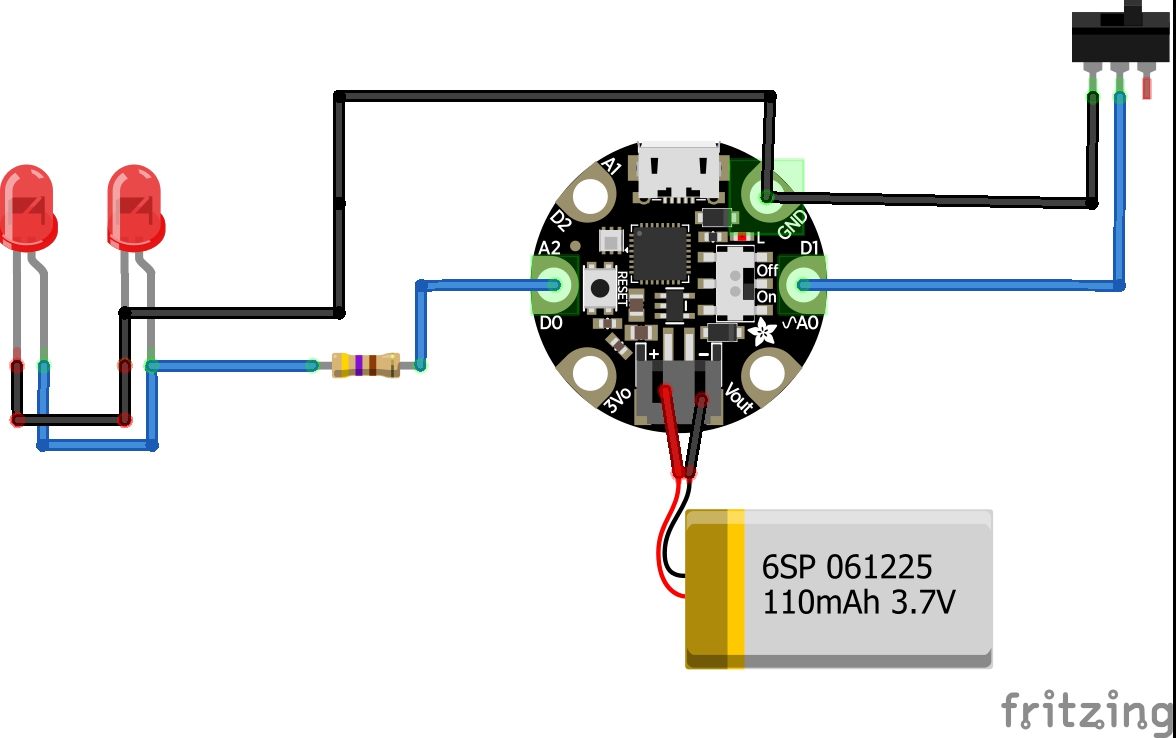
After the 3D printer had finished cooling it was time to work on the circuit and code. The main goal on the electronics side of things was to have two LEDs blink for eyes; 10mm LEDs to be specific. I decided to use a Gemma M0 board for this since I didn't need a lot of pins and it has an on/off switch along with a battery terminal for power. The Gemma is running a simple CircuitPython script that allows for the LEDs to blink with PWM. It also lets a switch, connected to a second pin, control whether the LEDs are blinking or just on with no blinking.
To solder everything up I used pieces of jumper wire to connect all of the components directly to the board along with heat shrink tubing to ensure that nothing would short out.The LEDs were then hot glued into the slots on the face of the pumpkin and a small dab of hot glue was used to secure the Gemma to the bottom of the pumpkin. Since the circuit consists of just two LEDs it doesn't require a lot of power and can run off of a small lipo battery.
After all the coding, soldering and gluing, all that's left is the power up the Gemma and top the pumpkin off with the lid to let Jack blink away in all their Halloween themed glory. At its core, this project is very simple but you could definitely expand the electronics or coding portion to make things more complicated; such as adding sensors or timers to add some extra fright. You could also resize the pumpkin to be bigger or smaller or maybe even print an entire blinking pumpkin patch. The possibilities are really endless.


_t9PF3orMPd.png?auto=compress%2Cformat&w=40&h=40&fit=fillmax&bg=fff&dpr=2)


Comments
Please log in or sign up to comment.