


Hardware components | ||||||
| × | 1 | ||||
| × | 1 | ||||
 |
| × | 1 | |||
Software apps and online services | ||||||
 |
| |||||
I just had for Christmas one of the many Arduino UNO starter kits. After I went through how to use almost each component, I didn't really know what to do with them, and when I was searching suggestions online, there were no middle between super cool, long and expensive projects; and tutorials on how to light a LED.
When I had learnt how to use those two components, I thought that it would be nice to be able to directly display things without programming it; and so I came up with my joystick.
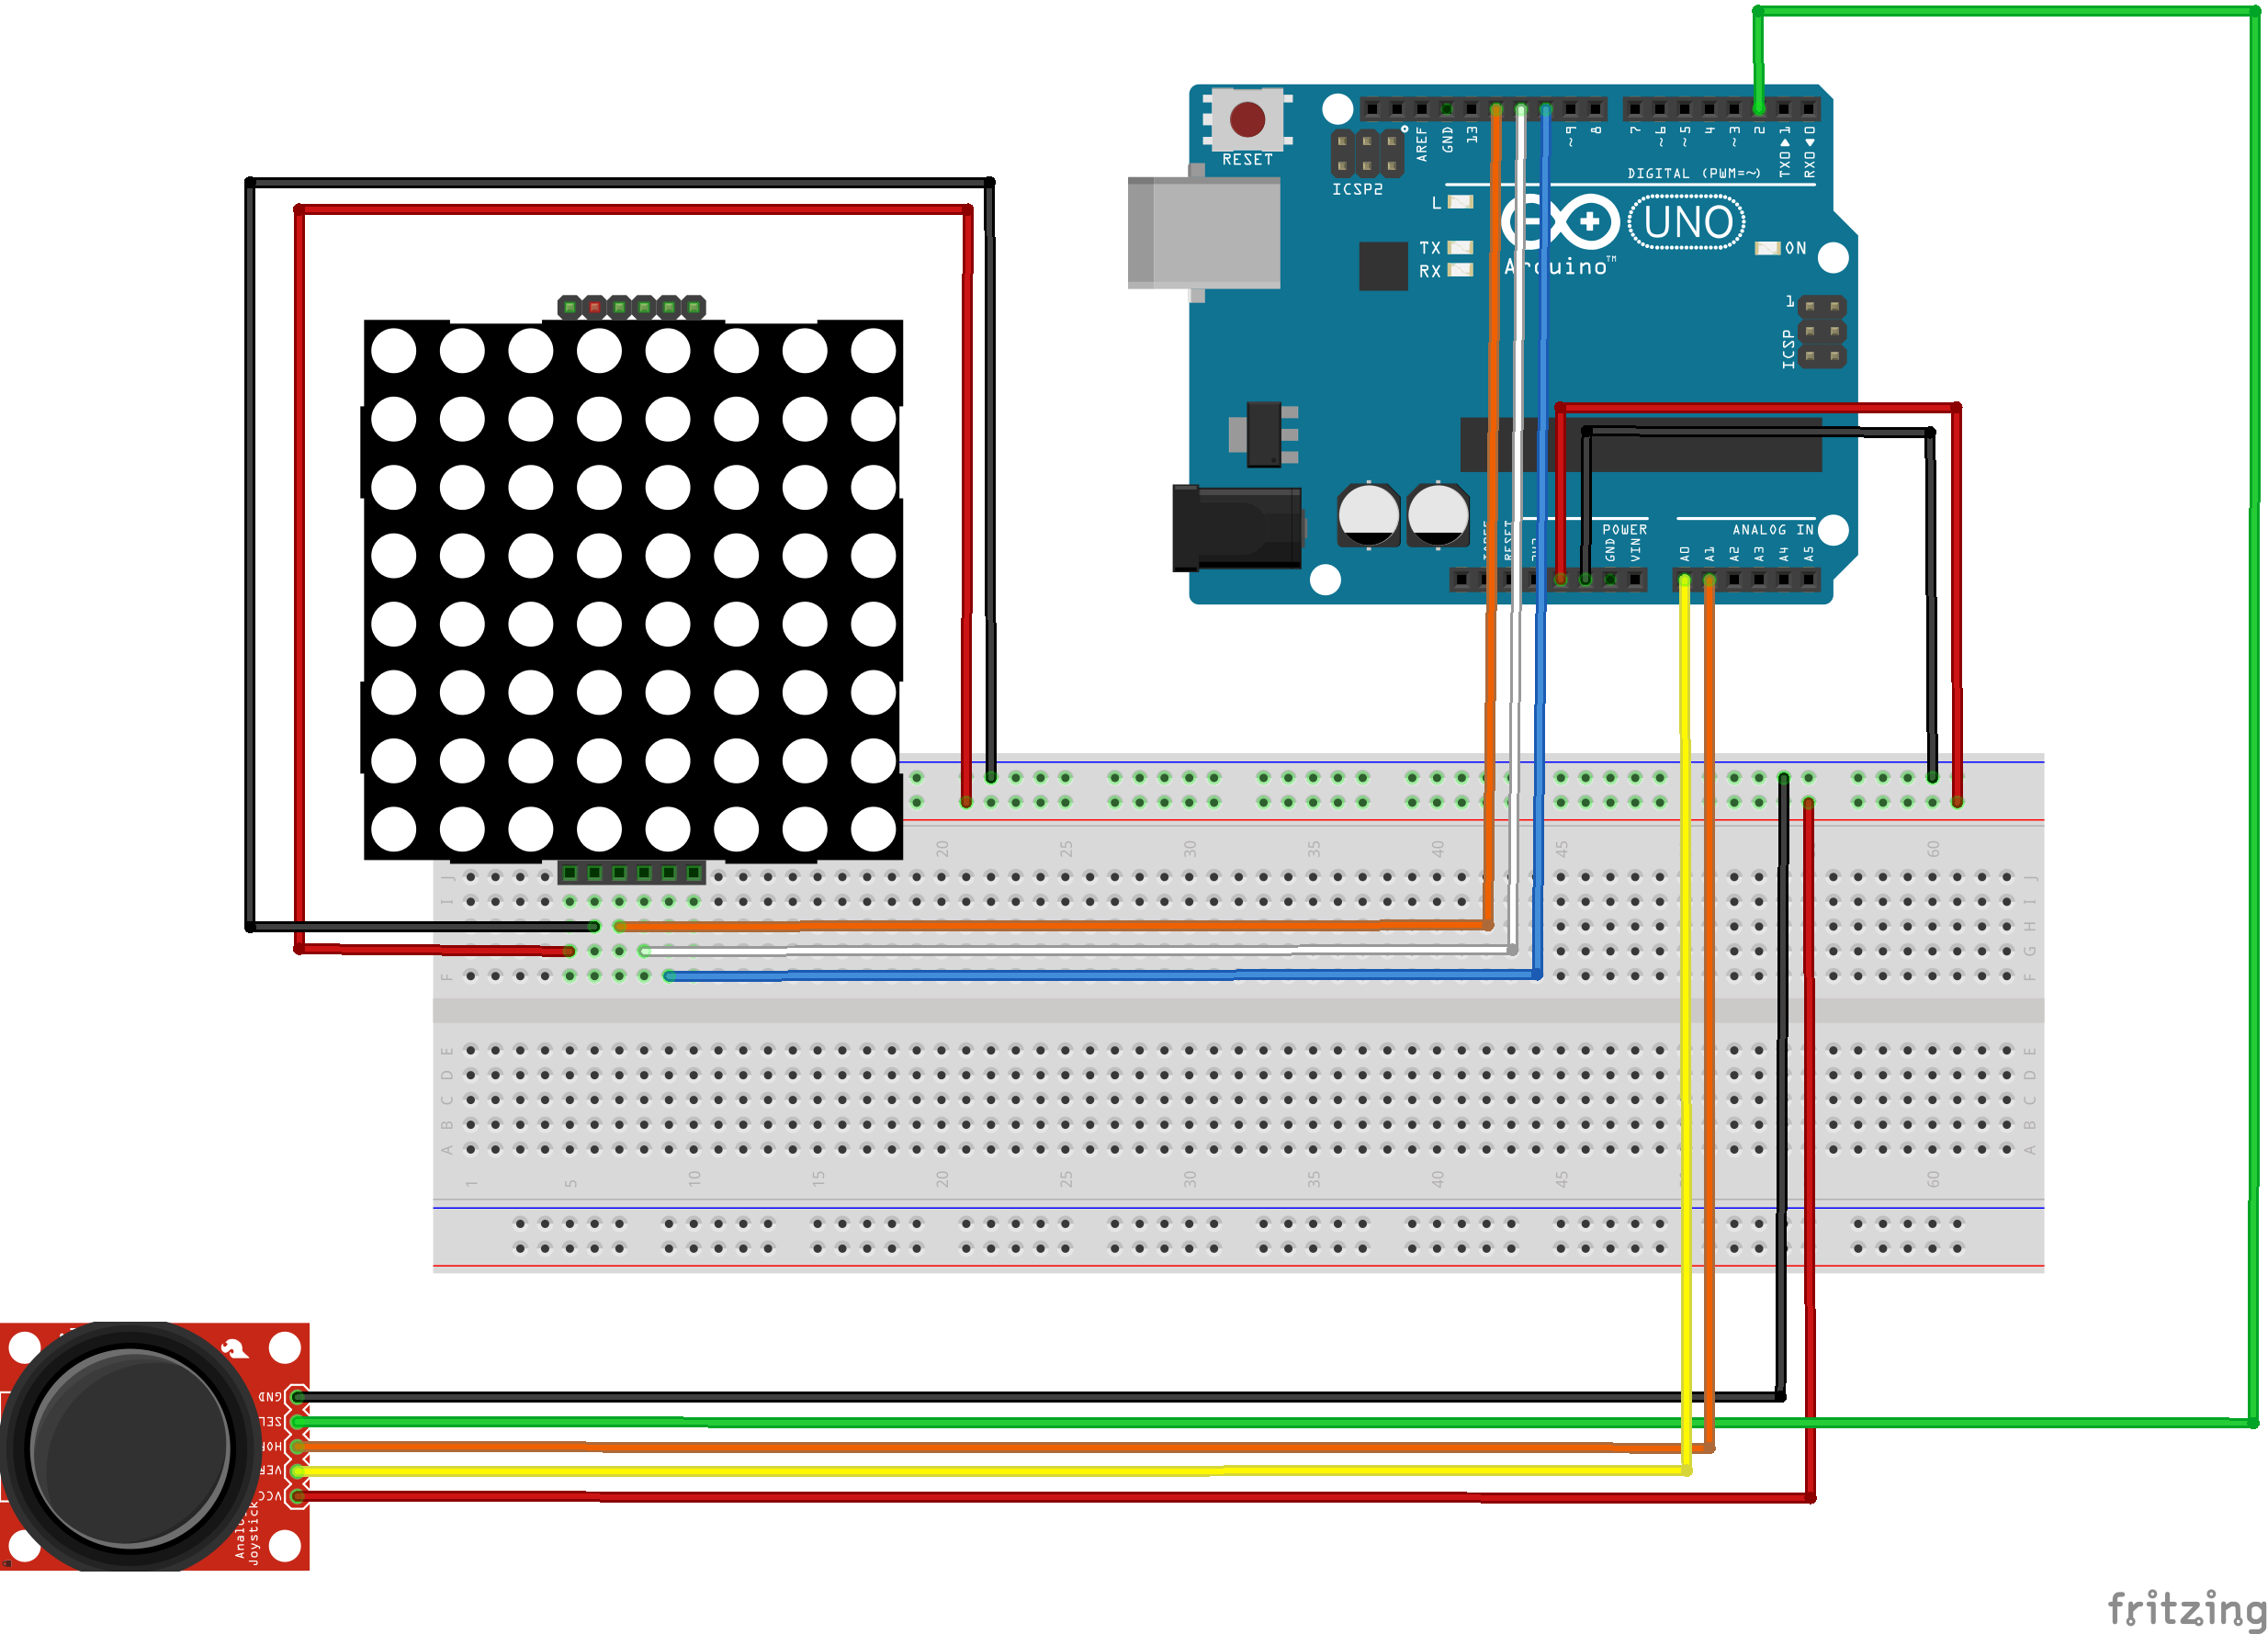
AssemblyWe don't need to do any more connections than the components' ones. However, we still have to use a breadboard, as both joystick and matrix require 5V alimentation; whereas the board only has one available.
Here is the result:
The point of the program stands on logic: instead of creating a complicated and heavy two-dimensional array to control the whole matrix status; we're gonna simply create a boolean describing the actual "mode" (writing or erasing), and then the rest depends of it:
void loop(){
    if (writing){
        lc.setLed(0,abscissa,ordinate,true);
    }

    /* Joystick events ... */

    // blinking point
    lc.setLed(0,abscissa,ordinate,true);
    delay(delayTime1);
    lc.setLed(0,abscissa,ordinate,false);
    delay(delayTime1);
}
When the blinking point will change of abscissa and/or of ordinate - during the joystick events; the precedent place will only be lit if it was just before, and so if writing was true.
DemonstrationAs you see, pressing the joystick induces changing the mode between writing and erasing. Note that the actual position will also be lit or shut off.
ConclusionThis is my first Arduino project. I wanted to show something simple that every beginner could do with his own abilities and materials, but would still be interesting to shape.


Comments
Please log in or sign up to comment.