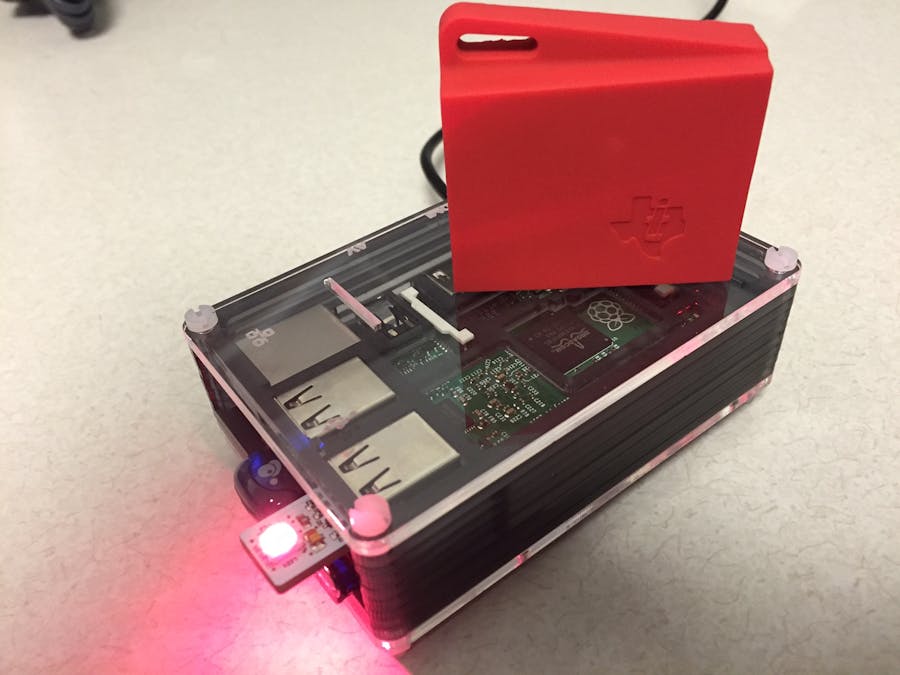
1) Use the latest version of "Jessie" on the Raspberry Pi 2 -https://www.raspberrypi.org/downloads/raspbian/
2) Connect the Raspberry Pi 2 to the internet and "Putty" into it from another computer.
3) Connect the Blinkstick to the Raspberry Pi 2 -
https://www.blinkstick.com/help/raspberry-pi-integration
4) Verify the Blinkstick is working (it will turn a random color). Type the following into the Raspberry Pi 2 terminal:
sudo blinkstick random
To avoid permission errors type this into terminal:
sudo blinkstick --add-udev-rule
Now "sudo" will not be needed when entering Blinkstick commands. Verify this by entering the command below. The Blinkstick should turn a random color.
blinkstick random
4) Follow the instructions to run Node Red and also install NPM on your Raspberry Pi 2 -
http://nodered.org/docs/hardware/raspberrypi.html
5) Once the Blinkstick and Node Red are set up on the Raspberry Pi 2, navigate to the Node Red directory to install some nodes.
cd ~/.node-red
6) Install "dweetio" and "blinkstick" nodes into Node Red.
sudo npm install node-red-node-blinkstick

sudo npm install node-red-node-dweetio
7) Restart Node Red and the nodes will be installed.
8) Download the Sensor Tag app for either iOS or Android -
http://www.ti.com/ww/en/wireless_connectivity/sensortag2015/appsAndPartners.html
9) Run the Sensor Tag app and edit the cloud configuration to send the data to Dweet.IO.
10) Name the "Thing" in Dweet.io settings on the Sensor Tag app. *Remember this unique name because you'll need it for your Node Red Flow later.
12) Open Node Red in your browser using the IP address of your Pi followed by :1880.
Ex. 192.168.2.67.1880
13) Copy the flow below into your Node Red. (Import > Clipboard > Paste). Once you see the flow pasted into Node Red, change the Dweetio Node to the name you set up in the phone app for your Ti Sensor Tag 2.
[{"id":"ece0d13a.131f3","type":"change","z":"9958e62f.66a718","name":"Darkness","rules":[{"t":"set","p":"payload","to":"random"}],"action":"","property":"","from":"","to":"","reg":false,"x":173,"y":189,"wires":[["37cb63cc.c8349c"]]},{"id":"221efe94.dde102","type":"switch","z":"9958e62f.66a718","name":"","property":"payload.light","rules":[{"t":"btwn","v":"0","v2":"10"},{"t":"else"}],"checkall":"true","outputs":2,"x":179,"y":122,"wires":[["ece0d13a.131f3"],["1e0f20ba.e1f0df"]]},{"id":"1e0f20ba.e1f0df","type":"change","z":"9958e62f.66a718","name":"Light","rules":[{"t":"set","p":"payload","to":"black"}],"action":"","property":"","from":"","to":"","reg":false,"x":167,"y":246,"wires":[["37cb63cc.c8349c"]]},{"id":"dd59be6.f22a64","type":"dweetio in","z":"9958e62f.66a718","thing":"","name":"","x":92,"y":66,"wires":[["221efe94.dde102","c738d7c0.38c728"]]},{"id":"37cb63cc.c8349c","type":"blinkstick","z":"9958e62f.66a718","name":"","serial":"","task":"set_color","delay":"500","repeats":"1","duration":"1000","steps":"50","repeat":false,"x":407,"y":154,"wires":[]},{"id":"c738d7c0.38c728","type":"debug","z":"9958e62f.66a718","name":"","active":true,"console":"false","complete":"false","x":394,"y":236,"wires":[]}]
15) Check the debug tab on your Node Red (located on the far right). The Sensor Tag 2 data will look like this:
{ "ambientTemp": 26.03, "objectTemp": 20.62, "humidity": 85.51598, "pressure": 1018.3, "altitude": -0.7708694, "accelX": -0.06, "accelY": 0.04, "accelZ": 1.03, "gyroX": -0.59, "gyroY": 0.81, "gyroZ": -0.76, "magX": 83.8, "magY": 80.2, "magZ": 116.47, "light": 18.5 }
16) Set the "blinkstick" node to either blink, morph, pulse depending on what you like. I prefer morph.
16) Now you have a smart light that responds to remote lighting conditions. The Raspberry Pi does not need to be on the same network as the cell phone that is publishing the Sensor Tag 2 data. Which makes it extra cool.


Comments
Please log in or sign up to comment.