My aim is to create a tool to aid shops to limit the number of customers entering at one time to ensure social distancing. The idea is a simple traffic light controller which counts people in and out. When a limit is reached, a red light shows and the customers must queue up outside.
So far I have created two versions of this controller. The first version had simple button controls for the limit, which despite being the cheapest, I wanted to make the control remote so shop owners would not have to leave their station (or protected area) to change the limit on the customers entering the shop. The next method used an ESP8266 as a server to create a website the shop owner could control from a computer. This method was a great improvement over the first but I wanted to make one more alternative approach which uses an app and the cloud to allow greater adaptability.
My final approach is to connect the traffic light to Arduino Cloud. This means data can be tracked over time and also making the system scalable to larger shops (or alternative large gathering locations) or to shops which use separate entrances and exits. Finally, this means that the data may be accessed by using the Arduino Cloud API from a separate piece of code or application, increasing possibility of customisation.
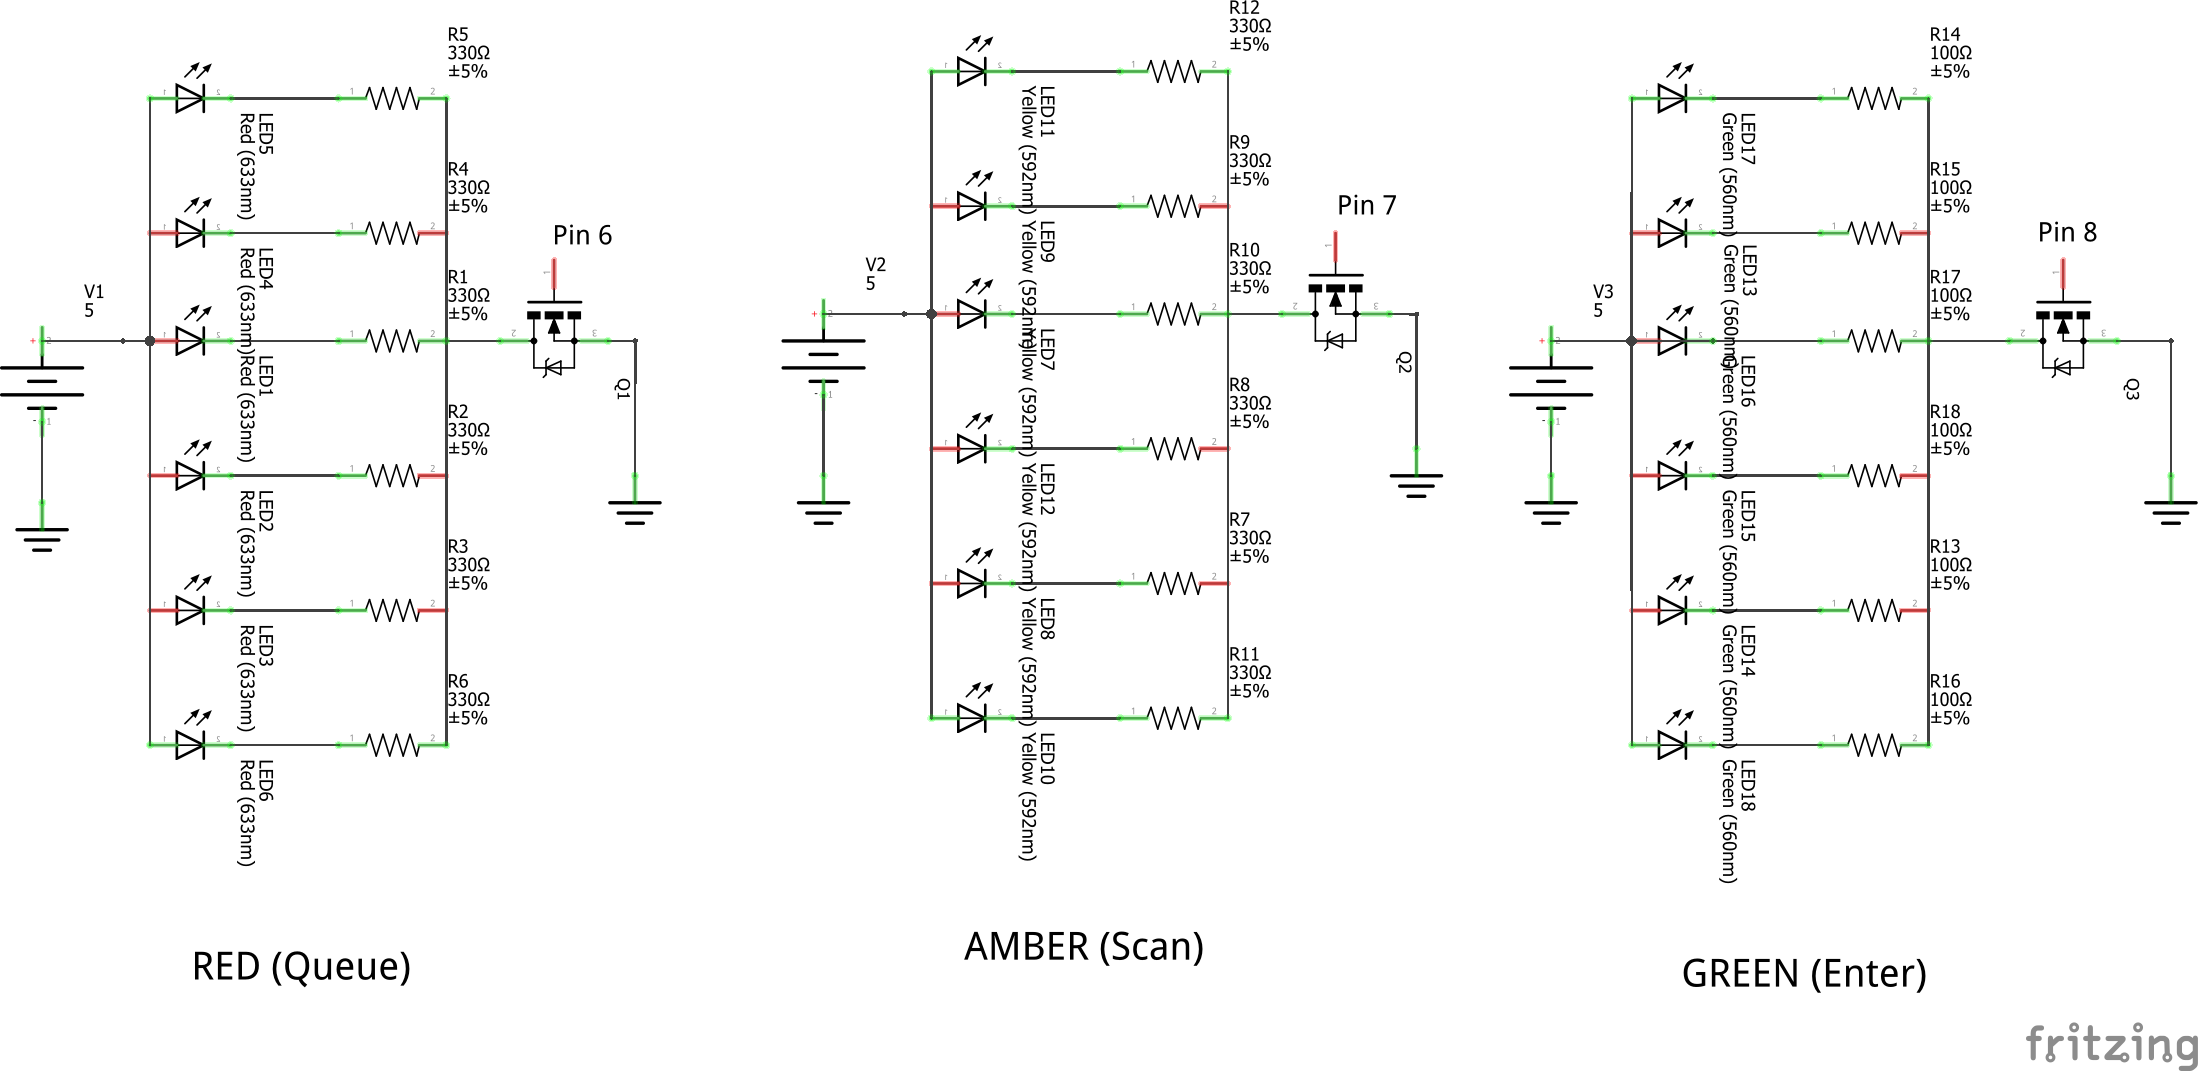
HardwareThe wiring is fairly simple. I have used MOSFETS here to supply higher currents required by more LEDs. The lights are powered externally and switched using the Arduino, meaning more LEDs can be added than the two I have used.
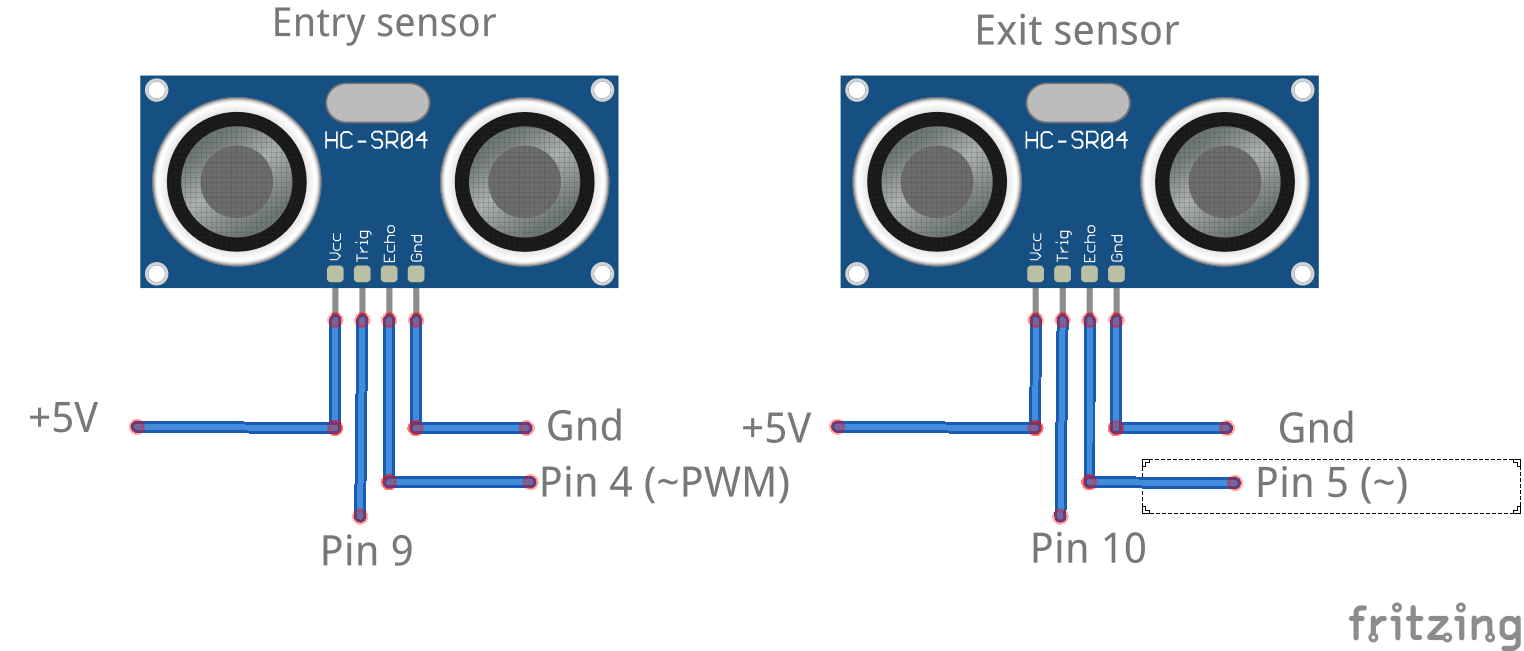
One catch to look out for is that the Arduino MKR WiFi 1010 uses 3.3V while the ultrasonic sensors require 5V. I am using a breadboard power supply here to provide the 5V/3V however alternative methods such as inputting 5V then using a buck converter such as the TPS560430X3FDBVR if a circuit board was going to be produced. The 3.3V logic of the Arduino can still operate the 5V ultrasonic sensors.
(Please see the bottom of the project for schematics.)
Software - Arduino SideThe software is added at the bottom of the page. You can setup your Arduino WiFi module using this great tutorial. The code I have supplied at the bottom may then be uploaded. All that is required is for the user to fill in their WiFi credentials in the secret file.
Software - Application SideI have created a separate in depth tutorial in how to make an MIT App Creator Application to communicate with Arduino Cloud. I have then adapted it slightly to allow automatic updates and to improve performance. The app layout may be downloaded from the bottom of the page. This can then imported into the MIT App creator software.
1. Setup the hardware according to the schematics.
2. Load to the Arduino Cloud and fill in the WiFi credentials. Then load software onto the Arduino. Check the software connects to the cloud.
3. Load the app into MIT App Inventor and fill in the device credentials - thing ID, API Client ID and API Client Secret.
Proof of ConceptAllow me to talk you through the video. Initially, the Arduino is on and connected to the cloud but the app is not connected. When I hit connect on the app, it gains the access token to use in the Arduino Cloud API. I then refresh the data with the button such that it matches with the Cloud data. We see that the customer limit is set to 7 while the customer count is currently at 0, which means the amber LEDs are displayed so a customer may scan to enter. When I turn on automatic updates, the app data will sync with the cloud every 4 seconds. This may be made shorter or longer in the app creator.
When I simulate someone entering using the left US sensor, the green LEDs show to indicate that the person may enter. The cloud and therefore also the app sync to this value. When the sensor on the right is used to simulate a customer exiting, the customer count decreases.
I then simulate 7 people entering the store so that the limit is reached. When this occurs, the red LEDs show, indicating the next customer must queue until someone has left. The data is reflected in the App and the Cloud dashboard.
Finally, I use the app to change the limit. When the limit is increased, the light goes to amber so a new customer may scan to enter.
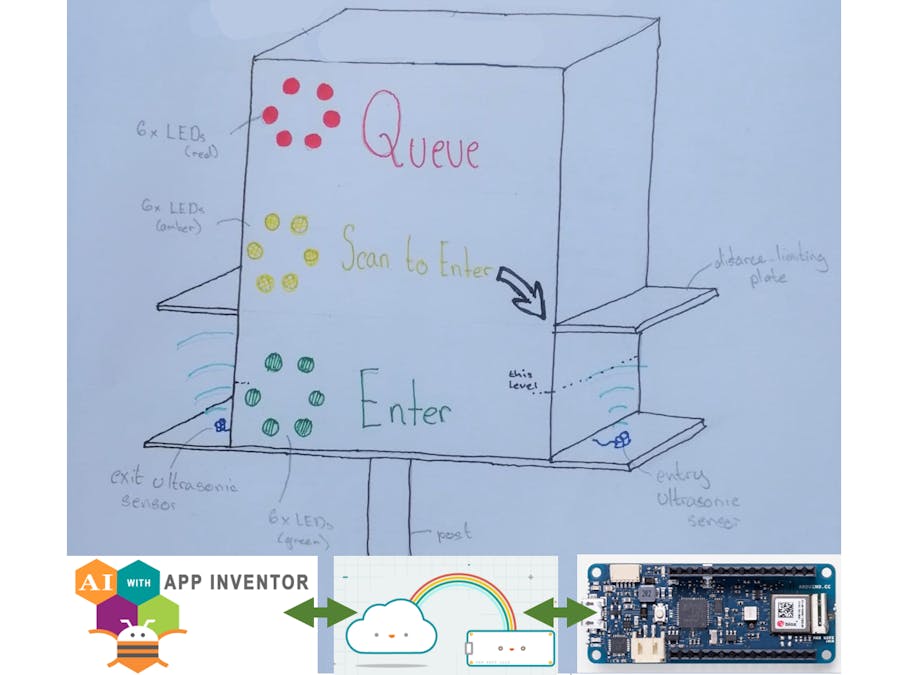
The Idea of the Casing/Final ProductThe image below shows an idea for how the final product should look.
- One interesting adaption which can easily be inputted is when a store uses a different route of entrance to the route of exit. They may then use two devices, each with one ultrasonic sensor on. As they are both connected to the cloud, the data will be shared between them.
- The phone app can be adapted to restaurants. The application may be adapted to state how many tables are free and of what size such that passers by know whether they may enter or not.
- In schools, the software could be adapted to prevent different classes coming into contact with each other when they pass from room to room.
Before I conclude the project, I would like to thank Arduino for allowing me to use the Arduino MKR WiFi 1010. It is my first experience using the 'cloud' and communicating using APIs so I have learnt a huge amount. I hope my in depth tutorial on using MIT App Inventor with Arduino Cloud allow others to make some useful projects.
Covid-19 has disrupted everyone's lives. I hope everyone stays sensible, looking after family, friends and neighbours. Together we will overcome it but only if we do work together and look after each other. I have seen some fantastic projects and so I thank the competition creators for creating this medium which allows our imagination to be focused in helping people in creative ways.
Any feedback is much appreciated,


Comments
Please log in or sign up to comment.