Robin Hartley
Published © GPL3+

Retrofit Clapper Light Switch

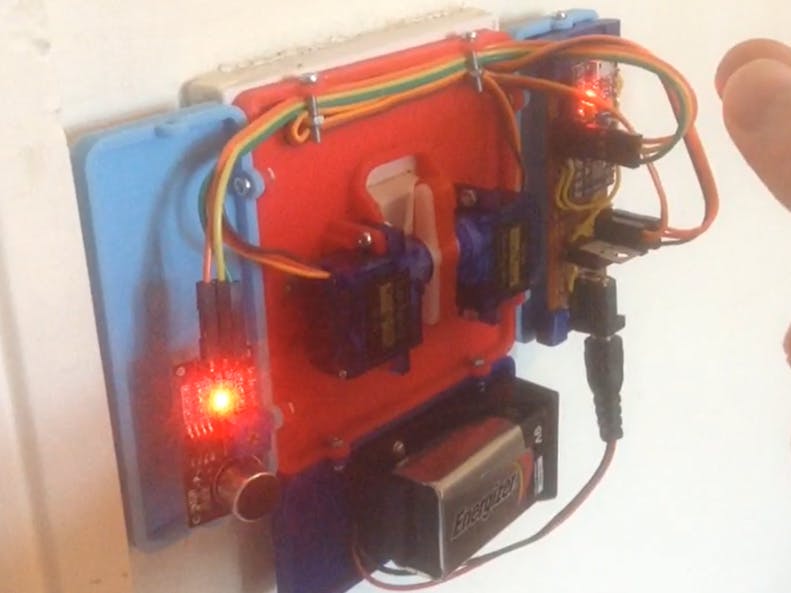
An Arduino clap controller you can retrofit to a UK light switch. Great for home automation!

IntermediateFull instructions provided8 hours1,036
Retrofit Clapper Light Switch

Things used in this project

Hardware components

SG90 Micro-servo motor
×2
5V Voltage Regulator
×1
Arduino-compatible Pro Micro
×1
9V battery holder and battery
×1
DC barrell jack
×1

Software apps and online services

Arduino IDE
Arduino IDE

Hand tools and fabrication machines

3D Printer (generic)

Story

Read more

Schematics

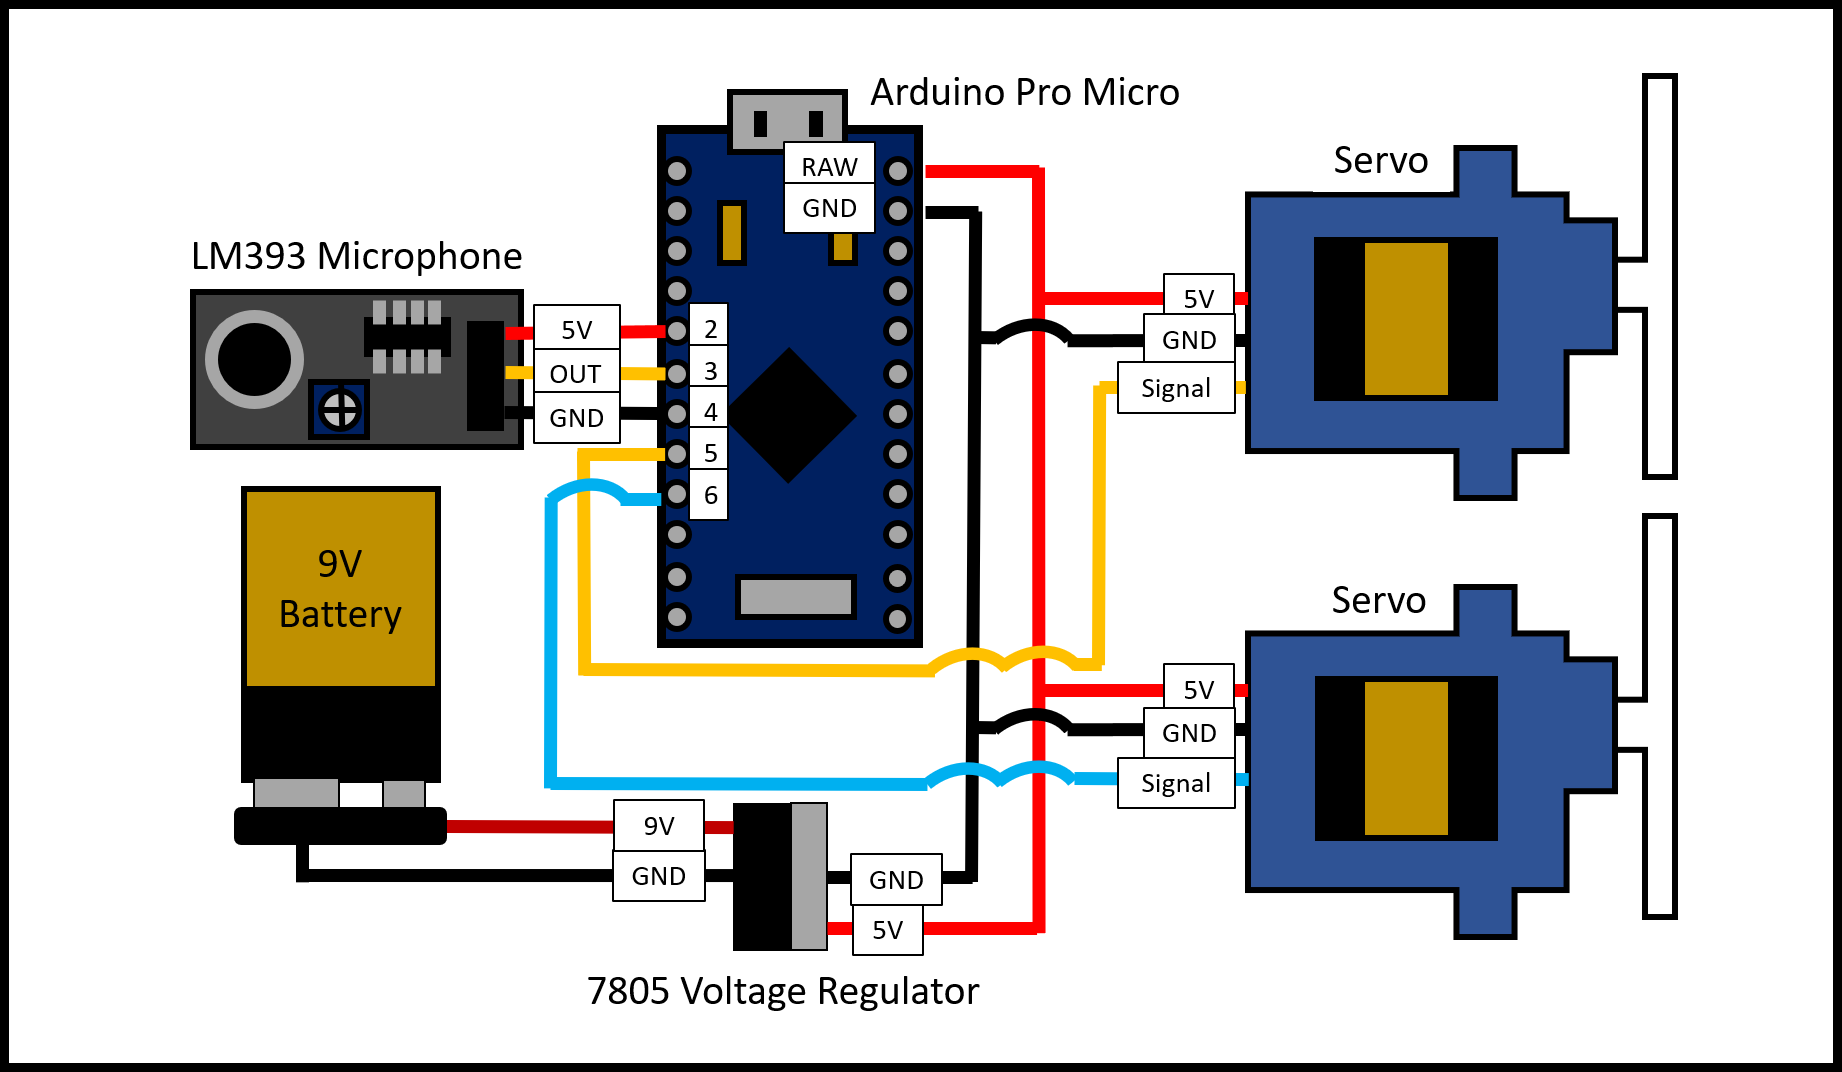
Circuit Diagram

Code

Arduino Code

Arduino
The code is fairly short, but is made a little more complicated by two things.

1) The servos are mirror images therefore, to turn the light on, the left servo must rotate clockwise whilst the right servo must go anticlockwise. This means the ‘destination’ position of each servo will be different for on and off.

2) The servo start positions are a weird angle due to ‘twitching’ which you can read about in ‘Lessons Learned’ further down in this article. For now though, all you need to know is that the servos had to start in a certain position – 92 degrees for the right servo, and 100 degrees for the left servo.

Without further ado, here is the code. I have commented it as best as I can but if you have any more questions, feel free to ask them in the comments.
#include <Servo.h>
 
Servo servoRight;       // create an object for the righthand servo
Servo servoLeft;        // create an object for the lefthand servo
 
const int rightStart = 92;    // variable to store the start servo positions
const int leftStart = 100;
 
const int twistAngle = 55;    // The angle the servos will twist to flick the light
 
int rightOn = rightStart - twistAngle;     // The angle required for the right servo to turn the light on
int leftOn = leftStart + twistAngle;       // The angle required for the left servo to turn the light on
 
int rightOff = rightStart + twistAngle;    // The angle required for the right servo to turn the light off
int leftOff = leftStart - twistAngle;      // The angle required for the left servo to turn the light off
 
// Input pin for the microphone signal. It's only on/off, based on a threshold
int micPin = 3;            


boolean on = false;
 
void setup() 
{
    pinMode(4, OUTPUT);
    digitalWrite(4, LOW);     // GND for the microphone
 
    pinMode(2, OUTPUT);
    digitalWrite(2, HIGH);    // +5V for the microphone
 
    servoRight.attach(6);     // Right servo is pin 6 (must be a PWM pin!)
    servoLeft.attach(5);
    
    // Move servos to their start position on power up
    // Really, they should be in the start positions anyway.
    servoLeft.write(leftStart);       
    servoRight.write(rightStart);     
}
 
void loop() 
{
    // If the microphone sound level passes the threshold
    boolean val = digitalRead(micPin);       
 
    if(val == HIGH)
    { 
        if(on) // If the light is on...
        {
             Serial.println("Turning Off");
             servoOff();              // Routine/method to turn the light off
             on = false;              // Now the light is off
             delay(300);
        }
        else // If the light is off...
        {
             Serial.println("Turning On");
             servoOn();               // routine/method to turn the light on
             on = true;               // The light is now on.
             delay(300);
        }
     }
}
 
void servoOn()
{
    int rightPos = rightStart;
    int leftPos = leftStart;
 
    // Move the right servo from 'rightStart' to 'rightOn'
    // Move the left servo from 'leftStart' to 'leftOn'
    while(rightPos > rightOn) 
    {                                           
        servoRight.write(rightPos);
        servoLeft.write(leftPos); 
        rightPos--;  // rightPos is decreasing in angle 
        leftPos++;   // leftPos is increasing in angle - they're mirrored
       delay(5);
    }
 
    // Move the servos back to their original position
    while(rightPos < rightStart)  
    {
        servoRight.write(rightPos); 
        servoLeft.write(leftPos); 
        // They now go the other way - rightPos increases, leftPos decreases
        rightPos++;                
        leftPos--;
        delay(5);
    }
 
}
 
void servoOff()   // This is the exact opposite of the above servoOn() routine
{
    int rightPos = rightStart;
    int leftPos = leftStart;
 
    while(rightPos < rightOff) { servoRight.write(rightPos); servoLeft.write(leftPos); rightPos++; leftPos--; delay(5); } while(rightPos > rightStart)
    {
        servoRight.write(rightPos);
        servoLeft.write(leftPos); 
        rightPos--; 
        leftPos++;
        delay(5);
    }
}

Credits

Robin Hartley
2 projects • 0 followers
Nerd by day, nerd by night. Engineer, programmer and maker. Lover of Arduino, Raspberry Pi, 3D printing and hardware/software hacking.

Comments