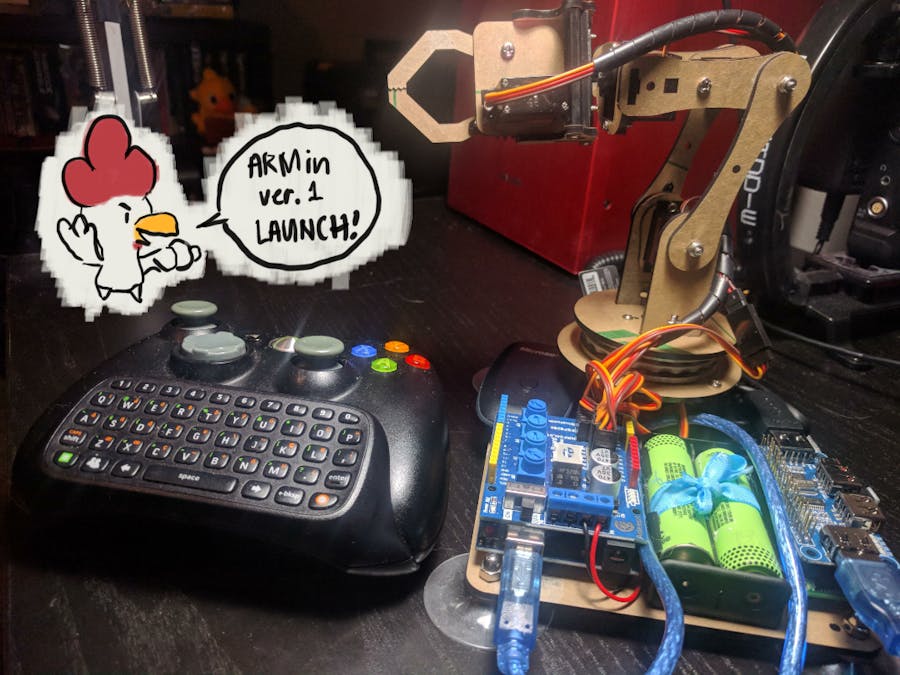
I wanted to do a straightforward Arduino robot controller using my old Xbox 360 controller connected to a Raspberry Pi. So I went ahead and found some old parts and cobbled things together.
Disclaimer: There are some projects already out there that utilize this approach, but I want to consolidate and share the steps as I go along my own little project.
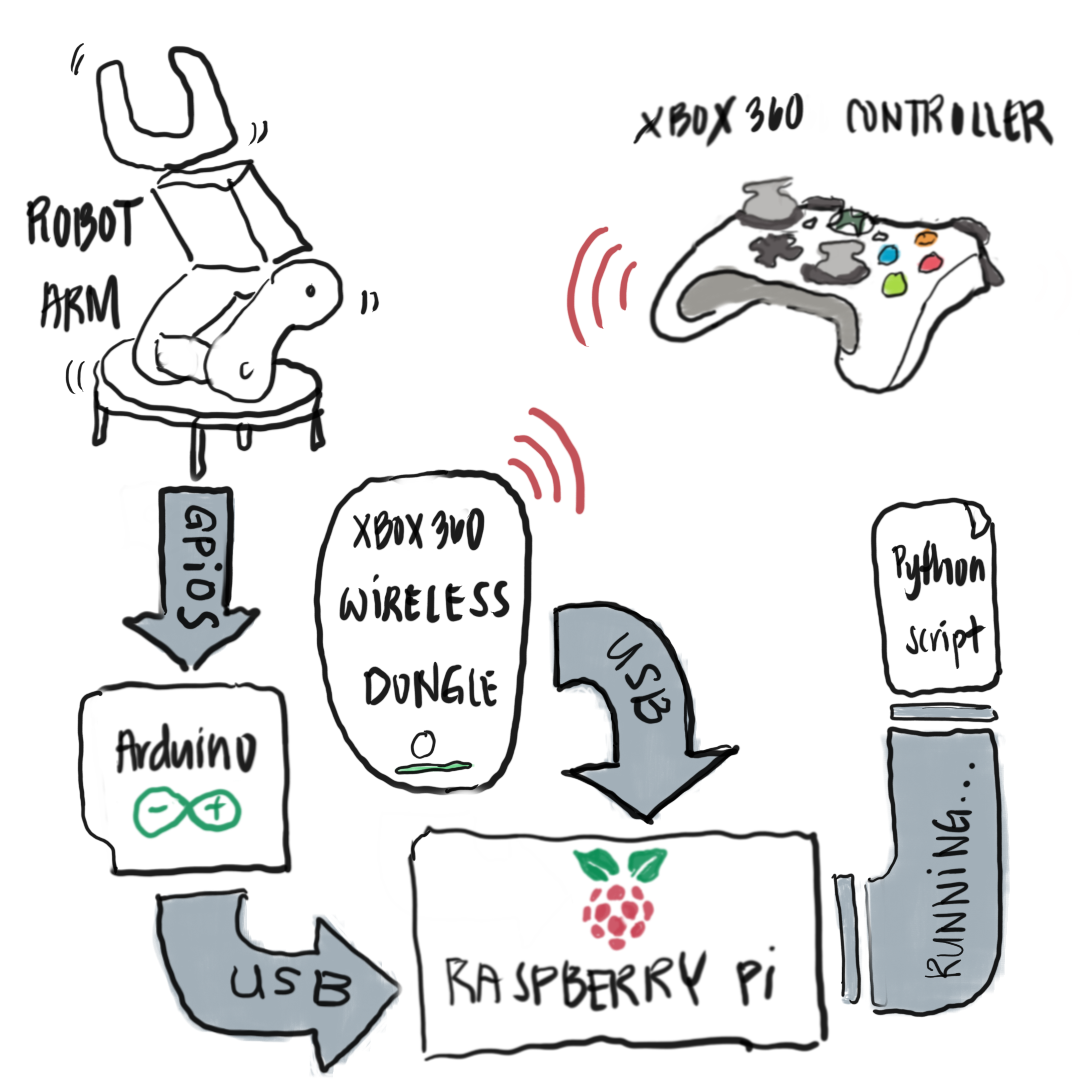
System OverviewThe project consists of the following:
- Raspberry Pi
- Arduino
- Robot arm kit
- Wireless Xbox 360 dongle
- Xbox 360 controller
The servos of the robot arm kit are connected to the Arduino's GPIOs (pin 9, 6, 5, 3, 11) as detailed below.
The Arduino is connected to the Raspberry Pi through USB along with the wireless Xbox 360 dongle.
Setting up the robot arm kitSo I got this kit for cheap from warehouse deals on Amazon. I've been wanting to test out these since forever, so I snatched it up once something went on sale.
The kit comes with six servos but only uses five of them. The kit also has all the necessary tools for you to build it which is thoughtful. It includes a dual 18650 battery holder but doesn't come with the 18650 batteries. So I had to source them from an old laptop battery.
Building the kit is kinda straightforward. The instructions can be seen here: [http://www.adeept.com/learn/details/id/31]. I suggest screwing in the servo wings to the acrylic pieces first before outfitting the servo motor. This helps decrease the frustration of screwing things in. Another caveat is the base with the ball bearings was not flush when mounting. So I had to loosen the screw of the servo wing to hit the right distance without hindering movement of the base.
Setting up the ArduinoOpen up your Arduino IDE and copy/paste the prototype.ino sketch. Upload the code to your Arduino and that's it!
Note: I only tried the code on an Arduino Uno. Other boards will be YMMV.
Setting up the Raspberry PiThere are dozens of tutorials on setting up the Raspberry Pi, from OS mounting, updating and Python installation. These change as new versions pop up. So I suggest checking out the latest guides on the interwebz for these.
To start off, we'll be installing xboxdrv for the controller command recognition.
sudo apt-get install xboxdrv
After that, let's do a sanity check by running:
sudo xboxdrv --detach-kernel-driver
This will display outputs like this:
X1:  -284 Y1:  1708  X2:   664 Y2:  -515  du:0 dd:0 dl:0 dr:0  back:0 guide:0 start:0  TL:0 TR:0  A:0 B:0 X:0 Y:0  LB:0 RB:0  LT:  0 RT:  0
X1:   170 Y1:  1708  X2:   664 Y2:  -515  du:0 dd:0 dl:0 dr:0  back:0 guide:0 start:0  TL:0 TR:0  A:0 B:0 X:0 Y:0  LB:0 RB:0  LT:  0 RT:  0
X1:   511 Y1:  1708  X2:   664 Y2:  -515  du:0 dd:0 dl:0 dr:0  back:0 guide:0 start:0  TL:0 TR:0  A:0 B:0 X:0 Y:0  LB:0 RB:0  LT:  0 RT:  0
X1:  1193 Y1:  1377  X2:   664 Y2:  -515  du:0 dd:0 dl:0 dr:0  back:0 guide:0 start:0  TL:0 TR:0  A:0 B:0 X:0 Y:0  LB:0 RB:0  LT:  0 RT:  0
These are your controller commands. The numbers beside the letters should change as you press the different buttons or move around the joysticks. If it works, great! If not, double check xboxdrv installed properly. Also check the user permissions. Now get the python module from the repository using:
wget https://raw.githubusercontent.com/FRC4564/Xbox/master/xbox.py
Next is to setup arduino-python3. The API requires several dependencies:
- Python 3.7
- pyserial 2.6 or higher
So let's install pyserial using this:
pip install pyserial
Now we can install arduino-python3, using the command:
pip install arduino-python3
Before we do anything else, time to do another sanity check. Create and run the blink.py. This can be found in mkals GitHub repository (https://github.com/mkals/Arduino-Python3-Command-API) which I also included on the "codes" section.
python blink.py
If it gives some permission issues, try running as sudo:
sudo python blink.py
This should trigger LED13 of your arduino to blink in 1 second intervals. If it doesn't work, try checking the following:
- prototype.ino sketch is uploaded properly
- BAUDRATE of your arduino
- COMPORT is detected
Time to play with our robot arm! First, connect your Xbox 360 controller (wireless or wired). Then create and run the arduino-control.py. The robot arm should shoot straight up when turned on. Now fiddle around with the controller and watch your robot arm dance to your command!
The nitty-grittyThe claw (servo5) is controlled using the right trigger while the other servos are mapped to the analog sticks. The left analog stick controls the base (servo1) and the first joint (servo2). The right analog stick, on the other hand, controls servo 3 and 4 which is the second joint and wrist, respectively.
# Move servo with respect to the left analog stick X values limited to the min-max angle set
def leftXmove(servonum,minAngle,maxAngle):
   angle = angle1
   if int(joy.leftX()) > 0:
       angle = angle - 2
       if angle <= minAngle:
           angle = minAngle
       return angle
   elif int(joy.leftX()) < 0:
       angle = angle + 2
       if angle >= maxAngle:
           angle = maxAngle
       return angle
   else:
       return angle

# Move servo with respect to the left analog stick X values limited to the min-max angle set
def leftYmove(servonum,minAngle,maxAngle):
   angle = angle2
   if int(joy.leftY()) > 0:
       angle = angle - 2
       if angle <= minAngle:
           angle = minAngle
       return angle
   elif int(joy.leftY()) < 0:
       angle = angle + 2
       if angle >- maxAngle:
           angle = maxAngle
       return angle
   else:
       return angle

# Move servo with respect to the right analog stick Y values limited to the min-max angle set
def rightYmove(servonum,minAngle,maxAngle):
   angle = angle3
   if int(joy.rightY()) > 0:
       angle = angle - 2
       if angle <= minAngle:
           angle = minAngle
       return angle
   elif int(joy.rightY()) < 0:
       angle = angle + 2
       if angle >= maxAngle:
           angle = maxAngle
       return angle
   else:
       return angle

# Move servo with respect to the right analog stick X values limited to the min-max angle set
def rightXmove(servonum,minAngle,maxAngle):
   angle = angle4
   if int(joy.rightX()) > 0:
       angle = angle - 2
       if angle <= minAngle:
           angle = minAngle
       return angle
   elif int(joy.rightX()) < 0:
       angle = angle + 2
       if angle >= maxAngle:
           angle = maxAngle
       return angle
   else:
       return angle

# Move servo when right trigger is used
def rightTrigmove(servonum,minAngle,maxAngle):
   angle5 = minAngle
   if int(joy.rightTrigger()) > 0:
       angle5 = maxAngle
       board.Servos.write(servonum,angle5)
   else:
       board.Servos.write(servonum,minAngle)
The other buttons on the controller can be mapped to another servo, LED, rubberband launcher, lasers, sensors, etc. But of course you need to code it in. For example, if you want an LED on pin 13 to light up when A is pressed:
board.pinMode(13, "OUTPUT")

if joy.A() == 1:
    board.digitalWrite(13, "HIGH")
else:
    board.digitalWrite(13, "LOW")
Play around, customize, and have fun with it!
Some useful references:https://github.com/mkals/Arduino-Python3-Command-API


_ztBMuBhMHo.jpg?auto=compress%2Cformat&w=48&h=48&fit=fill&bg=ffffff)


Comments
Please log in or sign up to comment.