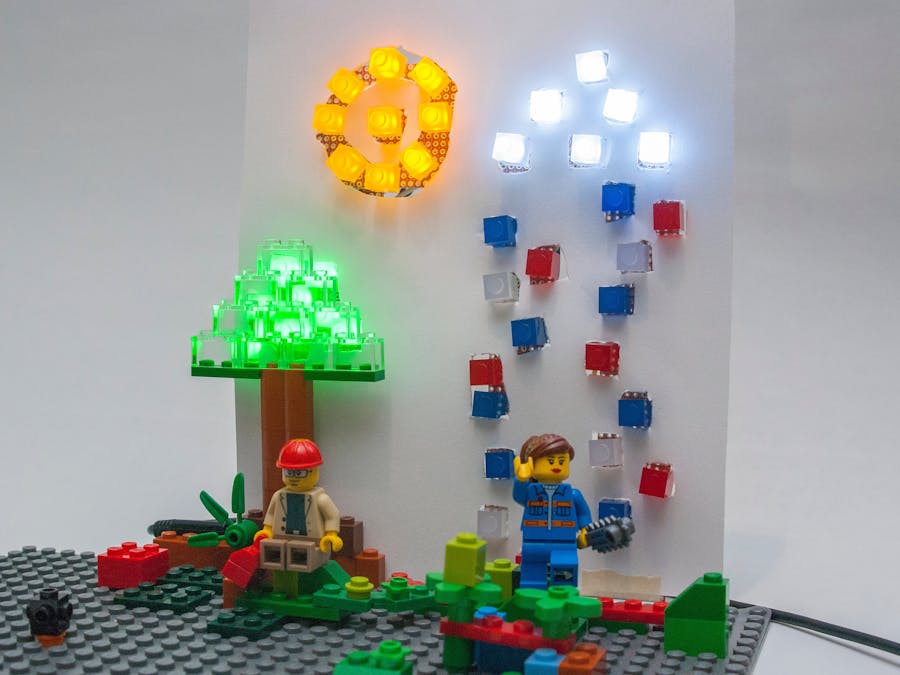
The idea with this project was to use a Photon to pull weather data from the cloud, then make it blink some of our Lunchbox Electronics Novelty PTH LED Bricks depending on what data it received. Check out the Lego scene I made for extra pretty decoration.
This tutorial assumes that you have already set up your Photon, a working knowledge of Arduino, and a basic understanding of webhooks.
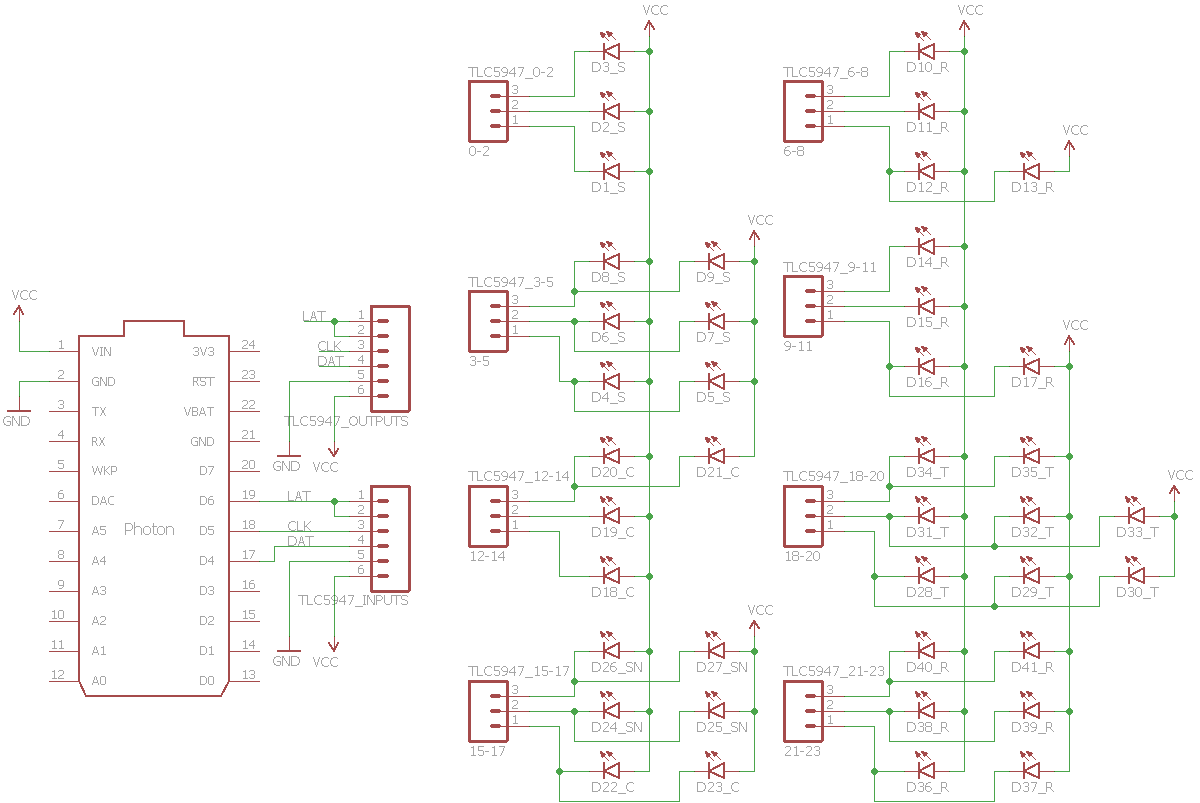
This project only uses two chips, but it uses A TON of LEDs. Organization is key so that you don't have to dig through a nest of wires as seen in the photo above. Take a look down below for a more organized view.
The first chip we'll be hooking up is the display driver, the TLC5947 that you can see below:
This driver chip communicates with the Photon using the SPI protocol, however, thanks to the lovely Adafruit library that's supplied with the break out board, any 3 pins on the Photon can be used to talk to it. I just ended up using D4, D5, and D6, but you can try out some others by changing the #defines in the code quickly and easily. Find the code below in the .ino file and then change the pins to whatever other pin you'd like to use!
#define _DAT       D4   // The pin plugged into the DIN line
#define _CLK       D5   // The pin plugged into the CLK line
#define _LAT       D6   // The pin plugged into the LAT line
One issue with using the Photon that I ran into was a constant flicker to the LEDs, which was very distracting. This isn't a problem many people have had with the TLC5947, but the way I fixed it was by connecting the LAT and /OE lines together on the input side of the breakout board. If you see some flicker, consider connecting these two lines together and see if it fixes it for you.
Once you have the data lines connected, power and ground are next. Since there are a lot of LEDs, we can't use the 3V3 line. 24 LEDs at 15mA each (the default current on the driver chip) will pull a whopping 360mA! If you use the 3V3 line the poor little Photon will have a terrible time. But if we look at the table from the datasheet below, the VIN line can supply way more than we need! Perfect! We'll connect the VIN line to the V+ for all our power.
This project uses Novelty PTH LED Bricks, which are Lego compatible. They come in five colors and are great LEDs for the project!
The display driver chip is an open-drain chip, which means all the LEDs are connected to it with their negative (shorter) leg. The positive (longer) leg will get attached to the high voltage line, which is VIN or V+ in this case.
To ensure the code will actually do what you want, you'll need to plug in the LEDs into the right channels. Below is the code that defines which channels get to be a part of which weather pattern.
// These are the pins used for the LEDs on the TLC5947
null
int _sun[6] = {0,1,2,3,4,5};
int _rain[6] = {6,7,8,9,10,11};
int _clouds[4] = {12,13,14,15};
int _snow[2] = {16,17};
int _trees[3] = {18,19,20};
int _reds[3] = {21,22,23};
You can use the channels that I did or adjust the arrays so that they correspond to channels of your own. If you want to use your own just write down exactly which LEDs are in each channel so you can adjust the code later. Each number relates directly to a channel on the TLC5947.
Each channel on the chip can take as many LEDs as you feel like using. However, since the supply voltage on the Photon is not much higher than the voltage drop on the LEDs, I suggest connecting the LEDs in parallel. If you put LEDs in parallel, with the positive legs connected and the negative legs connected, the current through them gets cut down. This makes each of them a little dimmer with each LED you add to the channel.
If you look at the schematic, I used up to 3 LEDs per channel. This did cause a very slight drop in brightness but it wasn't the end of the world.
The Code!This part is actually two parts. The Photon needs a .ino file that will let it request and interpret weather data it gets from the web, and hook.io needs a little snippet of code to run so that it can serve that data. Let's start with the Photon.
Photon CodeThe .ino file for the project can be found on our GitHub. Either download the .ino file or copy and paste the contents into a new Particle Build project. There are two pieces of code we need to look at to ensure that everything will work together nicely.
The first important part of the .ino file is the arrays that store the data of which LED is on which channel. Those arrays are defined on lines 25-30, and look like this:
int _sun[6] = {0,1,2,3,4,5};
int _rain[6] = {6,7,8,9,10,11};
int _clouds[4] = {12,13,14,15};
int _snow[2] = {16,17};
int _trees[3] = {18,19,20};
int _reds[3] = {21,22,23};
If you used these same channels, you can skip to the part about Particle.subscribe. If you changed which channels were used for which elements, you'll need to adjust the numbers in the curly brackets and the size of the array.
If you got rid of one of these groups entirely, don't delete the array! Just make it size [0] and ={};. That way the code won't throw any errors at you.
The second part of the code that you need to keep in mind is the Particle.subscribe() section. The code is on line 240 and looks like this:
Particle.subscribe("hook-response/getWeather", parseWeather, MY_DEVICES);
This code is EXTREMELY important as it is what links the Photon with the correct part of the Particle cloud. We'll come back to this later.
Once you have flashed your code onto your Photon, the first thing that should happen is your _trees group will flash twice and then remain on, and then your _clouds should come on with flashing _reds. If this doesn't happen, or other lights come on instead of the groups described above, check which LEDs are connected to which channels, and adjust your arrays accordingly.
This next piece of code we will use is the part that grabs the relevant weather data and sends it back to the Photon when requested. To make this happen, we will use a brilliant webhook service called hook.io to interpret Photon commands, make API calls, and parse out only the important information. We will use Forecast.io to get weather data.
Setting up Forecast.ioForecast.io is a great weather service for information across the world. To access that data for this project, you will first have to head to developer.forecast.io and set up an account. Once you have created your account, the bottom of the first page shows your API key. This is used to track how many calls are made by your devices, and over 1000 calls per day will require payment. For right now though, just copy that key and let's move to hook.io...
To pull all the information together, we will use hook.io. This website helps you host code in the cloud that will execute every time a certain http address is called. First you will need to create an account. Before we start implementing any code, we need to set up some environment variables. Head to hook.io/env and you will be presented with the option to create environment variables using keys that have certain values. This exists to keep things like your location and your API keys safe and away from prying eyes. To make sure the code works, create one key named exactly FORECASTIO_API_KEY and copy and paste your forecast.io API key into the value field. Next you need to create another key named exactly MY_LOCATION, with the value being a latitude and longitude at your location in a format like this:
40.0150,-105.2705
Notice that there are no spaces and it uses a negative sign instead of W or S. This field will be used to tell forecast.io where to grab the weather from.
Now we can create our webhook!
Go to the top of the page and click the "Create New Service" button. As seen below, you will need to give your service a name. It can be anything, and your "Home" URL will be used later to access the webhook from the Photon.
Next, it will ask you to select the Service Security type for this webhook. If, like me, you signed up for a free account, it won't let you choose right now. That's OK! It just defaults to public and you won't get charged anything.
Finally, we can actually add some code to our webhook. The javascript file on the Github is used in this section. Choose "Code editor" and copy and paste the code into the text field.
To make sure that the webhook actually runs, we can use the "Test Code" button. When you press the button it makes a call to the forecast API and should return the weather in your area, which will look something like this:
If you get something else, ensure that your environment variables are correct and check the webhook logs to see if you can find where the issue might be coming from. But if it works, lets connect the webhooks to the photon!
Particle Dashboard IntegrationsThe last part of the projects involves linking the hook.io webhook to something your Photon can talk through. Particle makes integrating webhooks like this extremely easy through their dashboard. First, head to dashboard.particle.io and click on the Integrations tab as seen below.
Then, click "New Integration" and then "Webhook". It will pull up a form to fill out. For this integration, the name MUST be "getWeather" since that is what our Photon will be publishing and subscribing to. The Full URL must be the "Home" URL from your hook.io page. This will send a POST request to your webhook and cause it to run everytime getWeather gets called. With all that information filled in it should look something like the picture below!
Currently, the Photon will make a getWeather call once an hour, starting with when it is power cycled. The reason for this long time between calls is due to free accounts with hook.io being limited to 1000 calls a month. This may seem like a lot, but when the code is running for 24 hours a day, it adds up quickly.
To see the weather near you, simply reset or power cycle your Photon and after a few seconds it should display the weather!
You're all done!


_3u05Tpwasz.png?auto=compress%2Cformat&w=40&h=40&fit=fillmax&bg=fff&dpr=2)


Comments
Please log in or sign up to comment.