


Hardware components | ||||||
 |
| × | 1 | |||
| × | 1 | ||||
| × | 1 | ||||
 |
| × | 1 | |||
Software apps and online services | ||||||
 |
| |||||
Before getting started make sure do you have
1 Agrumino Kit
1 Micro usb cable for upload sketch with Arduino Ide
1 MLX 90614 sensor
Setup Page https://bit.ly/3qgYQ43
1 Cable 4 pin Male Jumper to Grove 4 pin
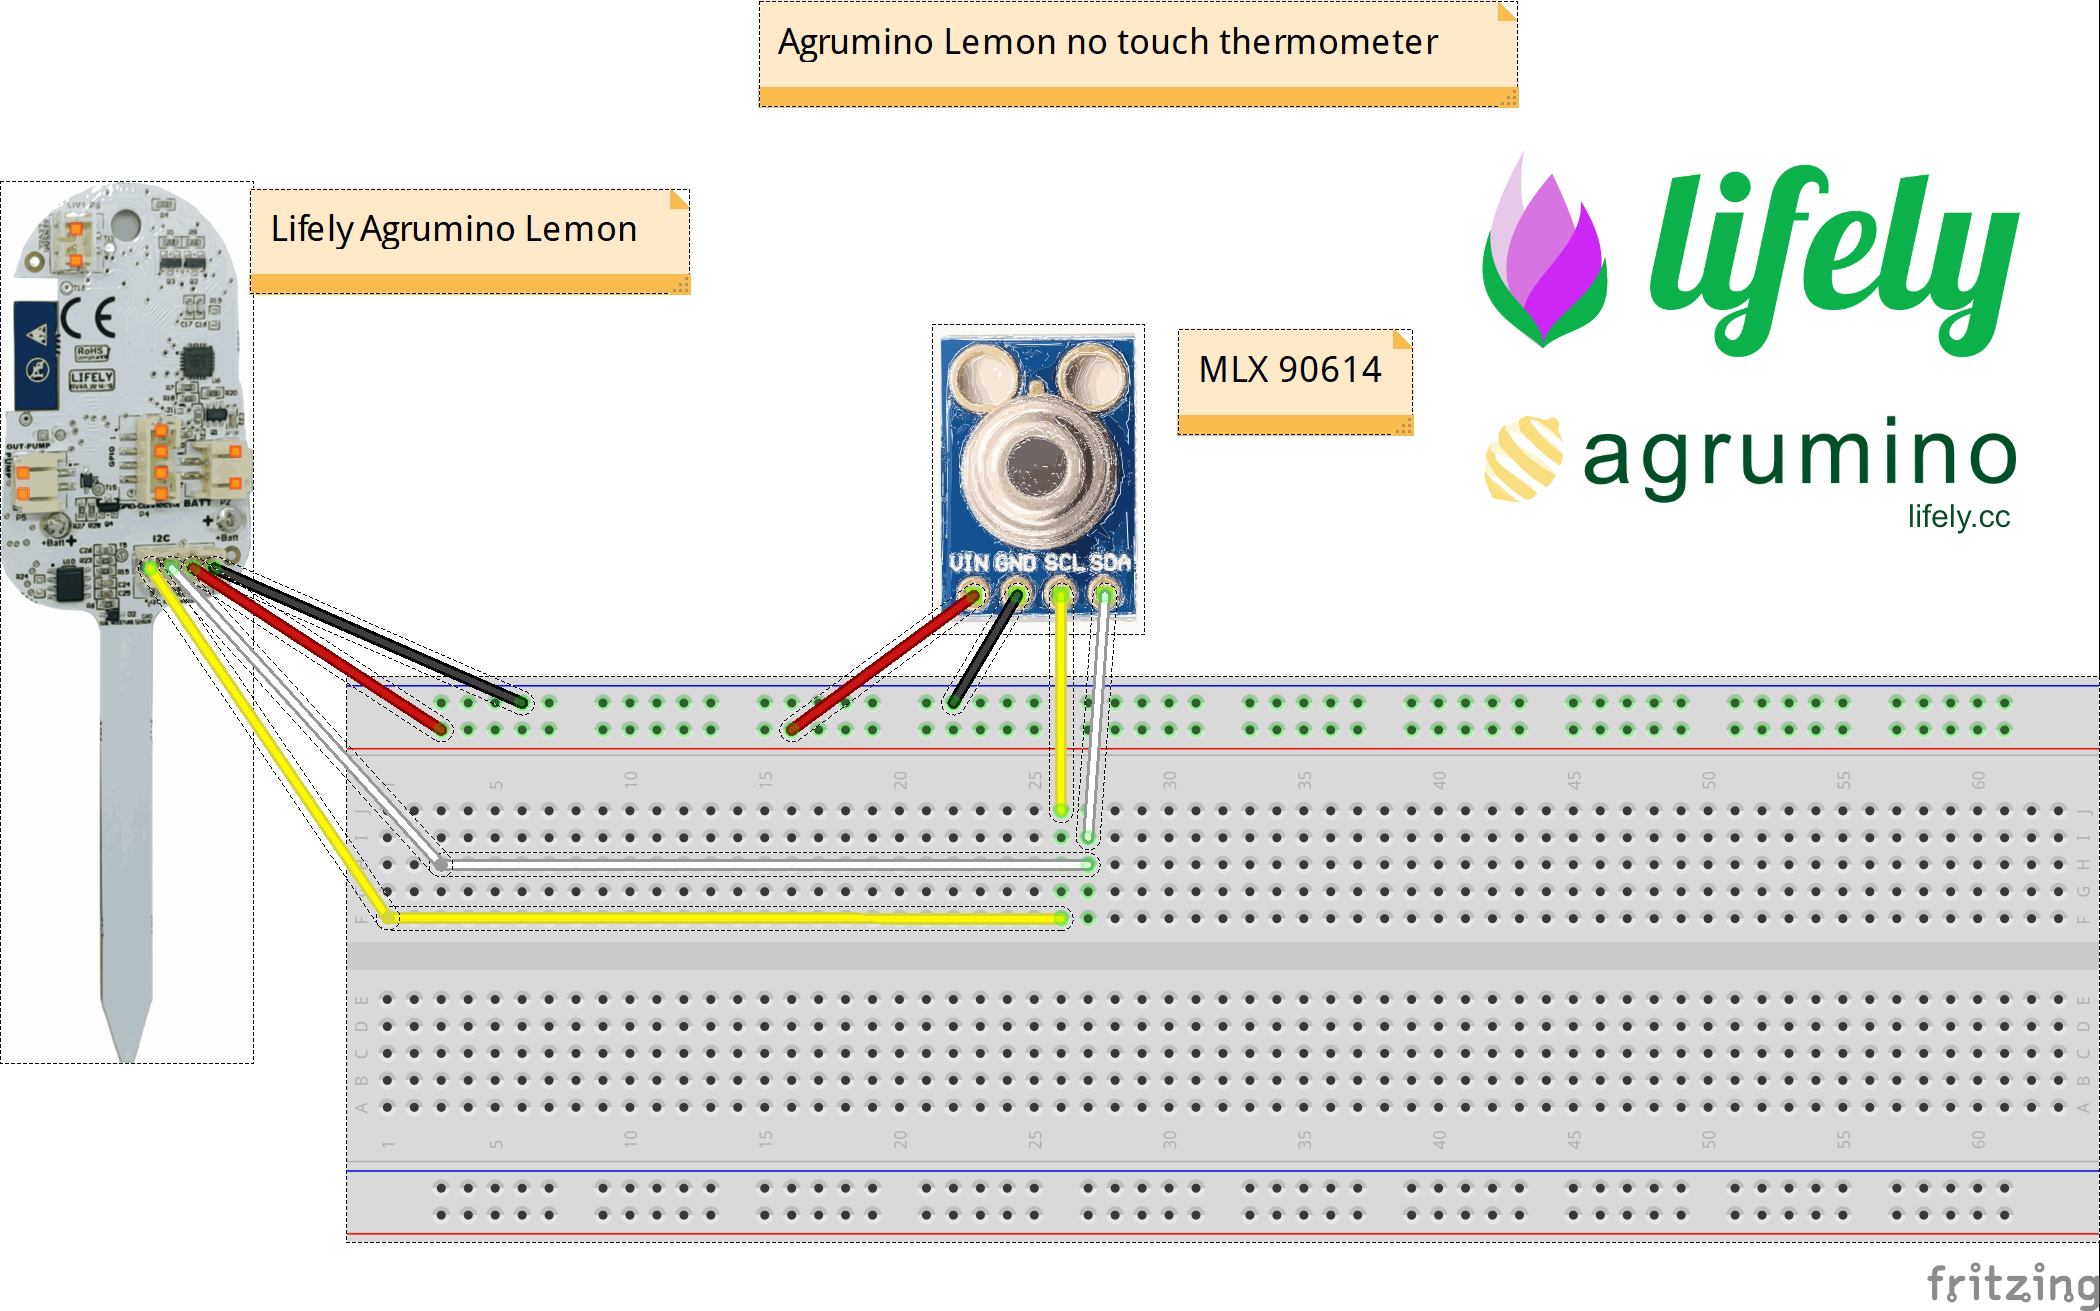
Step 1: Description and ConnectionIn the first you need to connect Agrumino Lemon like a Fritzing example
1 / 2 • Agrumino Lemon with cable
Now import sketch from link and upload them with Arduino IDE on your Agrumino Lemon
/*Agrumino_no_touch_infrared_thermometer.ino - Sample project for Agrumino.
Created by gabriele.foddis@lifely.cc - Stay tuned on lifely.cc -
This sketch read and send the temperature in the serial monitor.
Have fun !!!*/

#include <Agrumino.h>
#include <Wire.h>
#include <Adafruit_MLX90614.h> ///Download this libraries from Arduino IDE
#define DELAY 2000 /////ms Time
#define SERIAL_BAUD 115200
Adafruit_MLX90614 mlx = Adafruit_MLX90614();
Agrumino agrumino;
void setup() {
Serial.begin(SERIAL_BAUD);
agrumino.setup();
agrumino.turnBoardOn();
mlx.begin();
Serial.println("Agrumino Thermometer");
}
void readDataFromAgrumino() {
boolean isAttachedToUSB =   agrumino.isAttachedToUSB();
boolean isBatteryCharging = agrumino.isBatteryCharging();
boolean isButtonPressed =   agrumino.isButtonPressed();
float temperature =         agrumino.readTempC();
unsigned int soilMoisture = agrumino.readSoil();
float illuminance =         agrumino.readLux();
float batteryVoltage =      agrumino.readBatteryVoltage();
unsigned int batteryLevel = agrumino.readBatteryLevel();
Serial.println("Data from Agrumino Sensors");
Serial.println("isAttachedToUSB:   " + String(isAttachedToUSB));
Serial.println("isBatteryCharging: " + String(isBatteryCharging));
Serial.println("isButtonPressed:   " + String(isButtonPressed));
Serial.println("temperature:       " + String(temperature) + "°C");
Serial.println("soilMoisture:      " + String(soilMoisture) + "%");
Serial.println("illuminance :      " + String(illuminance) + " lux");
Serial.println("batteryVoltage :   " + String(batteryVoltage) + " V");
Serial.println("batteryLevel :     " + String(batteryLevel) + "%");
Serial.println("End");
Serial.println("#########################\n");
}
void readDataFromMlxSensor() {
float temperatureAmbC = mlx.readObjectTempC();
float temperatureObjC = mlx.readAmbientTempC();
float temperatureAmbF = mlx.readObjectTempF();
float temperatureObjF = mlx.readAmbientTempF();
Serial.println("Data from Mlx Sensor");
Serial.println("Temperature Ambient = " + String (temperatureAmbC) + " °C"); ///Uncomment for Celsius
Serial.println("Temperature Object = " + String (temperatureObjC) + " °C"); ///Uncomment for Celsius
Serial.println("");
//Serial.println("Temperature Ambient = " + String (temperatureAmbF) + " F"); ///Uncomment for Fahrenheit
//Serial.println("Temperature Object = " + String (temperatureObjF) + " F"); ///Uncomment for Fahrenheit
//Serial.println("");
}
void loop() {
readDataFromAgrumino();
readDataFromMlxSensor();
delay(DELAY);
}Arduino Serial monitor data
With this simple example you can build a very accurate infrared thermometer.
This should be seen as the start of your larger project.
I hope it will be interesting for you !!
Thank you....
See you soon


3 projects • 1 follower
Lifely has developed Agrumino, an open source device programmable with Arduino, thanks to the ESP8266 project, and based on the Wifi Chip.


Comments