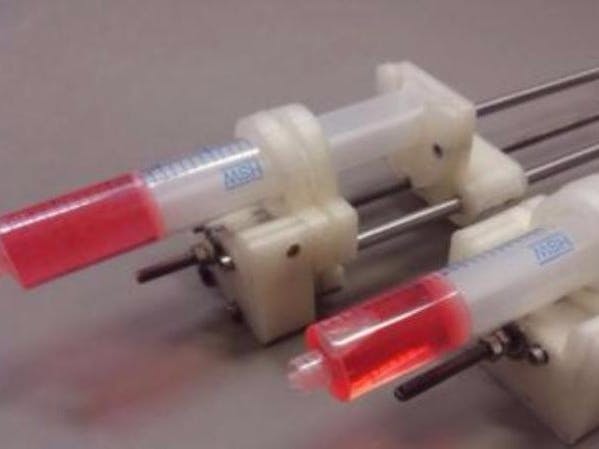
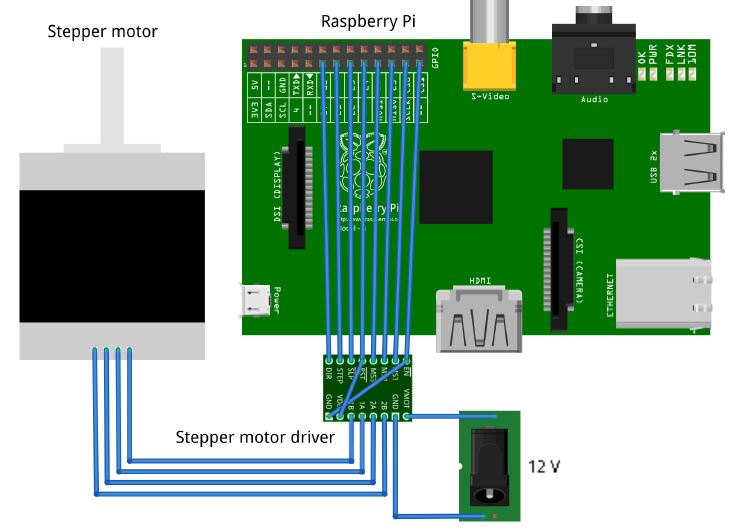
This article explores a new open-source method for developing and manufacturing high-quality scientific equipment suitable for use in virtually any laboratory. A syringe pump was designed using freely available open-source computer aided design (CAD) software and manufactured using an open-source RepRap 3-D printer and readily available parts. The design, bill of materials and assembly instructions are globally available to anyone wishing to use them. Details are provided covering the use of the CAD software and the RepRap 3-D printer. The use of an open-source Raspberry Pi computer as a wireless control device is also illustrated. Performance of the syringe pump was assessed and the methods used for assessment are detailed. The cost of the entire system, including the controller and web-based control interface, is on the order of 5% or less than one would expect to pay for a commercial syringe pump having similar performance. The design should suit the needs of a given research activity requiring a syringe pump including carefully controlled dosing of reagents, pharmaceuticals, and delivery of viscous 3-D printer media among other applications.
- For more information, click here.
1. Secure motor into the motor end using 4 M3 washers and 4 M3 x 20mm socket head cap screws.
2. Insert the 2 metal rods into motor end, then secure them in place with 2 M3 nuts and 2 M3 x 10mm socket head cap screws.
3. Insert threaded rod into the coupler halfway, the other half should be on the motor, secure it.
4. Hollow out the two ends of the carriage, with a handheld drill bit or knife to make a hole in the plastic.
5. Snap the linear bearings into place on the hollowed out ends of the carriage. Then insert an M5 nut into the nut-trap on the bottom of the carriage.
6. Attach the base of the Plunger holder to the carriage with 2 M3 nuts and 2 M3 x 10mm socket head cap screws.
7. Slide the carriage onto the threaded rod and make sure the two metal rods fit into the linear bearings.
8. After the carriage is midway down the threaded rod, thread two M5 nuts onto the threaded rod.
9. Insert the two bearings into the circular slots in the idler end.
10. Now slide the idler end onto the rods and secure it with two more M5 nuts on the end of the threaded rod. Push the two nuts already on the rod up to the idler end to secure it.
11. Insert the syringe body into the body holders, then slide the plunger into the base of the plunger holder.
12. Using four M3 x 40mm bolts, four M3 washers, and four M3 nuts secure the two holding pieces to the idler end of the pump. Put two nuts it the top of the holder closer to the carriage and two nuts in the bottom of the holder against the idler end.
13. Insert the tab of the plunger holder on top of the plunger to secure it to the pump and prevent slipping when in use.


Comments
Please log in or sign up to comment.