EnLight is a series of “add-on” devices to help improve and enable regular objects, like blinds, to have efficient energy collecting abilities! This particular EnLight device augments blinds to efficiently collect the setting sun’s sunlight, and close the blinds when it gets dark outside.
This Hackster project will explain with words and pictures/diagrams how to set up your blinds with an EnLight Sunset to collect the sun’s power! EnLight Sunset is a simple stand-alone system that doesn’t require any internet or manual operation (except for the setup)! Feel free to alter the code and CAD enclosures of this device to customize it to your own needs.
This tutorial doesn’t explain how to set up and wire a solar panel, even though it’s technically a part of this system’s product. Rather, this tutorial will explain how to set up a system that will measure a window’s sunlight exposure, and adjust the blinds (which would have solar-panels mounted onto) to have the maximum exposure to the setting sun’s angle. Think of it like the stem of a sunflower, the part that turns to face the sun. This decision was made because everyone’s blinds take a different form/shape, so one solar panel wouldn’t work.
Design considerationsSpeaking of different blinds, there were a couple design factors that had to be assumed (because there wouldn't be a product if there were so many conditionals). They are listed below:
- Your blinds close in an upwards motion
- Your blinds have/use a pulley system to operate
- There is a lip/thickness between the glass and the glass-frame
Remember, you are totally at the freedom to change any part of this product so it fits what you want.
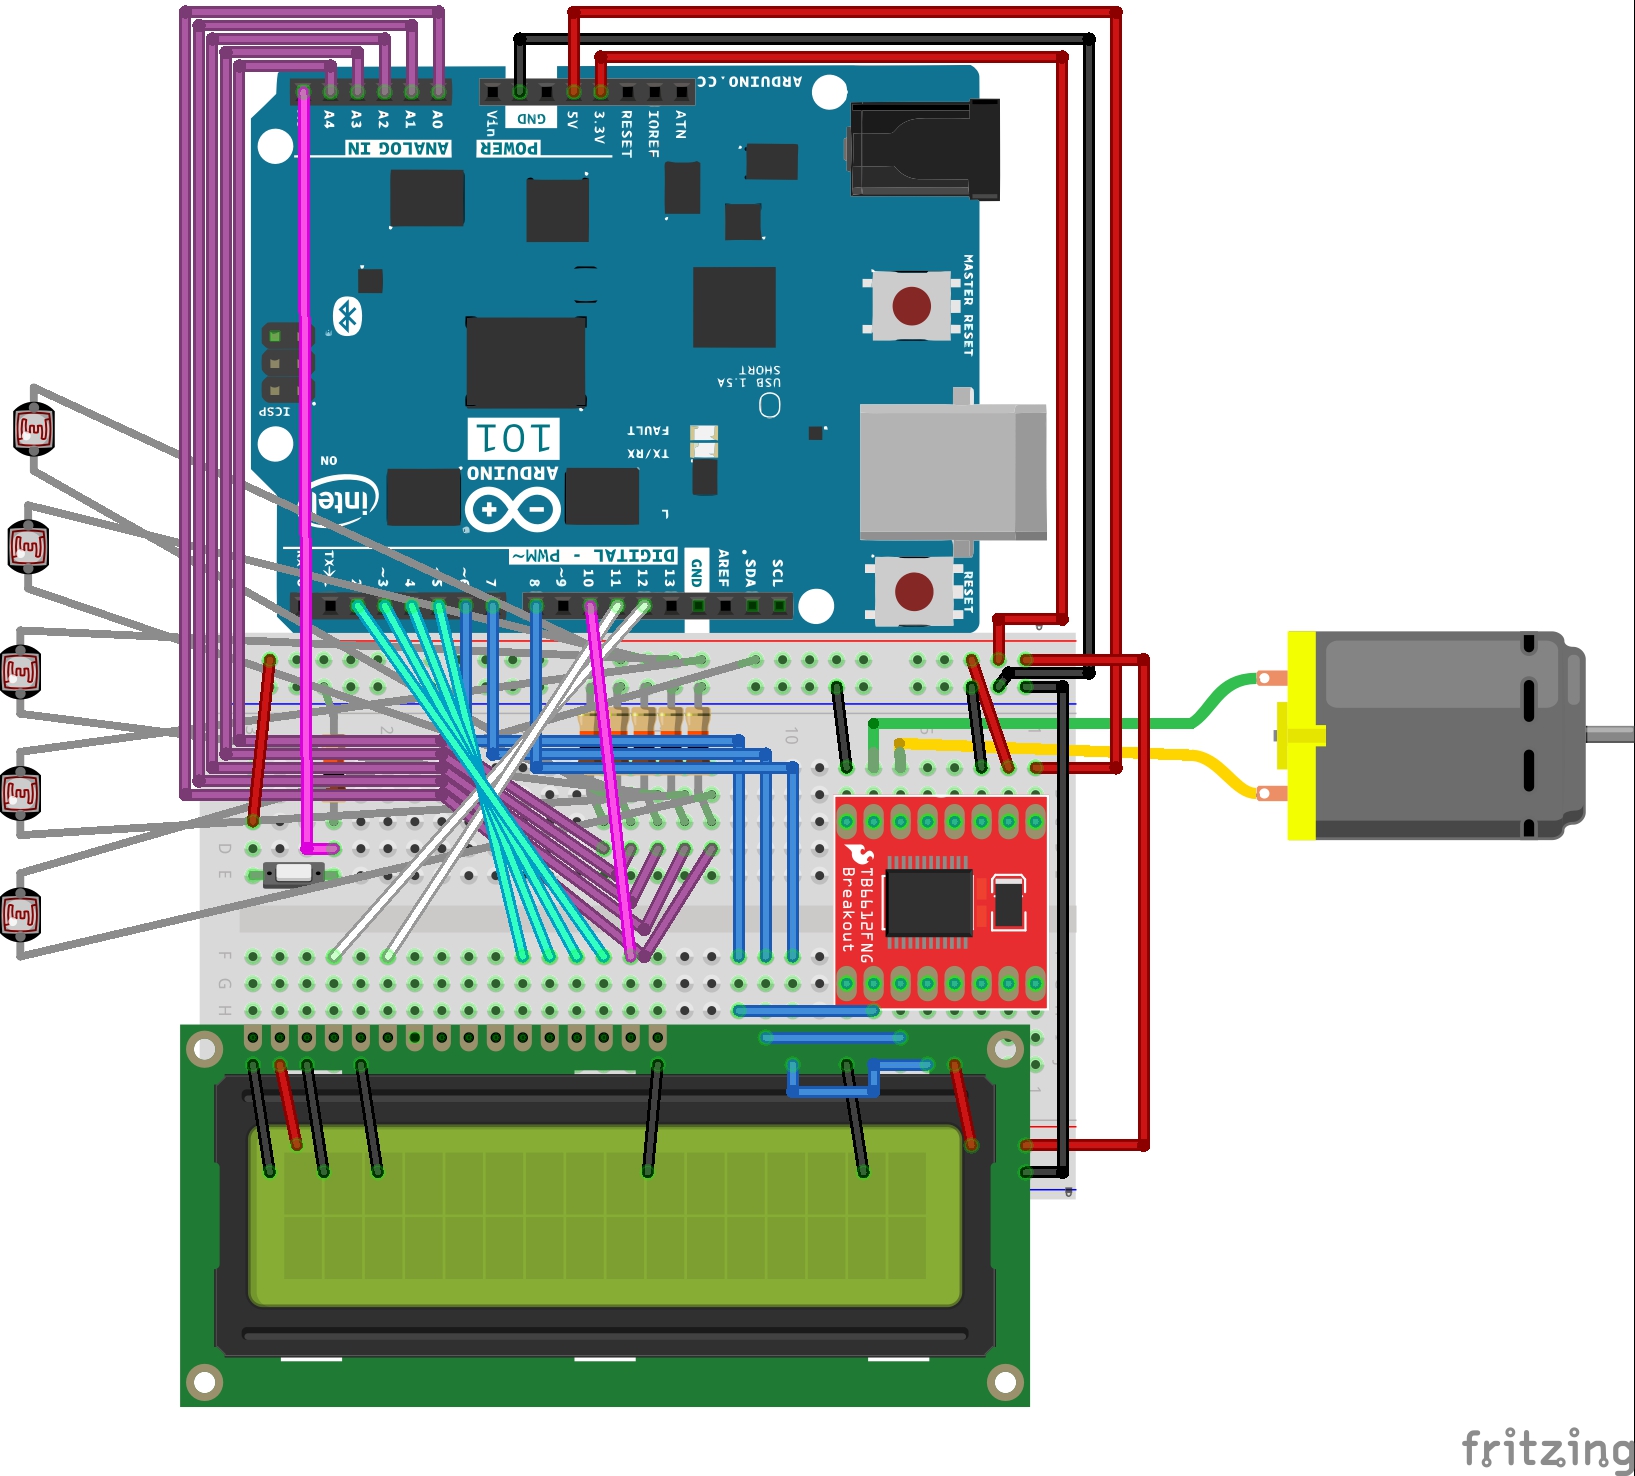
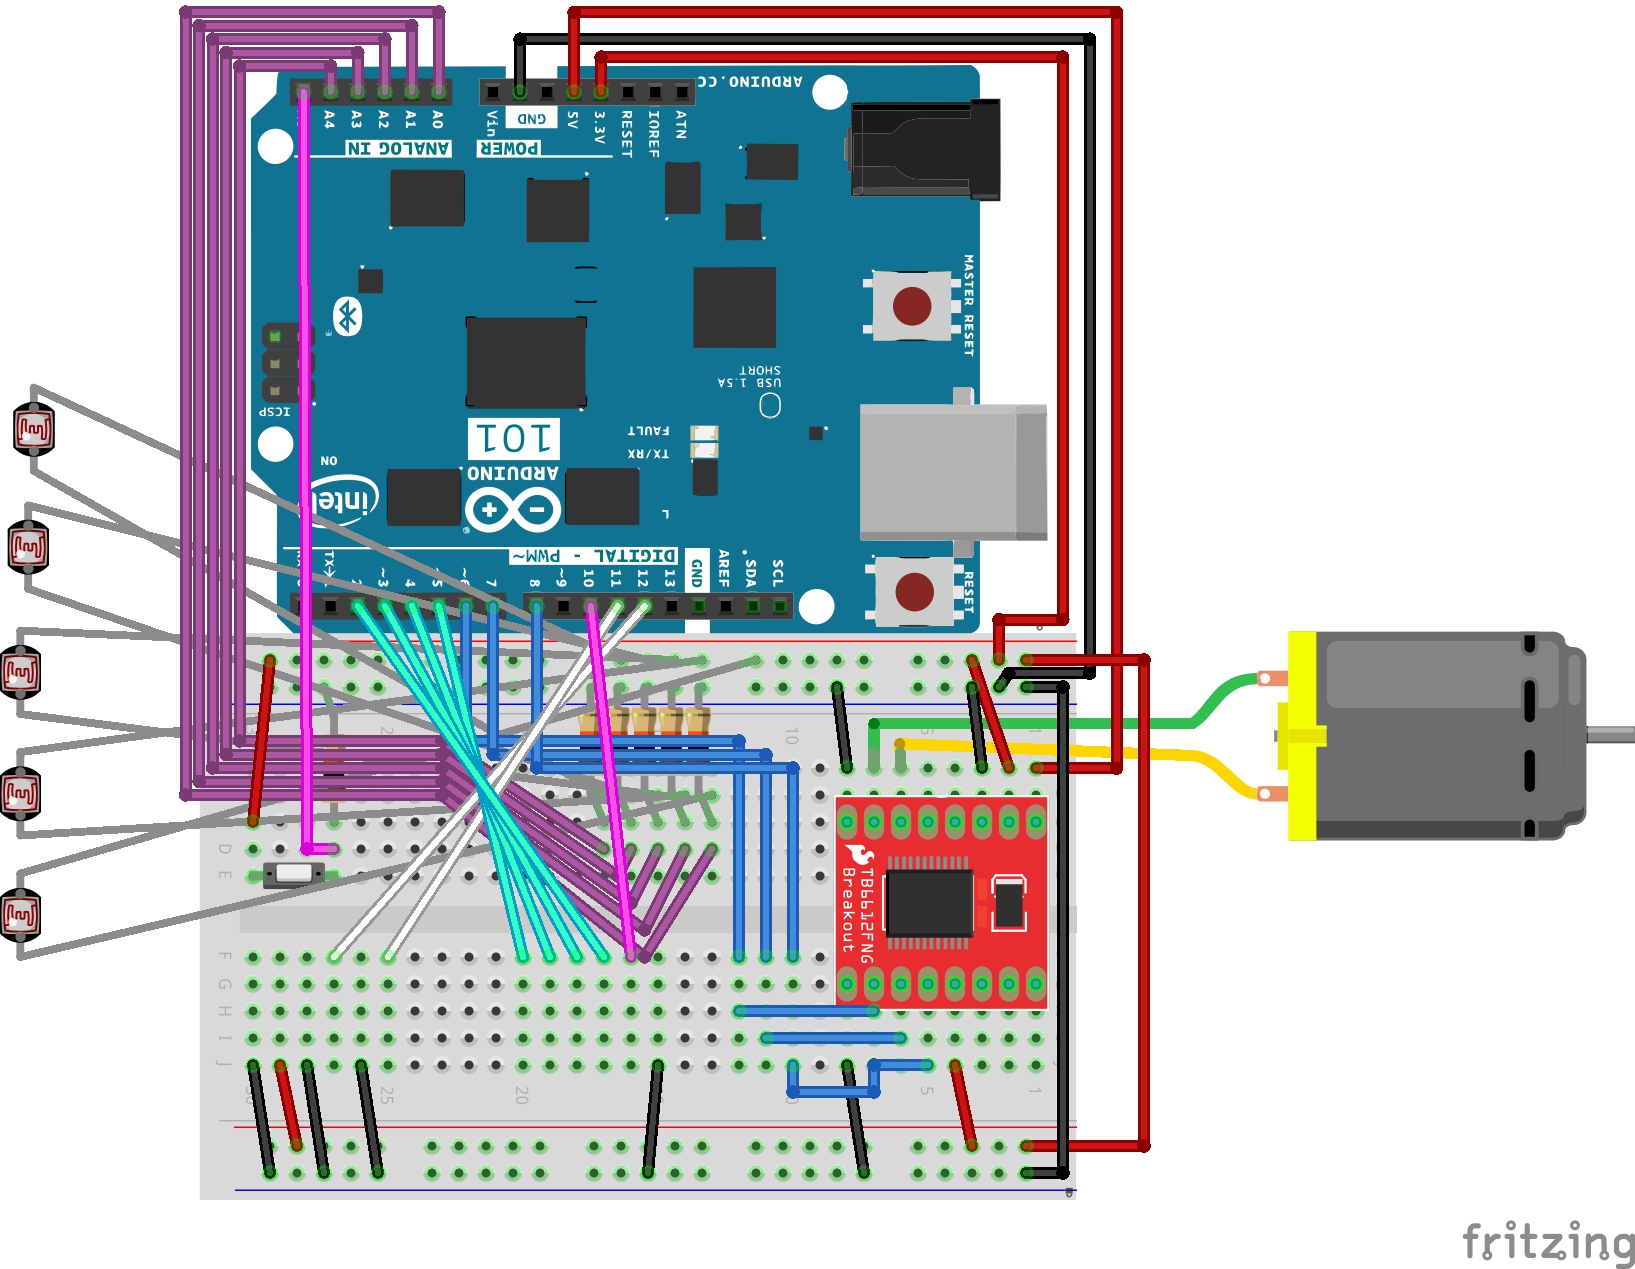
Hardware/physical setupThe technical hardware stuff (like wiring) are pretty straight forward. Just use the Fritzing breadboard picture/diagram in the “Schematics” section. There’s really not much else to it. The comments to point out two important things:
- All resistors used in this design are 10KΩ
- The wiring of the photoresistors. It is pretty difficult to see because of the coloring, but just follow a standard photoresistor wiring and you’ll get it.
Now comes that part where you have to do some adhering. 3D print the pulley wheel controller joint/wheel (found in the “Custom parts and enclosures” section) and the photoresistor placeholders (also found the “Custom parts and enclosures” section). If your printer’s resolution is high enough, you might be able to see the tiny labels on the placeholders which indicate where to put them on the following diagram. If not, don’t worry! You just have to compare the draft (tilt) of the small square plane to figure out which is which. The draft was put in place to tilt the photoresistor to the sun’s angle when it descends.
There are three drafts: 0º, 5º, and 10º. They are pretty easy to tell apart, so don’t worry.
If the photoresistor doesn’t fit perfectly in the placeholder, you may need to use some form of an adhesive to adjust the fit. You definitely will need to use an adhesive to attach the placeholders to the window border.
The same can also be said for the pulley wheel joint connection with the motor. The motor that comes with the Inventors Kit has a while axle that is controlled by the strapped in dc motor. The joint/axle of the pulley wheel fits over the DC motor’s axle.
Overall setupHere’s a diagram of the “planned” setup for this system.
I didn’t make an enclosure for this system because the Inventors Kit comes with a base and some users may want to use that instead, but feel free to make one yourself if you desire.
SoftwareDownload all three files in the “Code” section, its very important that you do. Once they are downloaded, put them together in a folder named “enlight” IT IS IMPORTANT THAT YOU NAME IT THAT. Enter the “enlight” folder, and edit the file extension of “constants.txt” and “voids.txt” from “.txt” to “.h” so now they should be “constants.h” and “voids.h”. This is very important because the main Arduino file, “enlight.ino”, relies on these headers for its constants and functions. Once you have accomplished this, simply open enlight.ino in the Arduino IDE and upload it to your Arduino 101. Remember to select the right board! If you don’t have the Arduino 101 (Intel Curie 32 bit) board installed, simply install it through the board manager (board series name: “Intel Curie Boards”).
OperationThe system starts up with a setup process through the serial monitor (the LCD will let you know). The board will still probably be connected to the computer because of the previous section. Open the serial monitor and follow the instructions shown. It is important that you don’t open the serial port again after you have finished the set up process. Reopening the port will cause the program to restart, making you go through the setup process again.
Final notesThat’s it! Pretty simple. Once the system finishes its setup process, your blinds will start angling itself for maximum sunlight absorption for your solar panels.
One of the alternate function of EnLight Sunset that was mentioned in the initial idea pitch was for comfort. By angling itself at the sun, you can reduce the amount/change of direct sunlight hitting your eyes or the room. This can also help conserve energy by helping keep the indoor temperature from rising due to sunlight exposure.
Please leave feedback and comments in the comments section!
Thank you!


_baVEVgguW1.jpg?auto=compress%2Cformat&w=48&h=48&fit=fill&bg=ffffff)


_t9PF3orMPd.png?auto=compress%2Cformat&w=40&h=40&fit=fillmax&bg=fff&dpr=2)


_3u05Tpwasz.png?auto=compress%2Cformat&w=40&h=40&fit=fillmax&bg=fff&dpr=2)


Comments
Please log in or sign up to comment.