


Hardware components | ||||||
 |
| × | 1 | |||
 |
| × | 1 | |||
 |
| × | 1 | |||
 |
| × | 1 | |||
 |
| × | 1 | |||
 |
| × | 4 | |||
| × | 1 | ||||
Hand tools and fabrication machines | ||||||
 |
| |||||
Controlling a surveillance robot is enjoyable for many people. On the other hand, we have the PlayStation 4 console controller, which has made good memories for us so far. The combination of a PlayStation controller and a control robot can be very attractive. In this tutorial we will learn how to build a Raspberry Pi based robot and control this robot with the PS4 controller. You can watch the full tutorial video before you start building the robot.
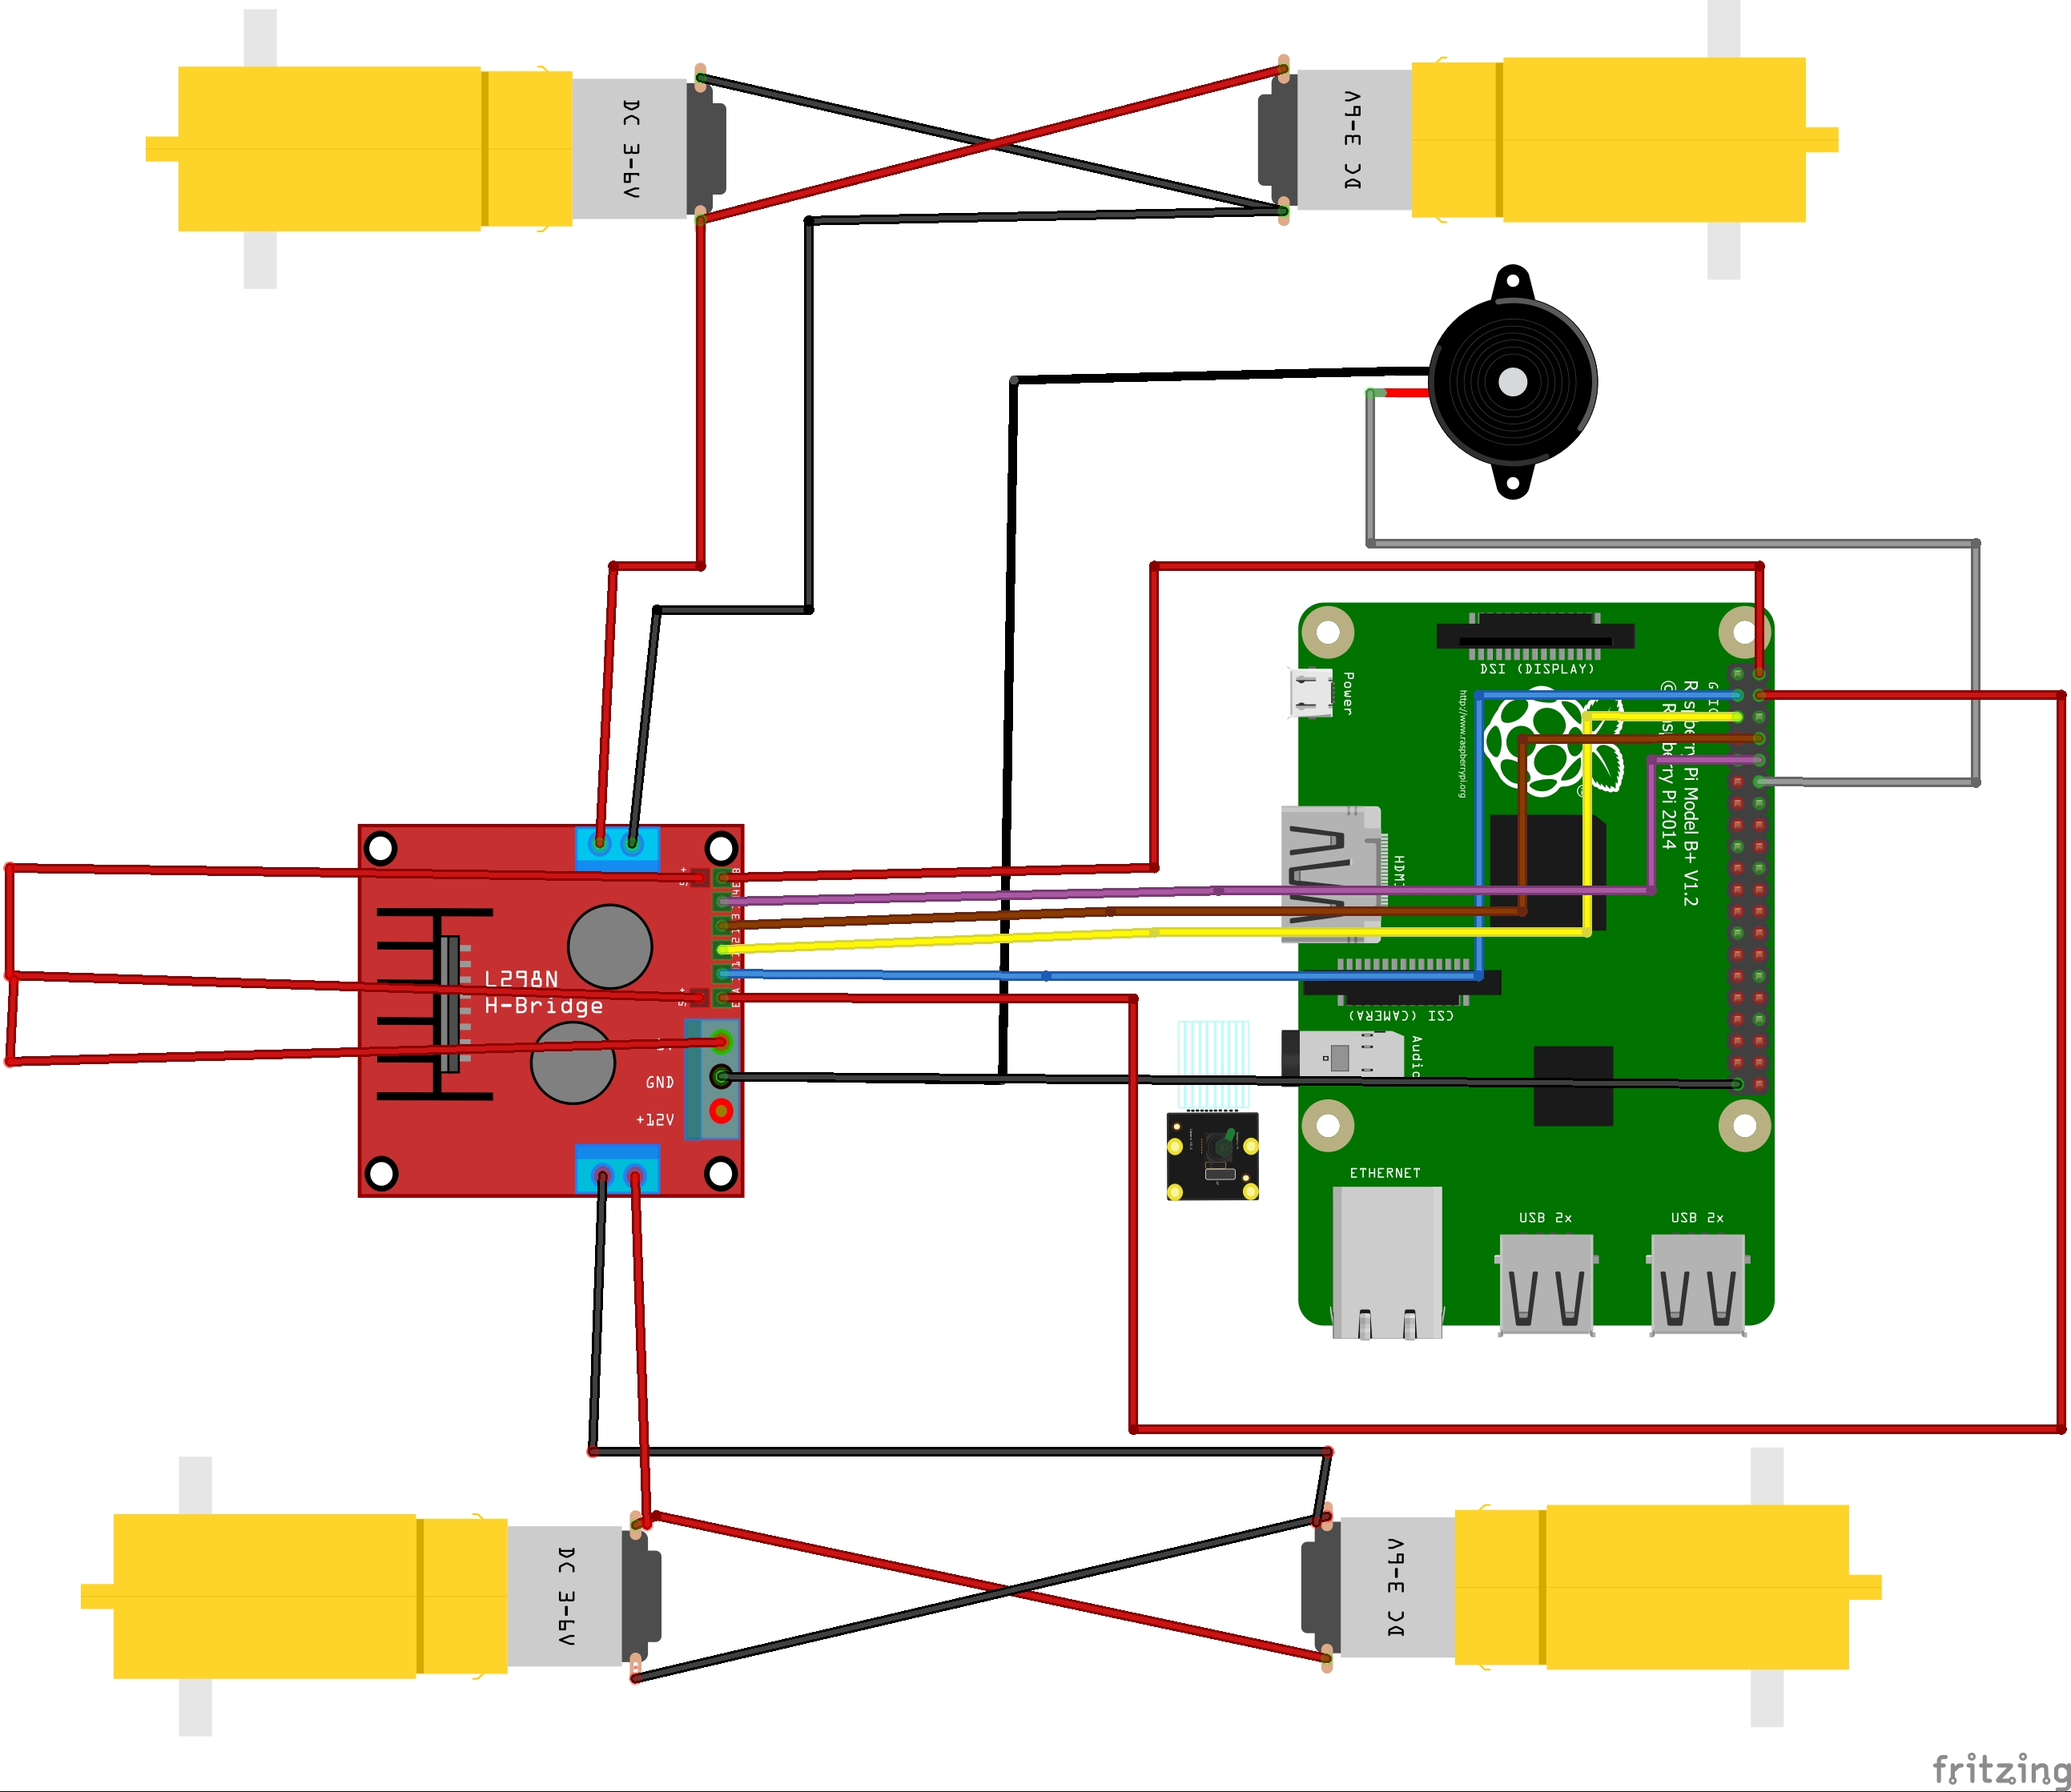
At the beginning we take a look at the hardware schematic.
In the picture above, you can see all the parts and connections. The robot circuit is very simple and has no special details. We just need to consider that we need a 5-volt power supply with a current of about 2 amps to start the motors. We can also use a power bank to turn on Raspberry Pi. We use a camera module for video recording. This camera module simply connects to the Raspberry Pi with a standard cable. There are many camera modules on the market that you can buy according to your budget.
After completing the robot circuit, it is time to program. We use Python for programming.
We use a Bluetooth connection to connect the controller to the robot. To connect the controller to the robot, we need to turn on the Bluetooth connection in Raspberry Pi. After turning on Bluetooth in Raspberry Pi, hold the Share and PS buttons on the PS4 Controller until the Controller light blinking, in which case the Controller goes into pairing mode and we can see the name of the Controller in the list of Bluetooth devices.
After connecting the controller to Raspberry Pi, it is time to receive the commands of the Controller by Python. for this purpose we use pyPS4Controller library. we enter the terminal and type this command:
pip install pyps4controlleror
pip3 install pyps4controlleryou can see all details about pyPS4Controller library in this link.
After connecting the controller to Raspberry Pi and receiving the commands, the work is almost done, we just need to execute the necessary conditions according to the commands received from the controller and control the robot in different directions. This is very simple and you will learn this by reading the source code that I put at the end of the article.
Finally, it's time to show the robot camera video. We use the default Raspberry Pi camera module library for this. Working with the instructions of this library is very simple and you will learn how to work with the instructions of the library by readimg the source code.
Now you can enjoy playing with the robot.


_3u05Tpwasz.png?auto=compress%2Cformat&w=40&h=40&fit=fillmax&bg=fff&dpr=2)


Comments
Please log in or sign up to comment.