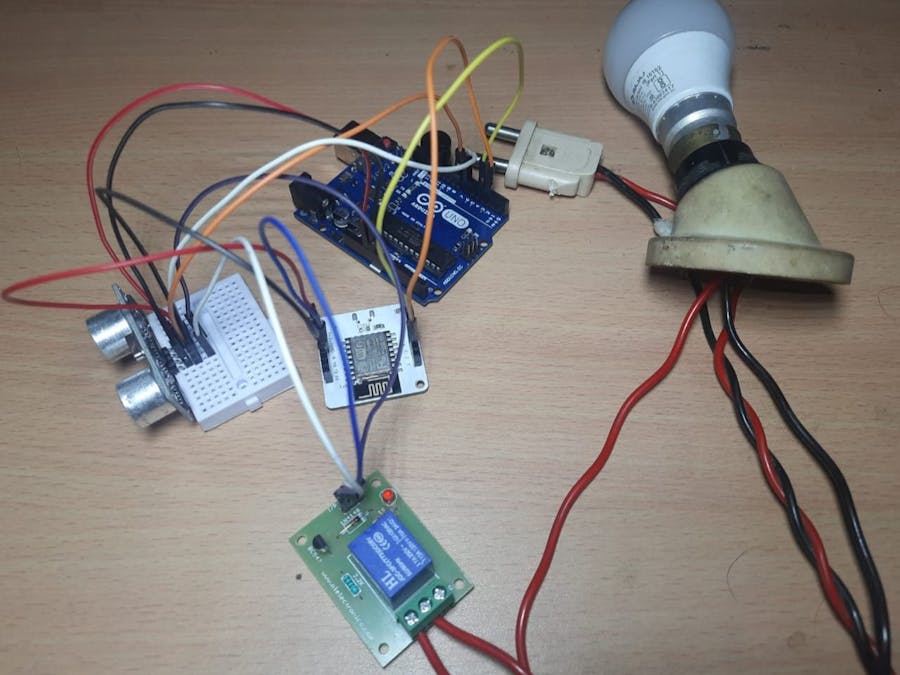
Burglary incidents in your area? No worries. Using the Bolt Wifi Module we will make a burglar alarm which notifies you if somebody enters your house at night. Also, this multi-functional system can turn your boring home into a smart home.
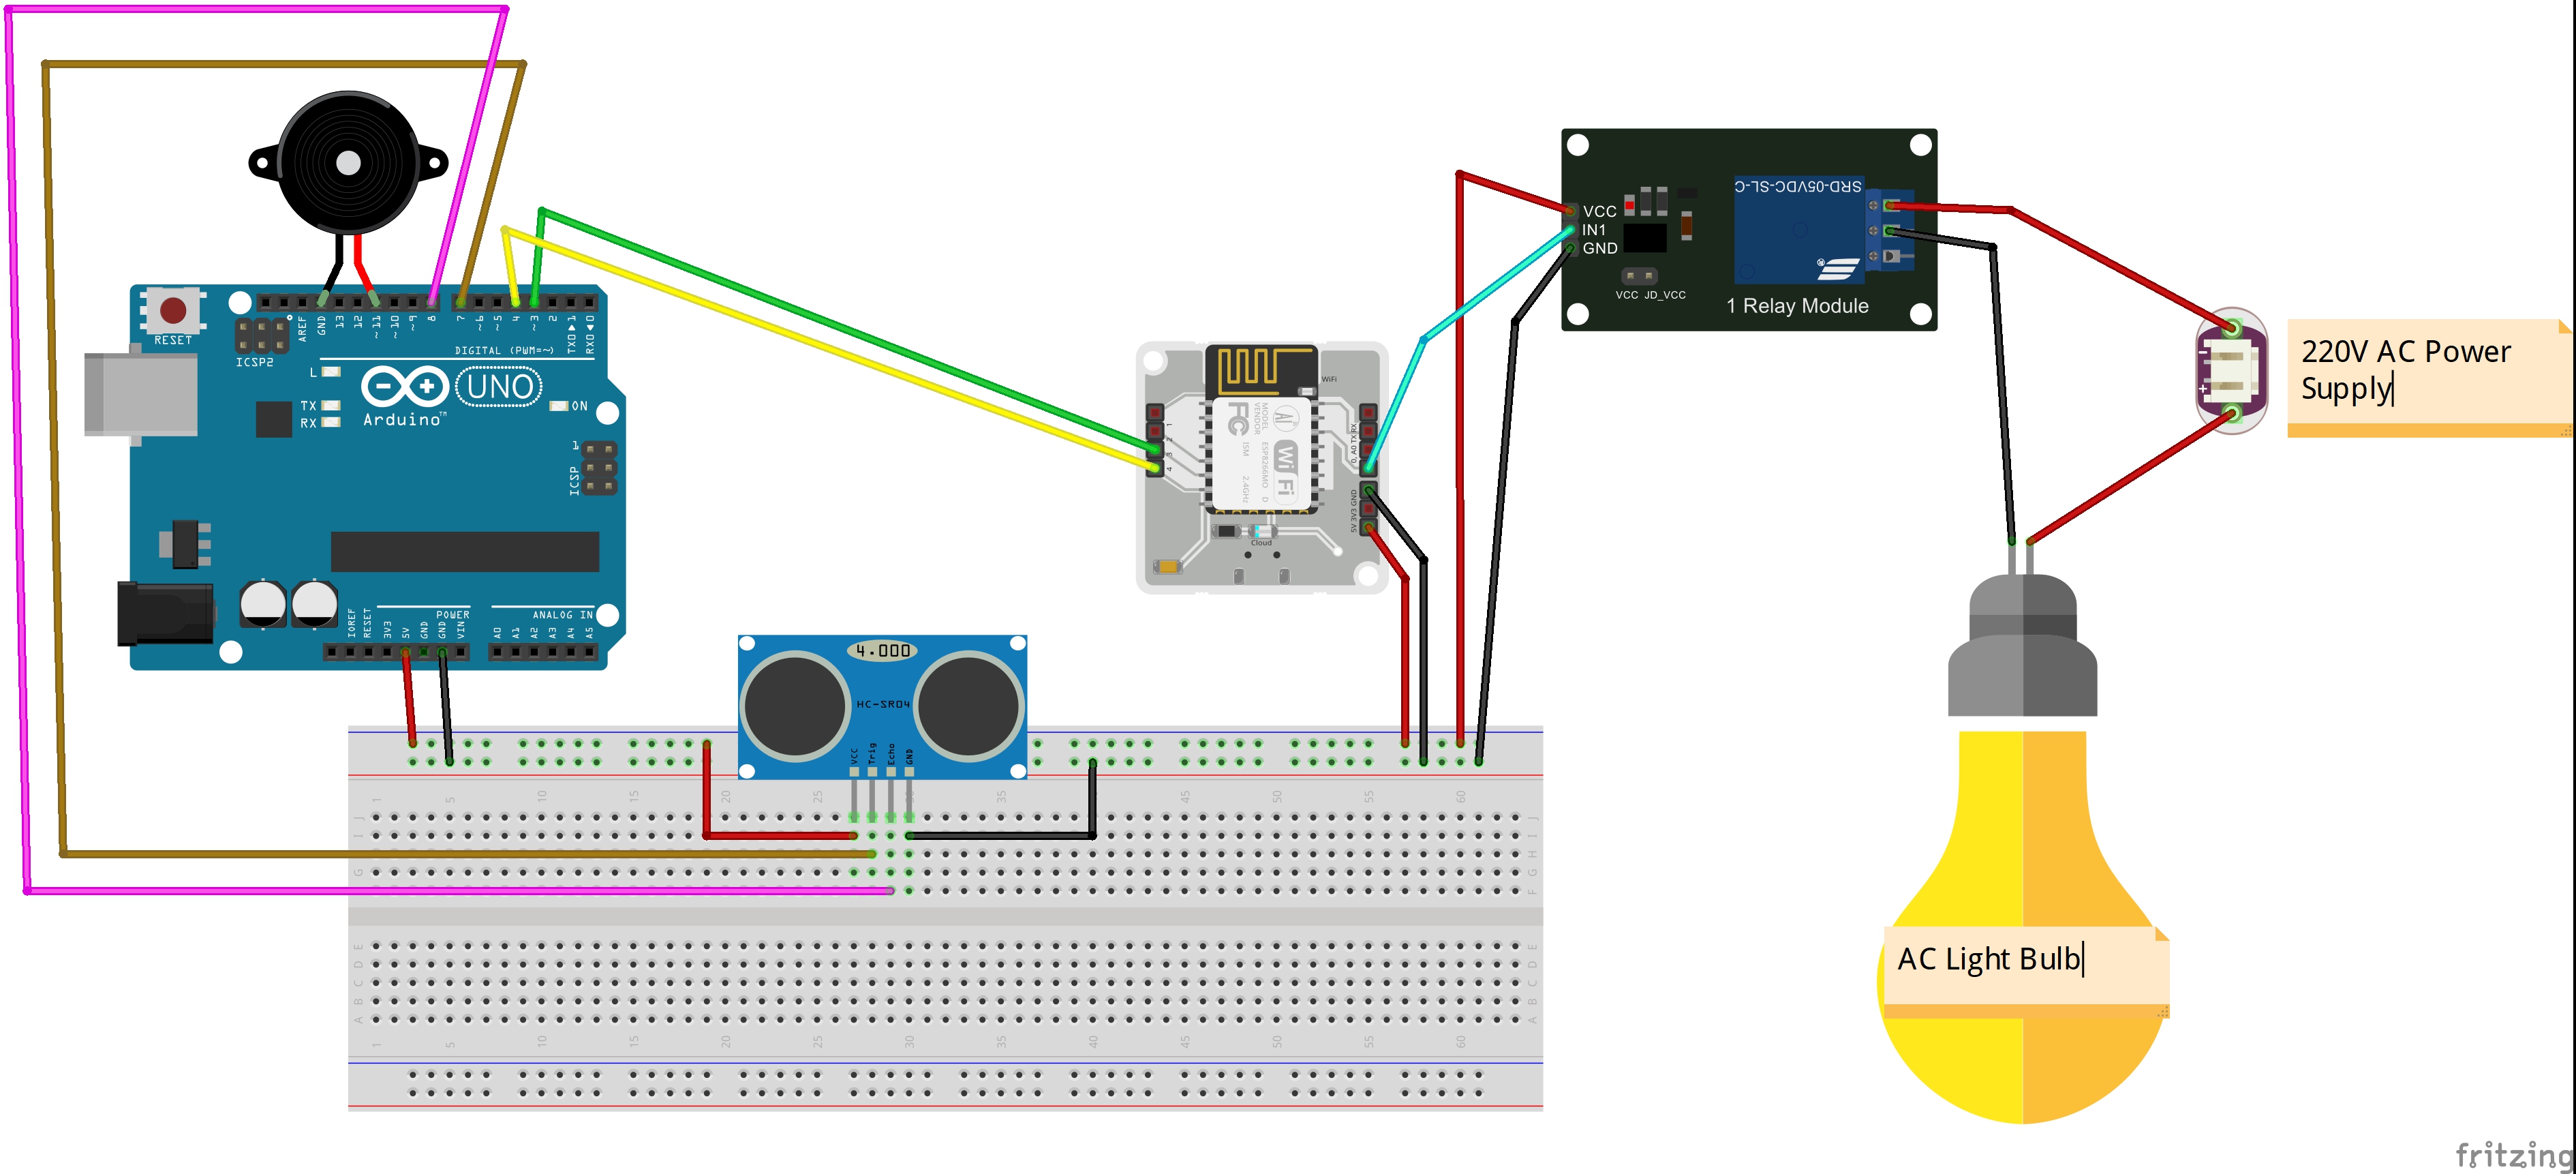
Hardware setupStep 1: Connect the Vcc and GND of the Ultrasonic Sensor to the 5v and GND of the Arduino respectively.
Step 2: Connect the Trig Pin of the Sensor to Pin 7 and the Echo Pin of the Sensor to the Pin 8 of the Arduino.
Step 3: Connect the positive side of the Buzzer to the Pin 11 and the negative side to the GND Pin of Arduino.
Step 4: Connect the Pin 3 and Pin 4 of the Arduino to Pin 3 and Pin 4 of the Bolt Wifi Module respectively.
Step 5: Connect 5v and GND of the Bolt Wifi Module to the Vcc and GND of the Ultrasonic Sensor respectively.
Step 6: Connect Vcc and GND of the Relay Module to Vcc and GND of the Sensor respectively.
Step 7: Connect the I/P(Input) Pin of the Realy Module to the Pin 0 of the Bolt Wifi Module.
Step 8: Connect the Bulb holder with the 2-Pin Socket.
Step 9: Cut one of the wires(In my case it is the Red Wire). After cutting connect one to NO Pin and the other to COM Pin of the Relay Module.
The Schematic of the project is shown below.
Step 1: Connect the Bolt device to Bolt Cloud.
Step 2: Create an account in Twilio and log in to your account.
To know how to get a Twilio number and Verify your phone number for SMS then click THIS.
Step 3: Get the Codes.
Download python_code.py and arduino_code.ino. Upload arduino_code.ino code to Arduino.
Step 4: Changes in Code.
In the python_code.py file change SID, AUTH_TOKEN, FROM_NUMBER, TO_NUMBER, API_KEY and DEVICE_ID. Make sure your Computer has Python installed on it and don’t forget to add Bolt Library to it. Use the command “pip install boltiot”.
Also, you can choose from which time to which the alarm should work. When the program starts it will ask you for Starting Hour and Ending Hour. If you want to use it from 12 am to 6 am then Starting Hour will be 0 and Ending Hour will be 6 in 24-hour format.
Step 5: Integrate your project with Google Assistant.
Go to the IFTTT and log in with the google account to which your Google Assistance is connected. Then click on the "Create" button on the top right corner.
Then Click On “If This”.
Then search Google Assistant. After that click on “Say a simple phrase”.
Then fill in the respective blanks at your convenience. Then click on “Create Trigger”.
Then click on “Then That” and search WebHooks. Click on “Make a web request”
After that in the URL, section fill this link: “https://cloud.boltiot.com/remote/API_KEY/digitalWrite?deviceName=DEVICE_ID&pin=0&state=HIGH” and change Content Type to application/json. Don’t forget to change the API_KEY to your API key and DEVICE_ID to your Device ID.
After that click on “Create action” then “Continue” and finally click on “Finish”. After that, you will get a page like this.
Again do this for Lights off by changing the previous URL state to LOW i.e. “https://cloud.boltiot.com/remote/API_KEY/digitalWrite?deviceName=DEVICE_ID&pin=0&state=LOW”.
Step 6: Now if you want to control the Lights using Bolt IoT App then Follow the following steps.
Open Bolt Cloud(https://cloud.boltiot.com) and go to the Products section and create a product.
Then link the product to your Bolt device.
Then click on configure the product and write the codes. Insert these lines of codes
“singleButton({name:”Lights On”, action:”digitalWrite”, pin:”0″, value:”HIGH”});singleButton({name:”Lights Off”, action:”digitalWrite”, pin:”0″, value:”LOW”});dataDownload(false);”
Now save this code, run the python code and control your system using the Bolt IoT app.
Conclusion
Now your security is in your hand. If somebody tries to enter your house at night, the alarm will trigger and it will notify you through SMS. Moreover, you can control your home’s electric appliances with just a button click.


_ztBMuBhMHo.jpg?auto=compress%2Cformat&w=48&h=48&fit=fill&bg=ffffff)


Comments
Please log in or sign up to comment.