


Hardware components | ||||||
 |
| × | 1 | |||
| × | 1 | ||||
 |
| × | 1 | |||
Software apps and online services | ||||||
 |
| |||||
Microcontrollers are getting crazy expensive these days (2022-23). Now is a good time to bring out those dusty Particle Xenon boards (discontinued by Particle IoT) and convert them to make programmable in Arduino
Thanks to Adafruit's hard work for providing bootloader for nRF52840 Feather Express board, which uses the same processor in Particle Xenon.
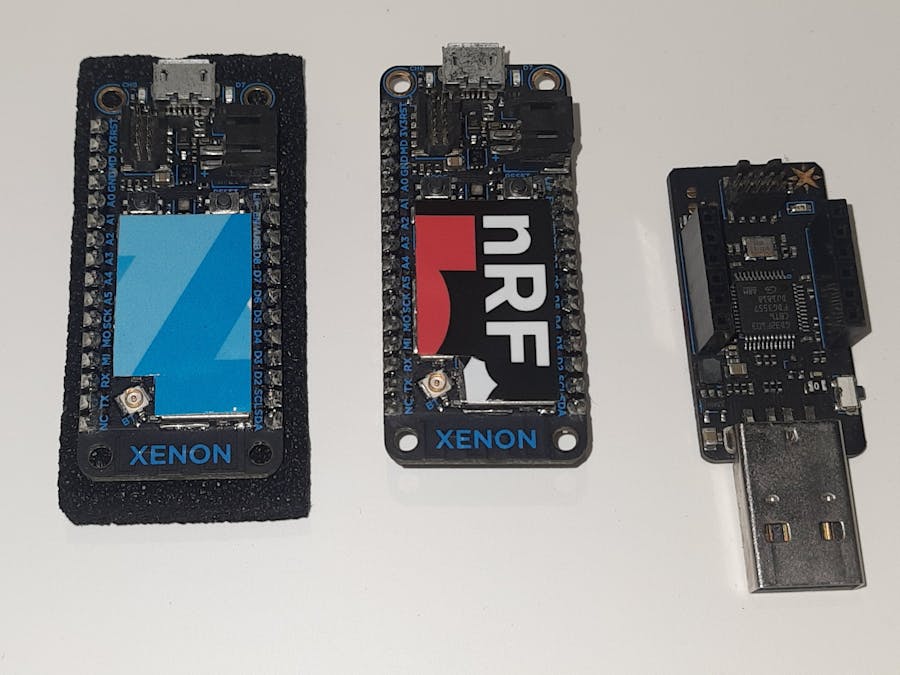
Things Needed- 1. Particle Xenon Board
- 2. SWD/JTAG programmer or debugger
- 3. OpenOCD (attached below)
- 4. Bootloader (attached below)
Step 1 : Get the files ready
Download Open OCD and Bootloader folders attached below and unzip these in C:/ drive. You can choose other locations but you will need to provide the path accordingly
Also, add paths to environment variables
Windows key >> (type 'path') System Properties >> Environment Variables >>New >>
(in Edit user value) add path:
C:\openocd-0.10.0\binStep 2 : Connect Hardware
Connect Particle Xenon board to SDW programmer, connect the programmer to PC USB port. Most Jlink/Daplink/Segger programmers should work !
Step 3: Burn the Bootloader
Next part is done in command prompt, open command prompt by pressing windows key and typing cmd
(select and copy following commands, use Ctrl + V keys of keyboard to paste then hit Enter to execute in command prompt)
Next change directory to the OpenOCD location with following command
cd C:\openocd-0.10.0\bin\Then flash the bootloader by following command :
openocd -f C:/openocd-0.10.0/scripts/interface/cmsis-dap.cfg -f C:/openocd-0.10.0/scripts/target/nrf52.cfg -c "adapter_khz 1000" -c "transport select swd" -c "init" -c "soft_reset_halt" -c "nrf52 mass_erase" -c "flash write_image C:/nrf52840.hex" -c "reset" -c "exit"If everything went well, you will see your Jlink/Daplink/Segger programmer will start blinking while it burns the hex file into the particle xenon, command prompt will show the progression of bootloader flashing with different messages. It will take about 20-30 seconds to burn the bootloader
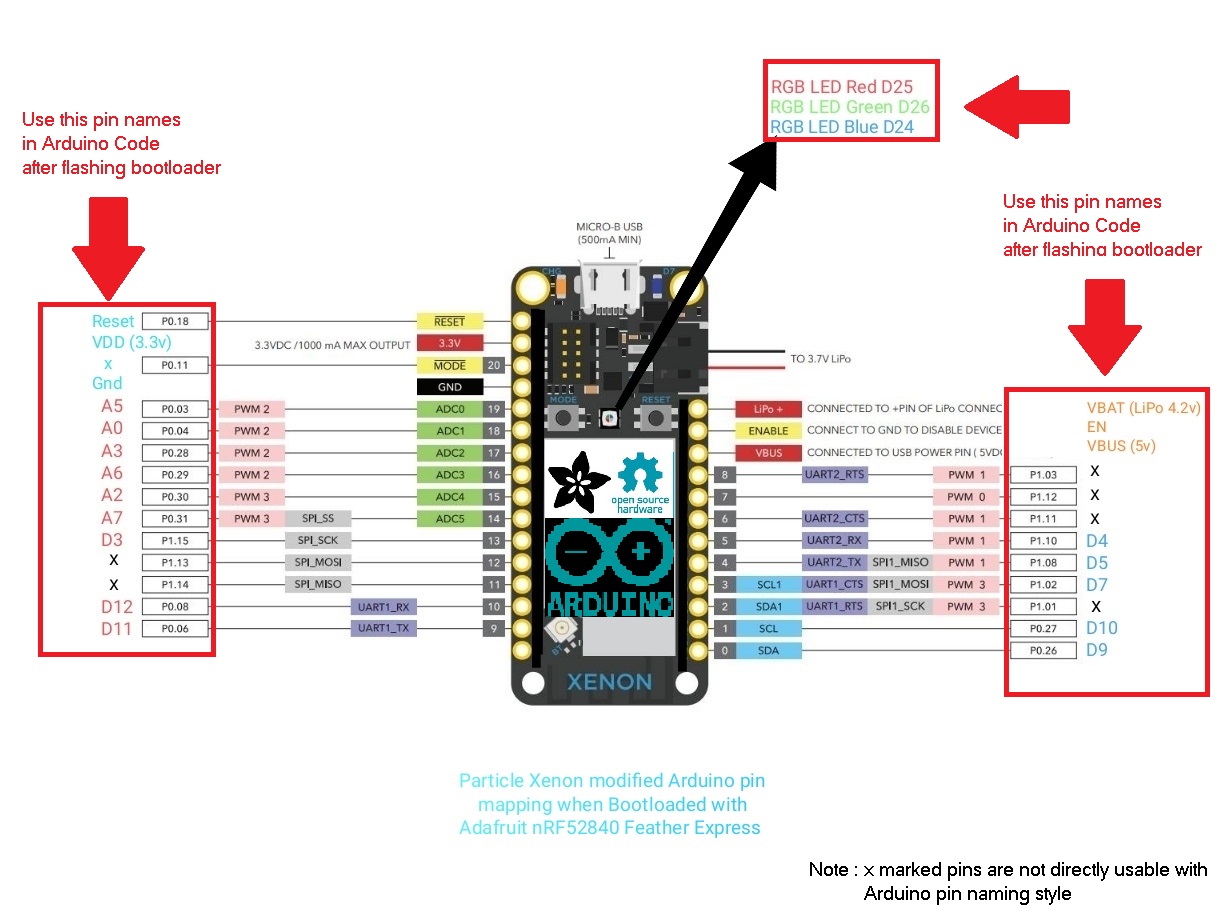
Pin Mapping change after conversionI have mapped these pinouts reading the schematics of Particle Xenon and Feather Express boards. Then, blinky checked each pin and all of them works. All the x marked pins can not be used directly, because they are not mapped (check board schematics to understand more). But, it may be possible to use them with low level code (not tested)
Now the Particle Xenon can be programmed through USB just like any regular Arduino board.
Connect it directly to PC USB with an USB cable and a new com port should appear (this com port number varies from PC to PC, it's better you take a look at the available com port in Arduino IDE right before plugging in so you can identify the new com port )
Select Adafruit Feather Express from Arduino IDE
Try to compile and flash the RGB blinky attached below.
After the very first programming, the com port will change again but this time it will show the board name as Adafruit Feather nRF52840 Express, which means Arduino IDE will detect the board automatically onwards whenever connected.
Adafruit Feather nRF52840 Express Pinout
Adafruit Feather nRF52840 Bootloaders


Comments
Please log in or sign up to comment.