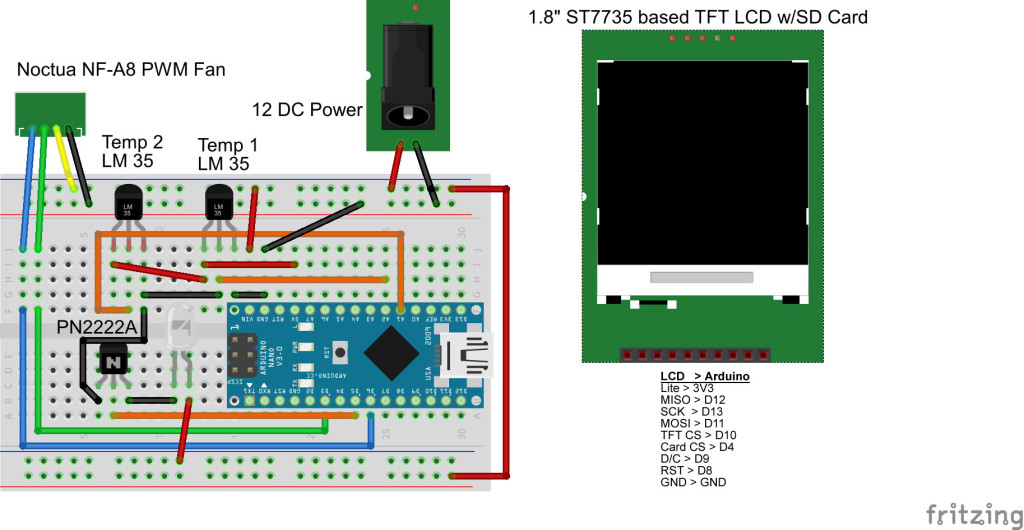
Pretty straight forward. An Arduino Nano is at the heart of it. It monitors 2 temperature sensors mounted in areas that get hot. Before selecting the locations, I ran a test print and used my laser temperature gun on the main board to see what areas got hot. As expected, the 4 motor driver chips on the RAMBO boards were it. They ranged from 30 C (idle) to 85C (printing).
As the X & Y axis get the most action, I mounted a sensor directly to one of those chips. The other was mounted to the power supply, but this does not get very warm. When the printer is turned on, the Arduino controller idles the fan at about 650 RPM. It never turns off. At this level, you can’t even tell it’s on. When printing starts, the Arduino polls the sensors every second and adjusts the fan speed based on the stepper motor controller chip temperature. The sensor returns Celcius values. Temp ranges (30-90C) are mapped to the AnalogWrite function to control the fan speed from idle (~650RPM) to full (~2200 RPM).
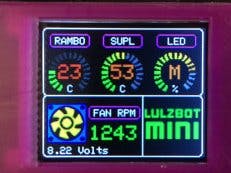
I also merged LED control into this project. It has a push-button on top. Using an interrupt, it allows switching between high, medium and low light levels. The display is there for s*its and giggles really. I had some laying around and thought it would be cool to provide some visuals. That way I would have something else to do for those times when I find myself staring at a print job for prolonged periods of time. The display shows the RAMBO and power supply “SUPL” temps, the LED level, an animated fan icon, the fan RPM and voltage being applied to the fan. The Mini stock fans are 24V, but for this project I dropped everything to 12V. The project, LEDs and fan are all powered by a switching regulator that takes 24V from the internal power supply and drops it to 12V.
It’s also important to note that this project is not specific to any one device. It is completely standalone. Simply supply 12V and mount/glue the temperature sensors wherever necessary.


Comments
Please log in or sign up to comment.